Non-Stop Cycle Plugin User's Guide
This article outlines how to use the Non-Stop plugin for Almaco and Syngenta.
Almaco Head Non-Stop
Wiring
Supplies Needed:
Two 2 pin weather-pack connectors
Two actuator cables (PN 15323)
Spare spool of wire, 14-16 gauge
Wiring Steps:
Place the red and white wires in the "A” position of the weather-pack connector. Place the black wires in the “B” position.
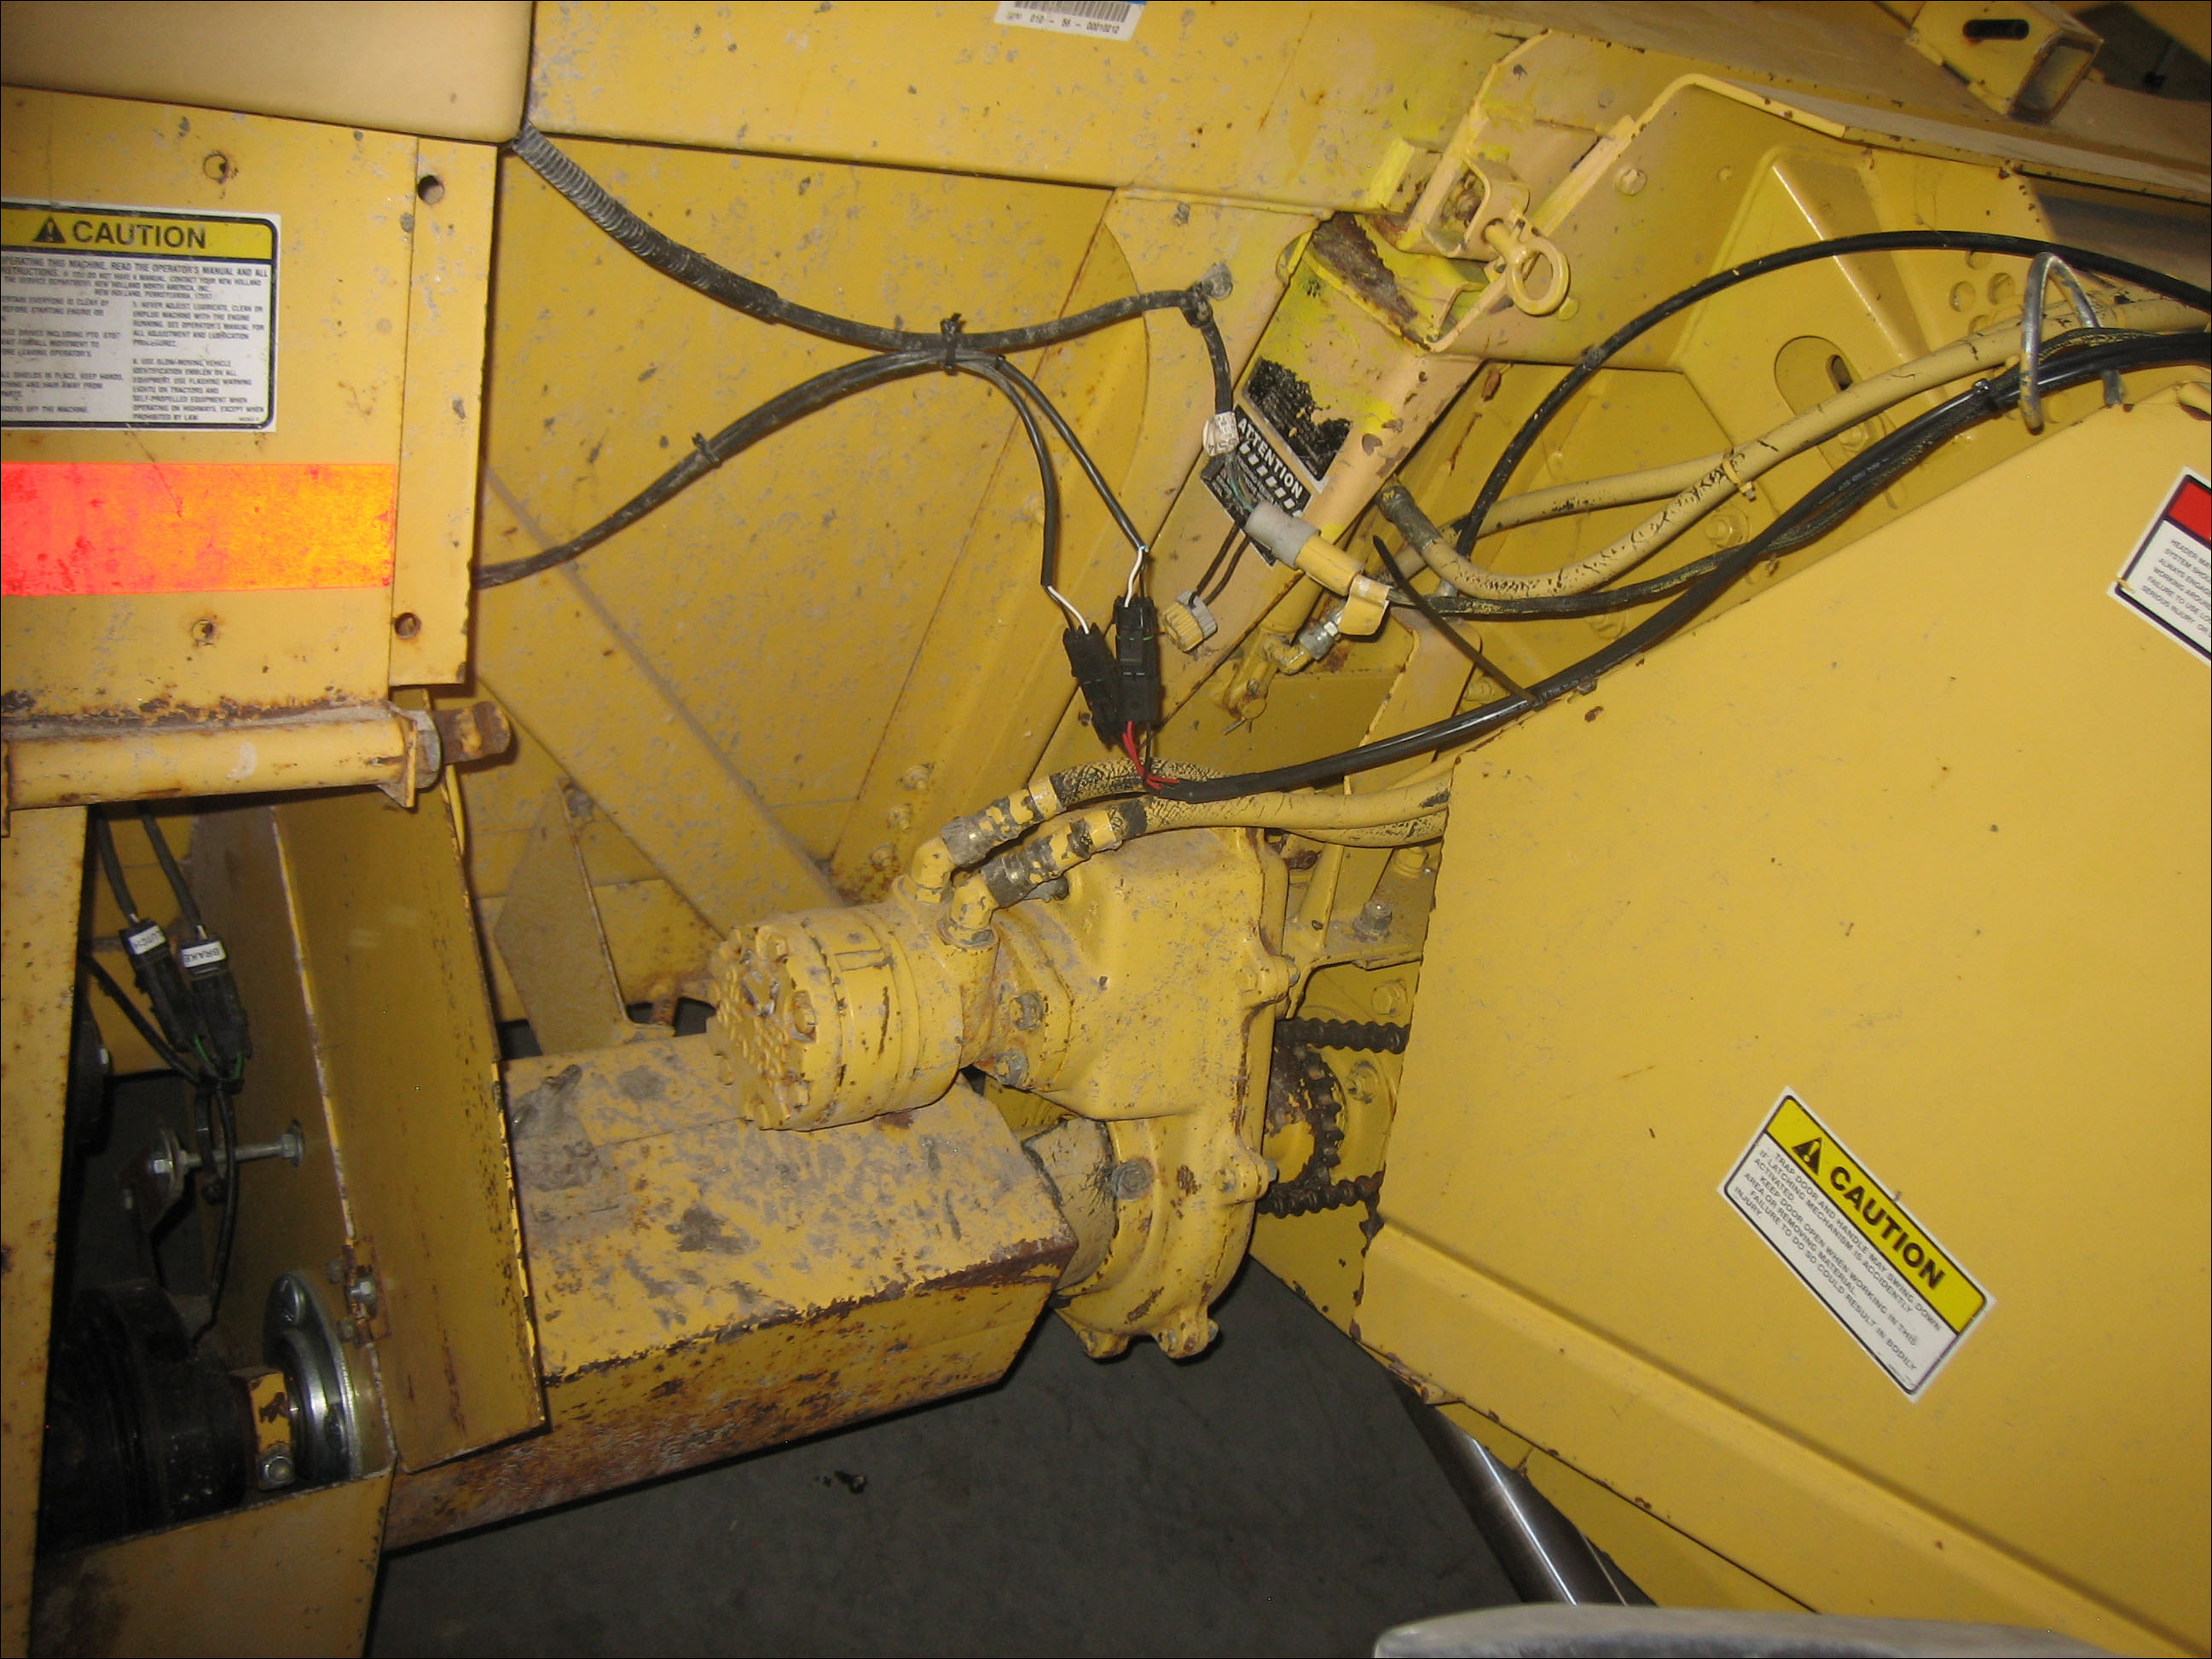
On the header, place a male connector on the clutch cable and a female connector on the brake cable.
Caution: To avoid crossing wires, configure either the clutch or brake with the male connector and the other with the female connector, so they are opposite.
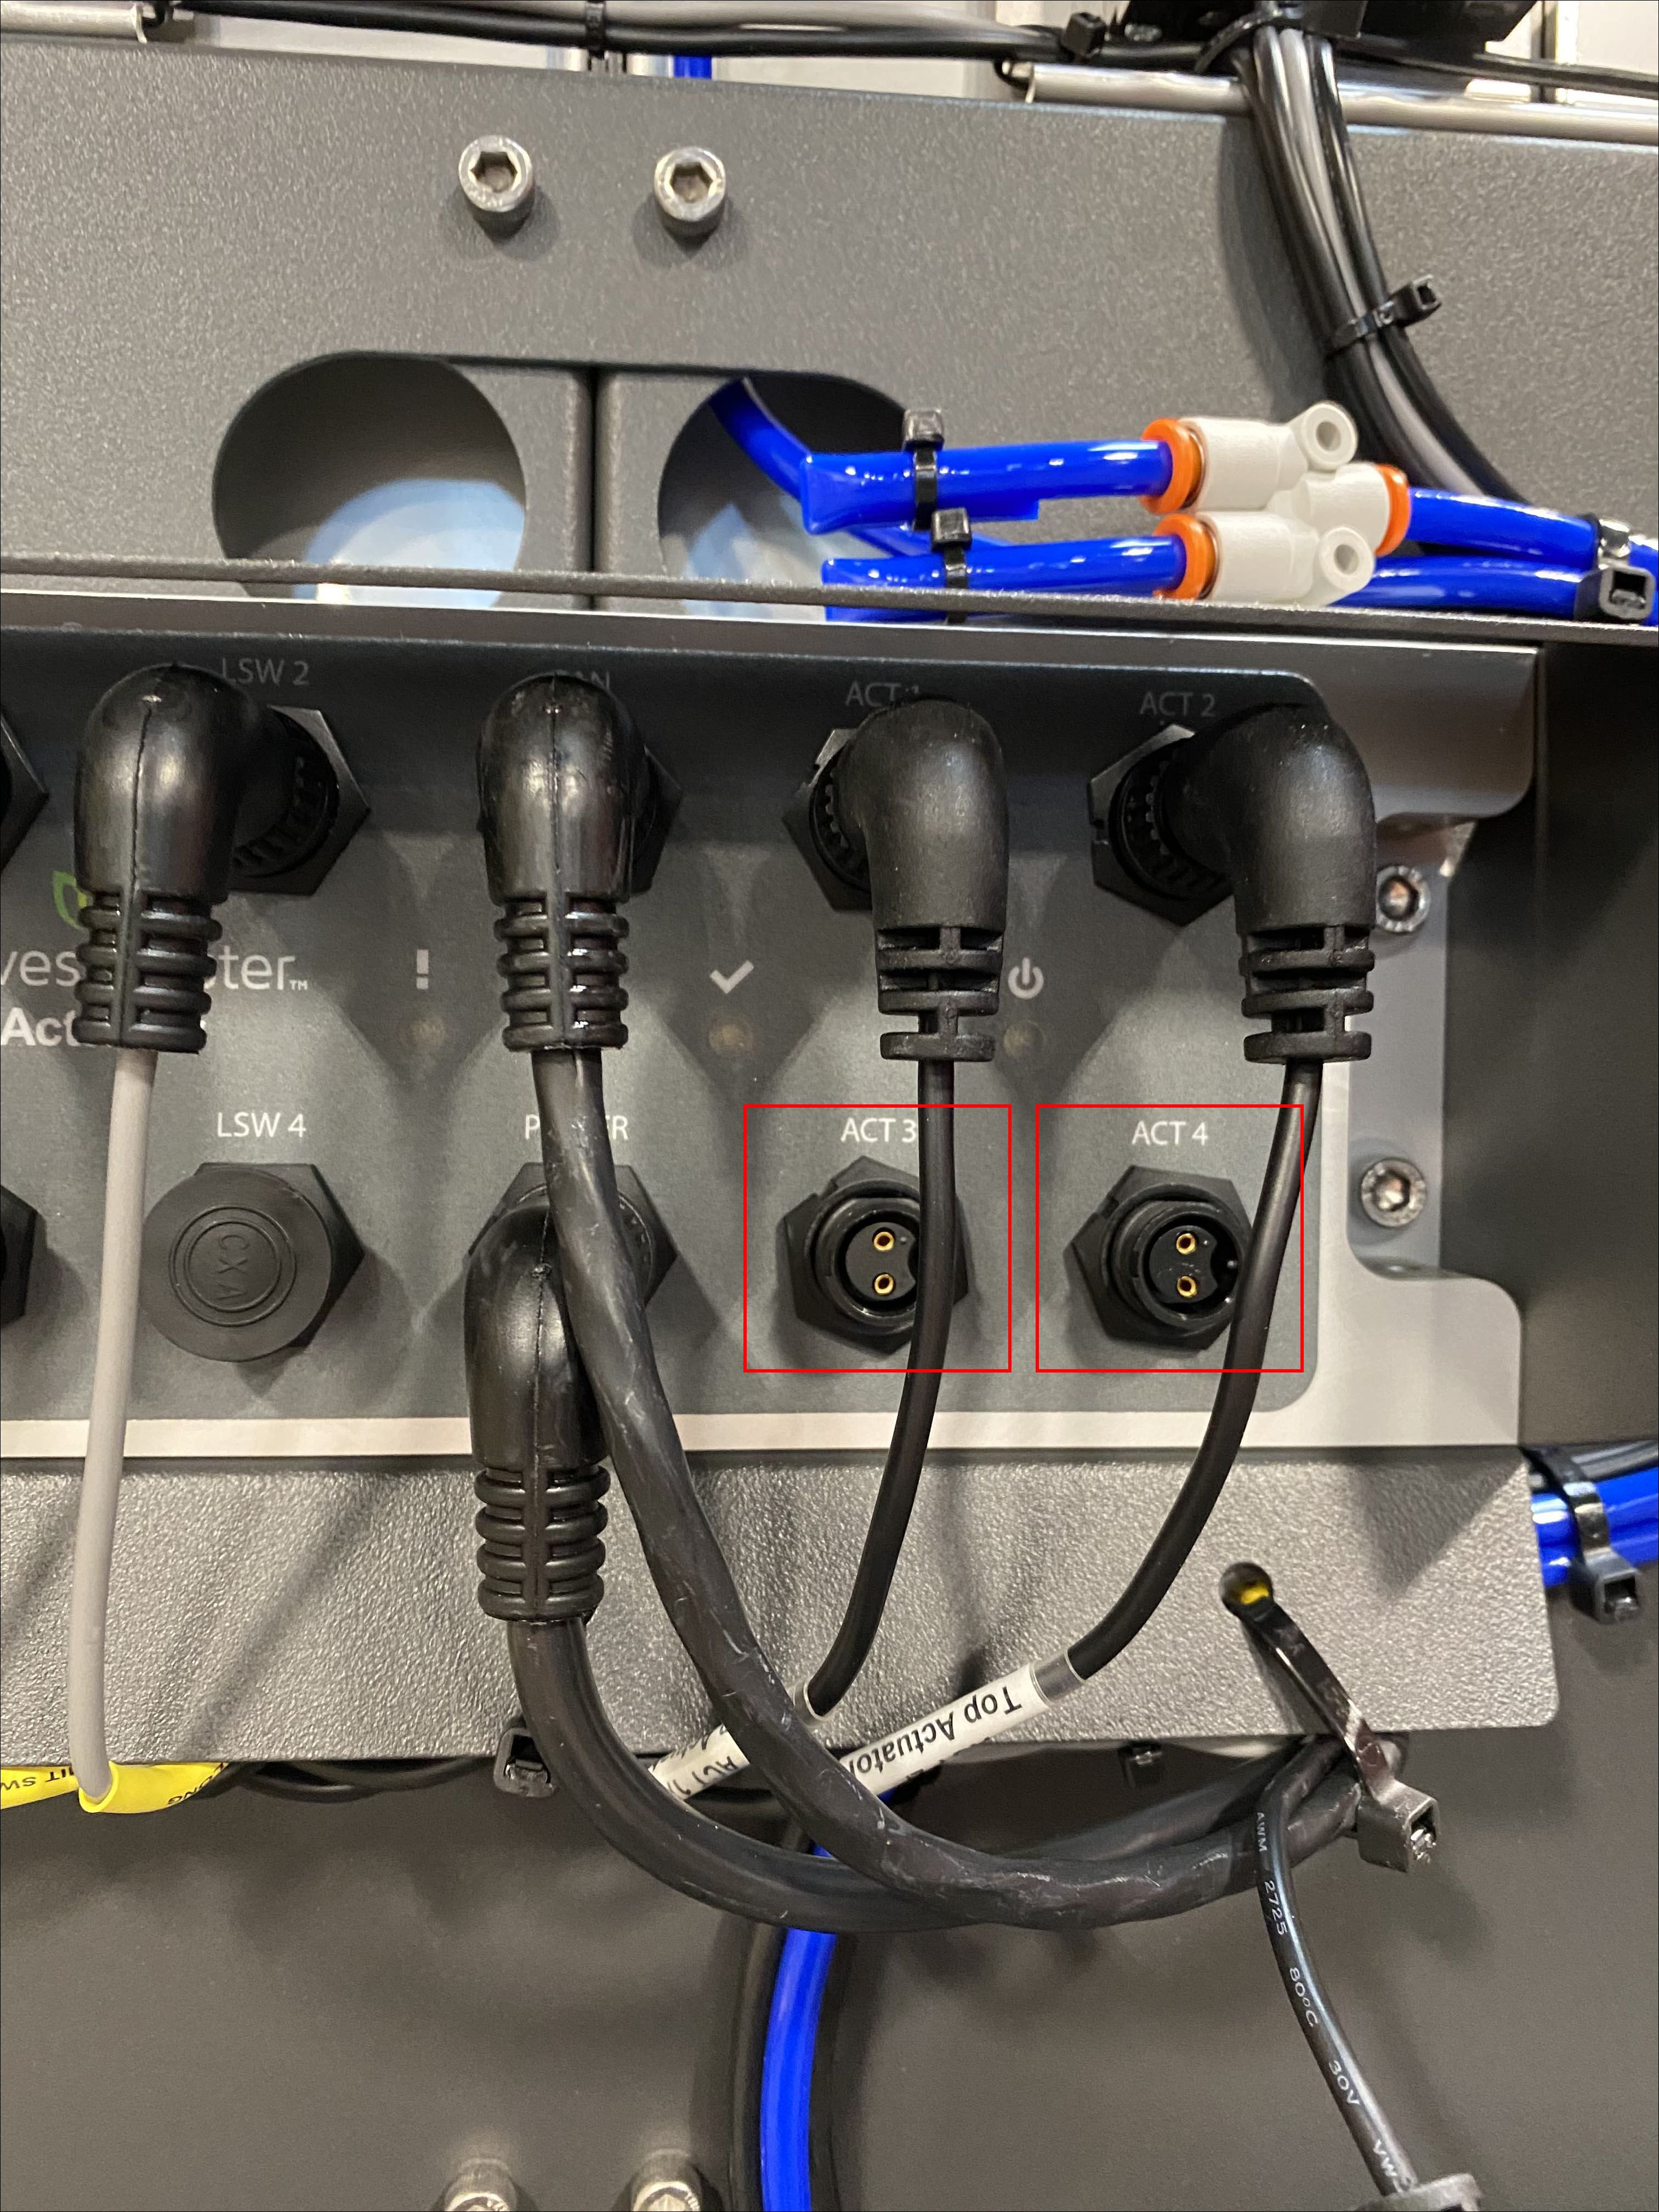
Attach the corresponding connectors to the actuator cables from the GrainGage. The clutch will be in Actuator 3 and the brake will be in Actuator 4 on the second (upper) module.
Connect the red wires to the white wires between cables.
Connect the black wires to the black wires between cables.
Header Settings
In Mirus, navigate to Setup > NonStop > Head.
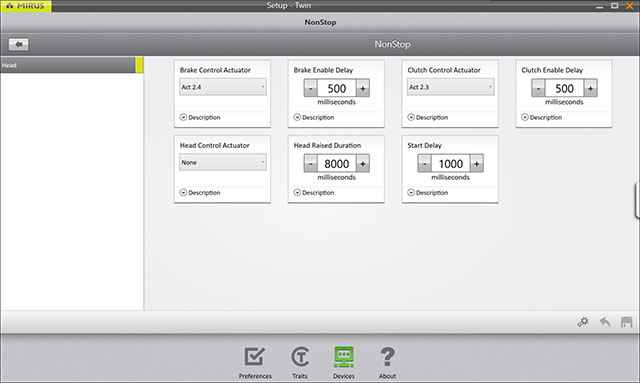
On the Head settings screen, make the following adjustments:
Set Actuators 2.4 and 2.3 to reverse pneumatic with no limit switches.
Set Brake Control Actuator to 2.4. This controls the brake on the header.
Set Clutch Control Actuator to 2.3. This controls the clutch on the header.
Set Head Control Actuator to None.
Set Brake Enable Delay to 500.
Set Clutch Enable Delay to 500.
Set Head Raised Duration to 8000.
Set Start Delay to 1000.
On your device, open the initialization script by navigating to C: > HarvestMaster > Mirus > Config > H2GrainGage > Scripts > Initialization.
Add the following lines to correctly stage the actuators:
h2.initialize()
actuate.close(act2_3)
actuate.open(act2_4)
Combine/System Operation
Non-Stop combine driving speed will be 0.7-1.4 mph. Connect to the plugin in Mirus by navigating to Connect Plugin > Attachments > Non-Stop.
To start the system, tap the Cycle button in Mirus. The countdown timer will start; the typical setting is 14-18 seconds.
Mirus waits the time set for the Start Delay, typically 1000 milliseconds.
Actuator 2.3 opens to disengage the header clutch.
Mirus waits the time set for the Brake Enable Delay, typically 500 milliseconds.
Actuator 2.4 closes to apply the brake.
Mirus waits the time set for the Head Raised Duration, typically 8000 milliseconds. The time set must be shorter than the countdown timer.
After the time has expired from the Head Raised Duration:
Actuator 2.4 opens to disengage the brake.
Mirus waits the time set for the Clutch Enable Delay, typically 500 milliseconds.
Actuator 2.3 closes to engage the header clutch.
Related Information
When testing to ensure you have the brake and clutch in the right actuator position, you should be able to manually actuate the solenoid (using Actuators 2.3 and 2.4 in Diagnostics) and hear and/or feel the brake and clutch engage/disengage. Occasionally, you may find you don't get a response from the clutch and/or brake because they are stuck from sitting. Before testing, engage the head for 10-15 seconds and this will free everything up if it is stuck.
You cannot glean open a field without the Toughpad and Mirus opened. If you close Mirus and power down the system controller, the clutch will be disengaged.
Syngenta Head Non-Stop
Wiring
Supplies Needed:
One weather-pack connector
One actuator cable (PN 15323)
Wiring Steps
Connect the black wire to the black wire and the red wire to whatever color is remaining. The solenoid is located in the middle, top, and front of throat.
Plug the actuator cable into Actuator 3 (upper).
Header Settings
In Mirus, navigate to Setup > NonStop > Head.
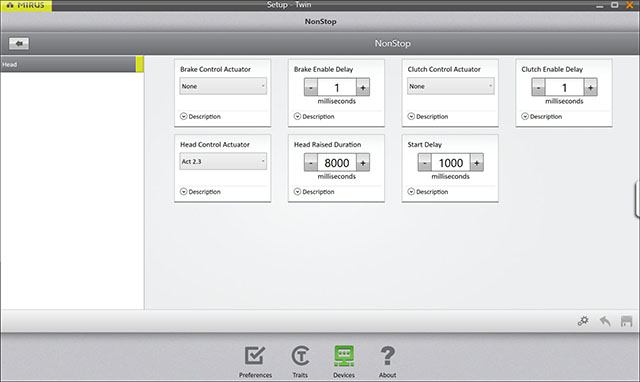
On the Head settings screen, make the following adjustments:
Set the Brake Control Actuator to None.
Set the Clutch Control Actuator to None.
Note: Make sure to set the Clutch Enable Delay and Brake Enable Delay to 1. If you put additional time in these boxes, the software will read it and add cycle time to the system even though they are not being used on the Syngenta setup.
Set the Head Control Actuator to 2.3.
Set the Brake Enable Delay to 1.
Set the Clutch Enable Delay to 1.
Set the Head Raised Duration to 8000.
Set the Start Delay to 1000.
Set the 2.3 Actuator type to reverse pneumatic.
On your device, open the initialization script by navigating to C: > HarvestMaster > Mirus > Config > H2GrainGage > Scripts > Initialization.
Add the following lines to correctly stage the cross auger:
h2.initialize()
actuate.close(act2_3)
Combine/System Operation
In Mirus, tap the Cycle button. The countdown timer will start; the typical setting is 14-18 seconds.
Mirus waits the time set for the Start Delay, typically 1000 milliseconds.
Actuator 2.3 opens and raises the cross auger in the header.
Mirus waits the time set for the Head Raised Duration, typically 8000 milliseconds. The time set must be shorter than countdown timer.
After the time has expired for the Head Raised Duration:
Actuator 2.3 closes and lowers the cross auger in the header.

