Mirus and GrainGage Setup
Start Mirus
Double tap the Mirus icon ![]() on your Windows desktop.
on your Windows desktop.
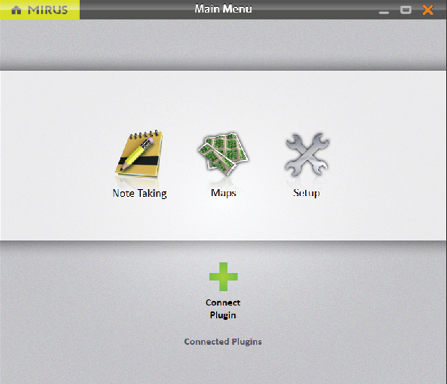
Mirus opens the Home screen. You can return to the Home screen at any time by selecting the Mirus home icon on the top left corner of the screen.
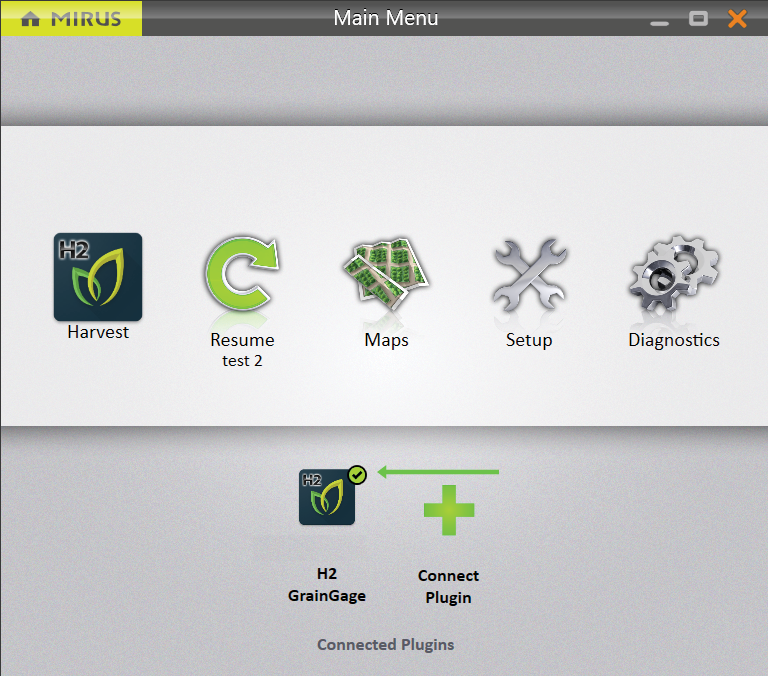
Connect to the GrainGage Plugin
On the Mirus Home screen,
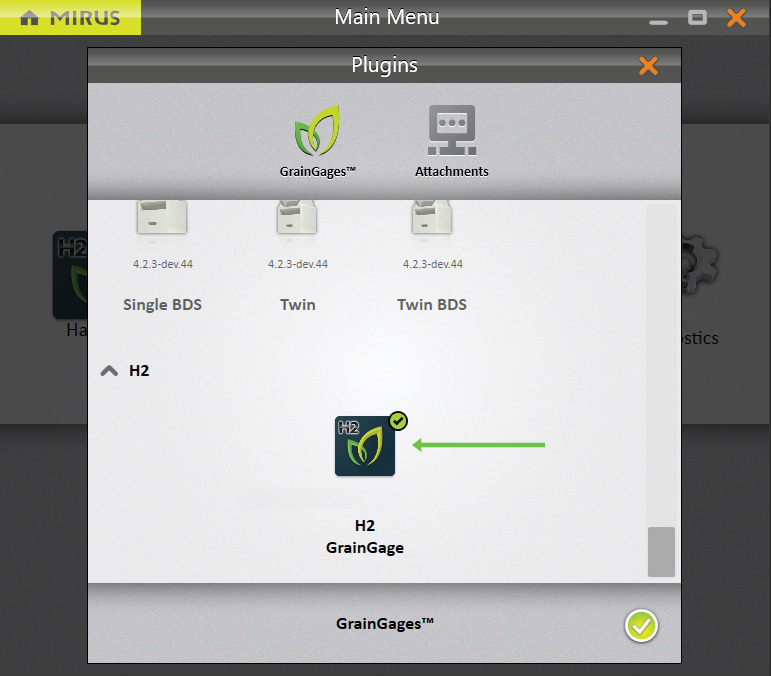
- Tap Connect Plugin.
- Tap H2 GrainGage or H3 GrainGage.
Note: You will only be able to select the H3 Plugin after it's been enabled in the Mirus Plugin Manager. See Enable the H3 Classic GrainGage Plugin.
- Tap the check icon
 .
.
If Mirus is unable to detect the GrainGage, the software may display a device connection error.
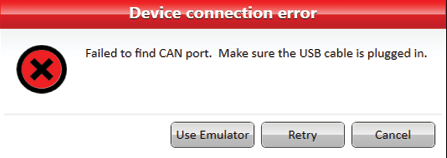
- Check the GrainGage power source to all modules (a green LED illuminated on each module).
Or
- Tap Use Emulatorto proceed without connecting the GrainGage. Emulator Mode is not recommended for setting up the GrainGage.
If further troubleshooting is needed, see Can’t Connect to GrainGage .
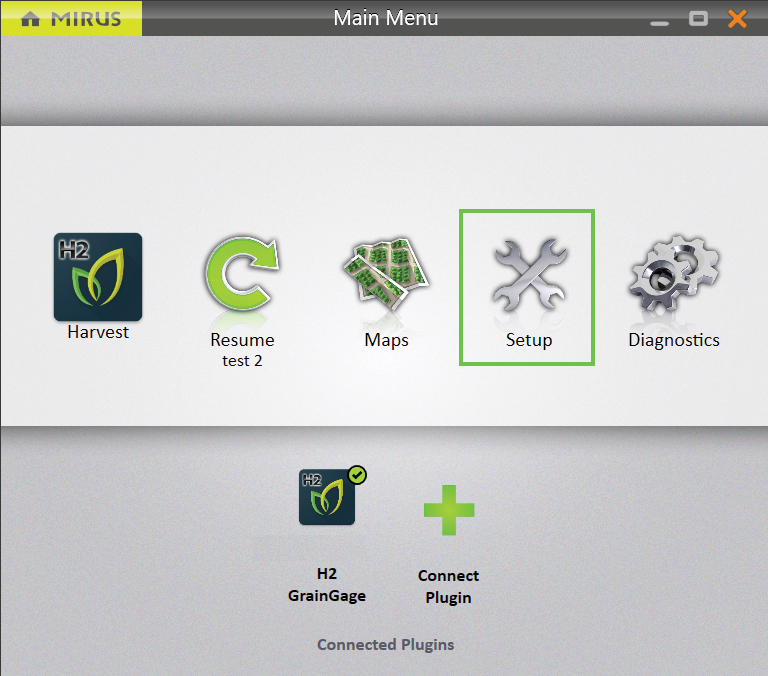
After connecting to the H2 or H3 GrainGage plugin, Mirus displays an icon for the GrainGage on the Main Menu screen.
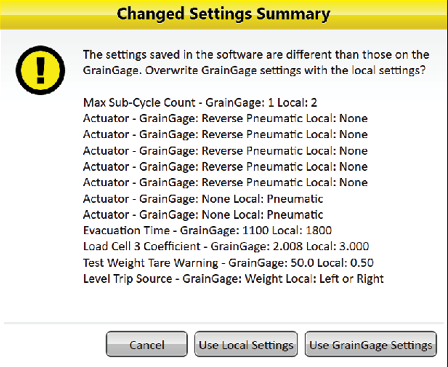
If you upgraded Mirus to a new version or changed settings in emulator mode before connecting to the GrainGage, Mirus will display a Changed Settings Summary warning. You will be prompted to Use Local Settings or Use GrainGage Settings.
- Local settings use the current settings on the tablet.
- GrainGage settings use the old settings saved to the GrainGage from the previous Mirus version.
Note: If you want to keep the current GrainGage weight and test weight calibrations, it is recommended to use the GrainGage Settings.
Setup Mirus Preferences
Open Setup
Open the Home screen,
- Tap Setup.
Mirus opens the Setup screen.
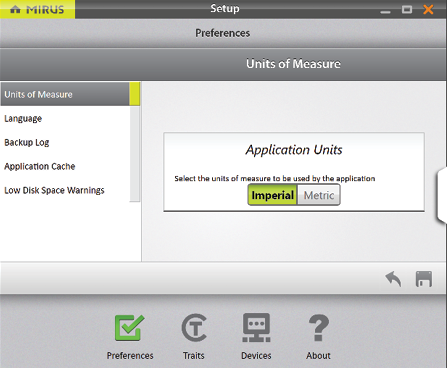
Set Preferred Units of Measure
On the Setup screen,
- Tap Preferences.
.png)
- Tap Units of Measure.
- Select your preferred units of measure.
- Tap Save.
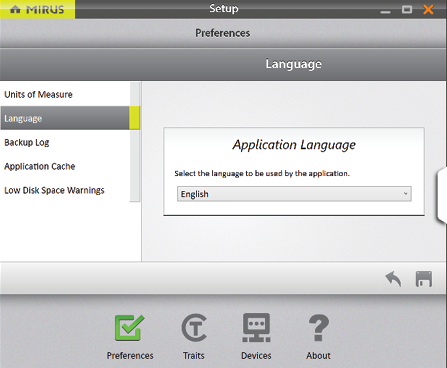
Set Preferred Language
On the Setup > Preferences screen,
- Select Language.
- Choose your preferred language.
- Tap Save.
Note: Some languages may not be currently available in Mirus version 4.4.0.
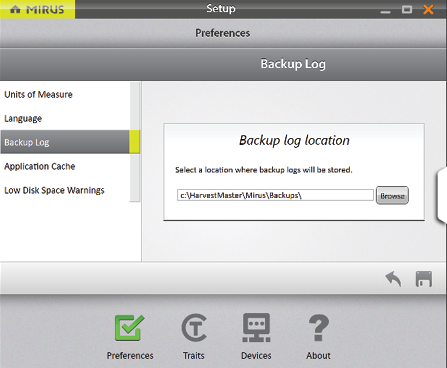
Set Preferred Backup Log Location
On the Setup > Preferences screen,
- Tap Backup Log.
- Enter your preferred file path for the Mirus backup log.
- Tap Save.
Note: Changing the Backup Log location is not recommended. If you do change it, be sure to record the new location.
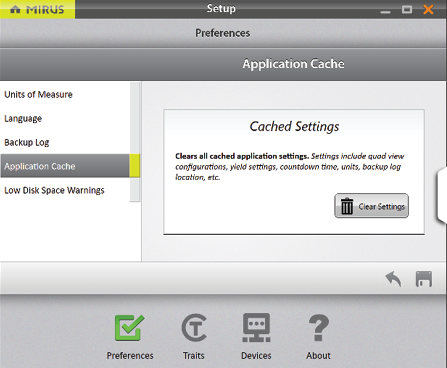
Clear Cached Settings
![]() CAUTION: This cannot be undone! Clearing the cache will set the application settings back to default and restart Mirus. This should only be done in consultation with a HarvestMaster Field Service Engineer.
CAUTION: This cannot be undone! Clearing the cache will set the application settings back to default and restart Mirus. This should only be done in consultation with a HarvestMaster Field Service Engineer.
On the Setup > Preferences screen,
- Tap Application Cache.
- Tap Clear Settings.
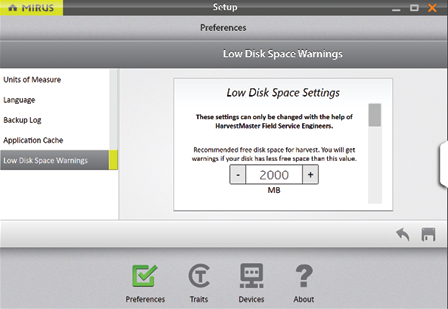
Set Low Disk Space Warnings
On the Setup > Preferences screen,
- Tap Low Disk Space Warnings.
- Set the amount of available disk space left that will trigger a warning.
- Set the minimum amount of disk space to allow harvest.
- Tap Save.
Generally, Mirus (and additional plugins) may use around 900 MB of disk space. However, the amount of space used in addition to this depends on the size of your map, the amount of data collected, and the quantity of maps created.
Setup the GrainGage
Open Setup
On the Home screen,
- Tap Setup.
Mirus opens the Setup screen.
Configure Actuators
The Setup screen defaults to Devices where you will set up your GrainGage.
- Tap H2 GrainGage or H3 GrainGage.
.png)
- Tap Actuator.
.png)
Mirus opens the Actuator Setup screen on which you can configure settings for each actuator in the GrainGage.
.png)
The following tables display the default values for each actuator, which may need to be adjusted based on your specific harvest conditions. Please contact a HarvestMaster Field Service Engineer for support.
|
Top Gate Settings |
||
|---|---|---|
|
Setup Parameter |
Default Value |
Description |
|
Actuator |
Dual |
The type of actuator. See Auxiliary Actuator Controls—DSP Actuator 5 & 6 table below for actuator type descriptions. When using the H2 or H3 GrainGage Classic, do not change. |
|
Limit Switch on Close |
Yes |
Enables the limit switch when the gate closes. |
|
Limit Switch on Open |
No |
Enables the limit switch when the gate opens. This is not supported in the H2 or H3 GrainGage Classic. |
|
Bottom Gate Settings |
||
|---|---|---|
|
Setup Parameter |
Default Value |
Description |
|
Actuator |
Dual |
The type of actuator. See Auxiliary Actuator Controls—DSP Actuator 5 & 6 table below for actuator type descriptions. |
|
Limit Switch on Close |
Yes |
Enables the limit switch when the gate closes. |
|
Limit Switch on Open |
No |
Enables the limit switch when the gate opens. This is not supported in the GrainGage. |
|
Separator Cylinder Settings |
||
|---|---|---|
|
Setup Parameter |
Default Value |
Description |
|
Actuator |
Dual |
The type of actuator. See Auxiliary Actuator Controls—DSP Actuator 5 & 6 table below for actuator type descriptions. |
|
Limit Switch on Close |
Yes |
Enables the limit switch when the gate closes. |
|
Limit Switch on Open |
No |
Enables the limit switch when the gate opens. This is not supported in GrainGage. |
|
Isolation Gate Settings |
||
|---|---|---|
|
Setup Parameter |
Default Value |
Description |
|
Actuator |
Dual |
The type of actuator. See Auxiliary Actuator Controls—DSP Actuator 5 & 6 table below for actuator type descriptions. |
|
Close Transition Time |
200 msec |
The amount of time it takes the actuator to close the gate. |
|
Limit Switch on Close |
No |
Enables the limit switch when the gate closes. |
|
Limit Switch on Open |
No | Enables the limit switch when the gate opens. This is not supported in the GrainGage. |
|
Open State Time |
500 msec |
The amount of time the isolation gate remains open before beginning to close. |
|
Open Transition Time |
200 msec |
The amount of time it takes the actuator to open the gate. |
|
Auxiliary Actuator Controls—DSP Actuator 5 & 6 |
|||||
|---|---|---|---|---|---|
|
Setup Parameter |
Action | Pin 1 | Pin 2 | Description | |
|
Pneumatic |
Open |
12 V |
Ground |
Drives solenoid with 12 V continuously while actuated but uses 0 V when not actuated. |
|
|
|
Close |
0 V |
Ground |
||
|
Reverse pneumatic |
Open |
0 V |
Ground |
Works in reverse to a pneumatic actuator. For example, if pneumatic opens a door, reverse pneumatic will close the door. |
|
|
Close |
12 V |
Ground |
|||
|
Dual |
Actuator 1 |
Open |
0 V |
n/a |
Allows the pins to be controlled independently but be tied to a common ground. With a dual actuator, you can control two actuators from one actuator port |
|
|
Close |
12 V |
n/a |
||
|
Actuator 2 |
Open |
n/a |
0 V |
||
|
Electro-mechanical |
Open |
12 V for transition time |
Ground |
Drives the pin with 12 V for the transition time and then uses 0 V when the transition time expires. Runs forward and backward. |
|
|
Close |
Ground |
12 V for transition time |
|||
View GrainGage Info
On the Setup > H2 or H3 GrainGage screen,
- Tap Info.
Mirus opens the Info screen on which you can view Chamber, Module, and Sensor information for the GrainGage..png)
Configure Weight Sensors
On the Setup > H2 or H3 GrainGage screen,
- Tap Sensors > Weight.
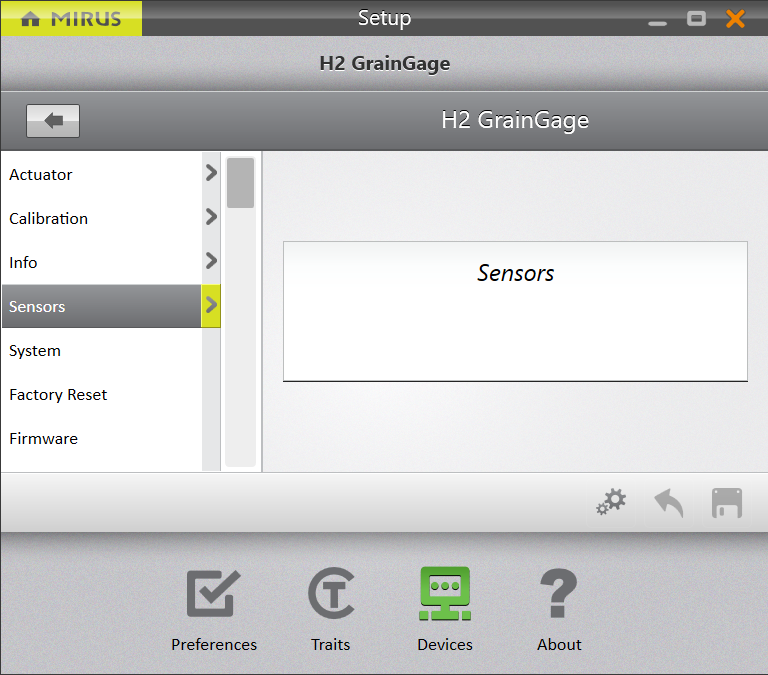
Mirus opens the Weight Sensors Setup screen on which you can configure weigh bucket settings for the GrainGage.
.png)
The following table displays the typical preferred setting for each item on this screen.
|
Weight Sensors Settings |
||
|---|---|---|
|
Setup Parameter |
Default Value |
Description |
|
Chamber Head Room |
25% |
The percentage of additional grain required to perform a moisture and test weight measurement or include that sub-cycles as part of the average moisture and test weight measurement. For example, if the chamber head room is set to 25% and the minimum weight threshold is 4 lb, then Mirus requires 5 lb to ensure that the test chamber is full and that the data will be accurate. If the full amount isn’t reached (i.e., minimum weight threshold + chamber head room), Mirus doesn’t record the moisture or test weight data, because it’s not likely to be accurate. Mirus still collects the plot weight. If the amount required by Mirus isn’t met on a sub-cycle, then that moisture and test weight measurement won’t be included in calculating the average. If you are harvesting low yield grains, the chamber head room can be set as low as 15% without losing any accuracy. |
|
2000 msec |
The amount of time all the top and bottom gates remain open to allow for the evacuation of all grain from the weigh bucket. This setting overrides the open state time for the top and bottom gates. Caution: Wetter grain or oil seeds may require longer evacuation times. Low-volume inserts will also require a longer evacuation time. If this setting is inaccurate, it may increase the weighing cycle time unnecessarily or cause the mixing of two plots. |
|
|
Load Cell Coefficients |
2.000 |
The default values for load cell coefficients are placeholders. These are custom values that are generated during weight calibration. They are used to convert millivolt readings from the load cells into pounds or kilograms. Do not adjust these manually. |
|
Slope and Motion Compensation |
Yes |
This corrects weight errors resulting from movement and vibration as well as harvesting on a slope. |
|
Trip Point |
80% |
The percentage of full bucket capacity at which a weight trip cycle will occur. |
|
Weigh Time |
1000 msec |
The period over which weight readings are averaged. Although a shorter weigh time will shorten cycle times, it may reduce the accuracy of the measurement. |
|
Weight Tare Warning |
0.500 lb |
This is the threshold above which a tare warning is generated after weigh bucket evacuation. |
Note: Preconfigured values are default values based on generalized harvest conditions. They may not reflect the optimum settings for the harvest conditions for your particular climate, fields, or grains. Changing default values requires a certain level of experience. Please contact HarvestMaster Field Service Engineers when adjusting these settings. See Contact a HarvestMaster Field Service Engineer.
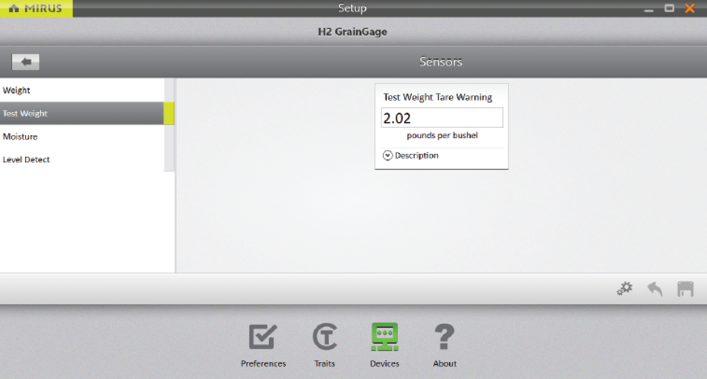
Configure Test Weight Sensors
On the Setup > H2 or H3 GrainGage > Sensors screen,
- Tap Test Weight.
Mirus opens the Test Weight Sensor Setup screen on which you can configure test weight settings for the GrainGage.
|
Test Weight Sensor Settings |
||
|---|---|---|
|
Setup Parameter |
Default Value |
Description |
|
Test Weight Tare Warning |
2.02 lb/bu |
A tare warning is generated when a tare check indicates weight in the chamber is above this threshold. |
Note: To edit other test weight settings, see Calibrate Test Weight.
Configure Moisture Sensors
Note: This option is only available with the H2 GrainGage.
On the Setup > H2 GrainGage > Sensors screen,
- Tap Moisture.
Mirus opens the Moisture Sensor Setup screen where you can configure the moisture setting for the GrainGage.

|
Moisture Sensor Settings |
||
|---|---|---|
|
Setup Parameter |
Default Value |
Description |
|
Moisture Tare Warning |
1% |
A tare warning is generated when a tare check indicates that the moisture is above this threshold. |
Note: To edit other moisture settings, see M2.0 Moisture Model Recalibration.
Configure Overflow Sensor
Go to the Setup > H2 or H3 GrainGage > Sensors screen.
- Tap Level Detect.
Mirus opens the Level Detect Sensors Setup screen on which you can configure Level Clear Delay and enable/disable the Overflow Sensor.

Note: Typically, only H2 or H3 Classics mounted on Wintersteiger Quantum or Classic Plus combines are equipped with an overflow sensor that trips when grain is in close proximity.
|
Level Detect Sensor Settings |
||
|---|---|---|
|
Setup Parameter |
Default Value |
Description |
|
Level Clear Delay |
1000 msec |
The amount of time delay between last level/weight trip and the start of the flush cycle. |
|
Overflow Sensor |
Yes |
Enables the sensor for use in overflow detection. |
Configure the GrainGage System Settings
On the Setup > H2 or H3 GrainGage screen,
- Tap System.
Mirus opens the System Setup screen where you can configure settings for the GrainGage.
.png)
The following table displays the typical preferred setting for each item on this screen.
|
System Settings |
||
|---|---|---|
|
Item |
Default Value |
Description |
|
Debug Streaming Enabled |
Yes |
This enables or disables debug streaming messages for the DSP module. HarvestMaster recommends leaving this enabled. |
|
GrainGage Type |
Classic |
Designates which GrainGage type is connected to Mirus. |
|
Isolation Gate Mode |
Normally Open |
Controls the initial state of the isolation gate. |
|
Max Sub-Cycle Count |
1 |
The maximum number of sub-cycles that will be run during a cycle if the minimum weight threshold continues to be satisfied. |
|
Enable SCiO Data Sync |
Yes |
H3 SCiO scan data will be backed up to the cloud upon connecting to the internet. |
Reset the GrainGage to Factory Settings
This option can be found on the Setup > H2 or H3 GrainGage > Factory Reset screen.
![]() CAUTION: This cannot be undone! Resetting the GrainGage to factory defaults will clear all your settings, including actuator timers and weight calibrations. This should only be done in consultation with a HarvestMaster Field Service Engineer.
CAUTION: This cannot be undone! Resetting the GrainGage to factory defaults will clear all your settings, including actuator timers and weight calibrations. This should only be done in consultation with a HarvestMaster Field Service Engineer.
.png)
Update the GrainGage Firmware
This option can be found on the Setup > H2 or H3 GrainGage > Firmware screen.
As an operator, you are not likely to need this screen. When you install or update Mirus, the program will check for the latest firmware and update it automatically. The purpose of this screen is to help HarvestMaster Field Service Engineers during troubleshooting procedures.

The moisture curve option is covered in detail in Moisture Curve and Chamber Calibration Wizard.
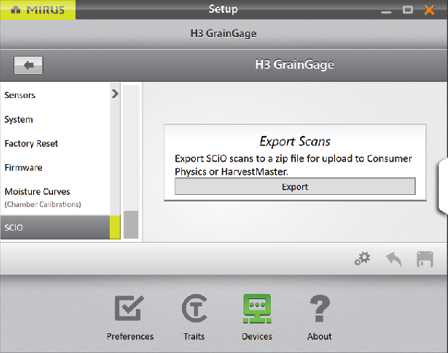
Export SCiO Files
This option can be found on the Setup > H3 GrainGage > SCiO screen.
You can zip the raw scan files that could be used for post-processing here if needed.
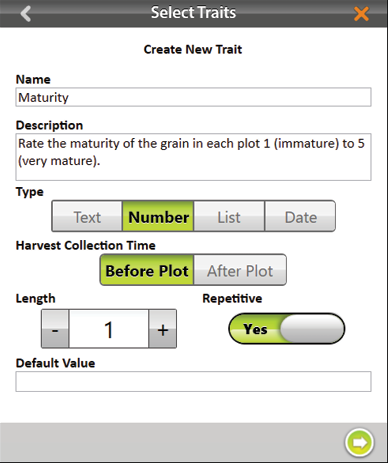
Create and Record Traits
This option can be found on the Setup screen.
To create a new trait,
- Tap the new icon
 .
.
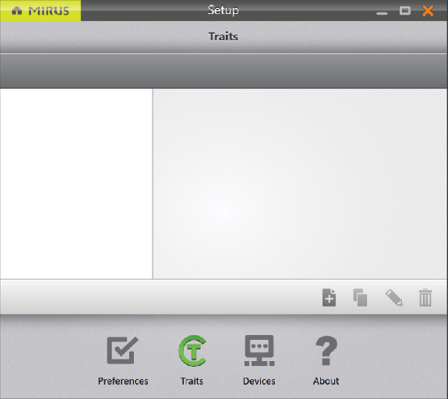
- Enter a Name and Description for the new trait.
- Select the Type of trait.
- Select when you want Mirus to prompt the operator to record the trait: Before Plot or After Plot.
- Specify the Length, or number of characters allowed in the record field.
- Indicate whether or not this trait is Repetitive.
- Enter the Default Value (if needed).
- Tap the next arrow
 to save the trait.
The following table describes the settings for each item on this screen.
|
New Trait Settings |
|
|---|---|
|
Item |
Description |
|
Name |
This is the name of the trait. |
|
Description |
This describes the type of data to be recorded within the trait. |
|
Type |
|
|
Harvest Collection Time |
Specifies whether trait data will be collected before or after the plot is harvested. |
|
Length |
This setting helps Mirus know when to move on to the next trait. After the allotted number of characters is entered, Mirus moves on automatically so that the operator doesn’t need to press enter. |
|
Repetitive |
Selecting “Yes” indicates data for that trait will be collected multiple times on different days. For example, if you wanted to rate your grain for disease three times a year, you would have a repetitive disease trait. |
|
Default Value |
This is the most common or most expected value for this trait. Mirus will automatically populate the record field with this value to save the operator time. The operator needs only to press or tap Enter. If the value is different from the default value, the operator can enter the new value and press Enter. If the maximum number of characters within the length of the trait is met, Mirus will advance automatically. |
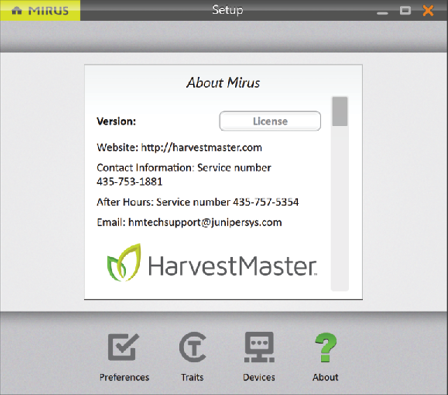
View Information About Mirus
This option can be viewed on the Setup > About screen.
This screen shows information about Mirus, including the version number, license information, website, and contact information.