Connect GPS
Uinta connects to a device's internal GPS receiver, an external GPS receiver (such as Geode or Spire), or Location Services to capture location data. You can adjust the location settings and apply correction services to increase the data's accuracy.
For a list of external GPS receivers supported by Uinta, email Juniper Systems at uintasoftware@junipersys.com.
Connect GPS in Uinta for Windows
The following sections describe how to connect to a GPS receiver with a Windows device.
Connect to the Internal GPS (Windows)
To connect the device's internal GPS receiver:
- Tap the GPS icon
 in the upper-left corner of the title bar.
Or, from the menu, select Settings > GPS Connection.
- Select the internal GPS.
 CAUTION: While Windows Location Services is listed as an option, we do not recommend using it as a valid GPS data collection source. Windows Location Services shows the position from network-based approximation and is much less accurate.
- Tap Connect.
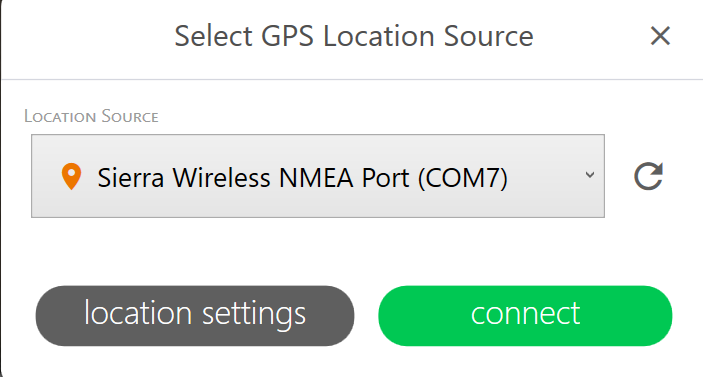
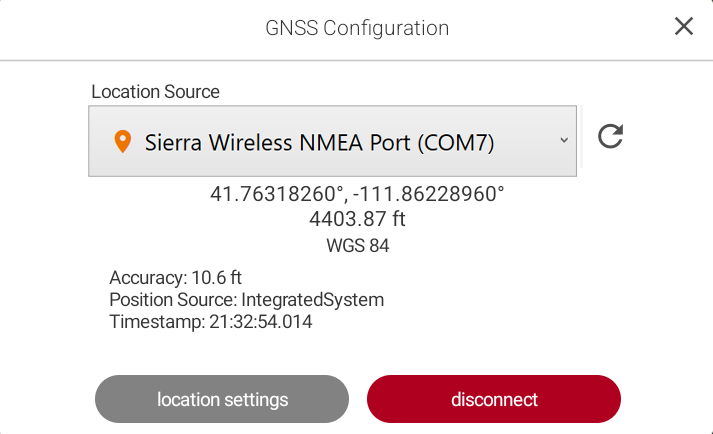
Uinta displays information about the receiver, including the accuracy, location, and position source.
Connect to a GPS Receiver (Windows)
You can connect to a GPS receiver, such as Geode or Spire, through Bluetooth®, USB, or serial port, depending on its capabilities.
Pair to Bluetooth Receiver
To pair to an GPS receiver:
- Power on the receiver.
- Enable Bluetooth on your Windows device.
- Pair the receiver to your Windows device.
- Open Uinta.
- Tap the GPS icon in the upper-left corner of the title bar.
Or, from the menu, select Settings > GPS Connection.
- In Location Source, select the receiver. If the receiver isn't listed, tap Refresh
 . The list may take up to 15 seconds to update.
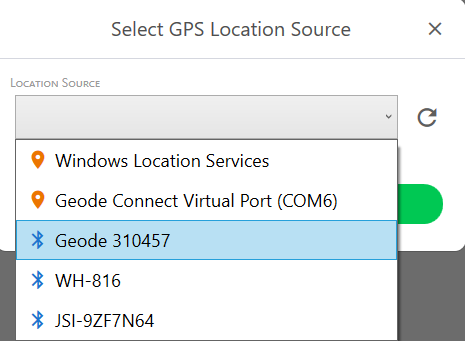
- Tap Connect.
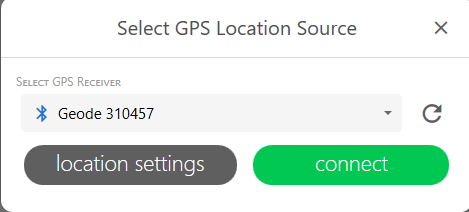
Uinta displays information about the receiver, including the accuracy, correction source, fix quality, and battery charge level.
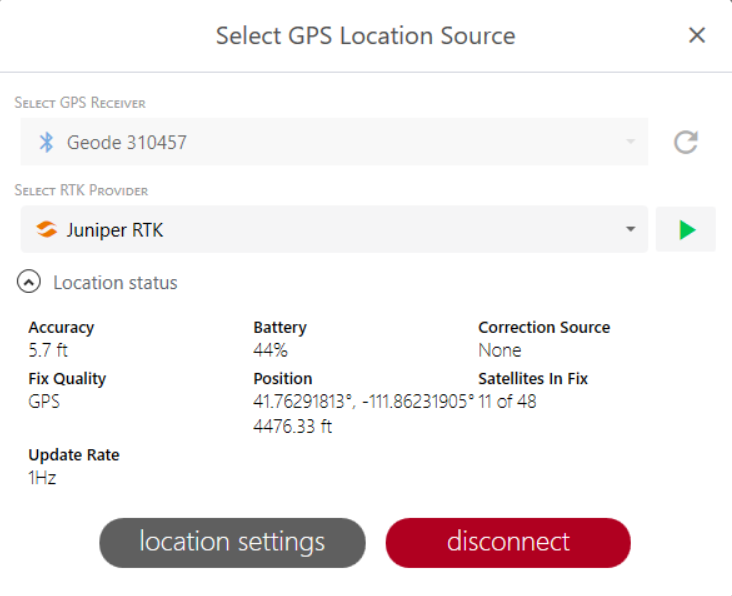
Connect via USB
You can connect an GPS receiver to a Windows device using a USB cable.
- If the PC or tablet is running Windows 10, turn off tablet mode.
- Power on the receiver.
- Plug the USB cable into your Windows device and the receiver.
- Open Uinta.
- Tap the GPS icon in the upper-left corner of the title bar.
Or, from the menu, select Settings > GPS Connection.
- In Location Source, select the USB serial device. If the receiver isn't listed, tap Refresh . The list may take up to 15 seconds to update.
- Tap Connect.
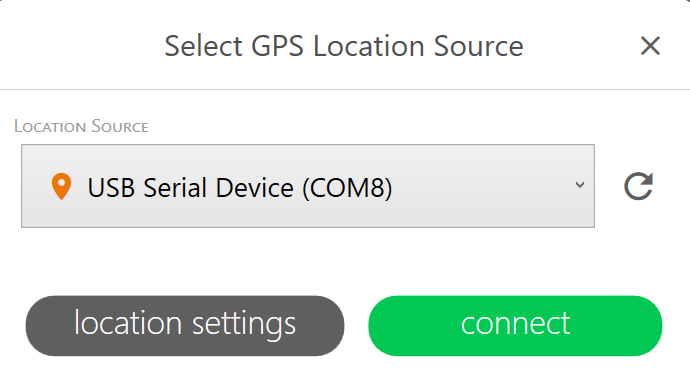
Uinta displays information about the receiver, including the accuracy, correction source, fix quality, and battery charge level.
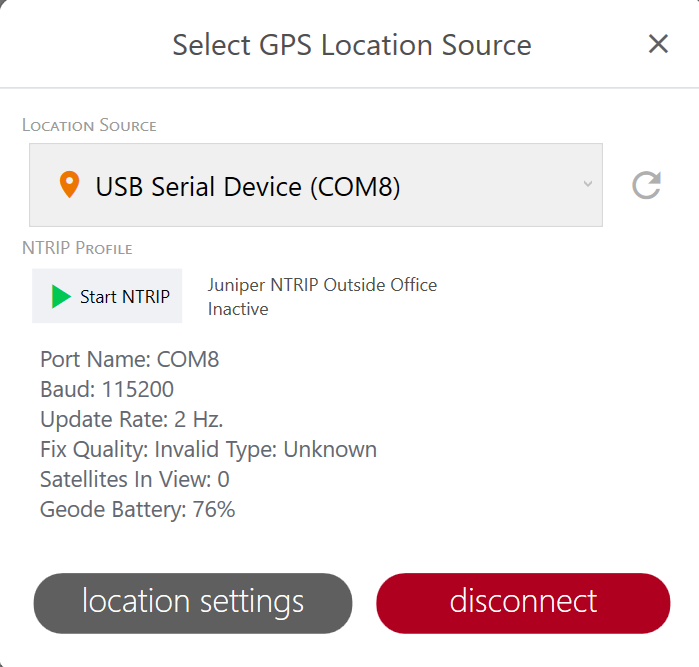
Connect via Serial Port
Some external GPS receivers, such as the Geode, have a 9-pin RS-232C serial port. This allows the GPS receiver to be mounted to a piece of equipment while maintaining a constant connection for data and power.
To connect a Windows device and a GPS receiver with a straight-through serial cable:
- Power on the receiver.
- Plug the serial cable into your Windows device and the receiver.
- Open Uinta.
- Tap the GPS icon in the upper-left corner of the title bar.
Or, from the menu, select Settings > GPS Connection.
- Select the USB serial port. If the receiver isn't listed, tap Refresh . The list may take up to 15 seconds to update.
- Tap Connect.
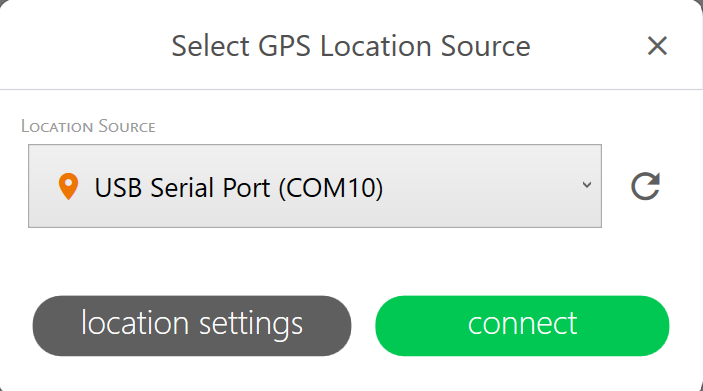
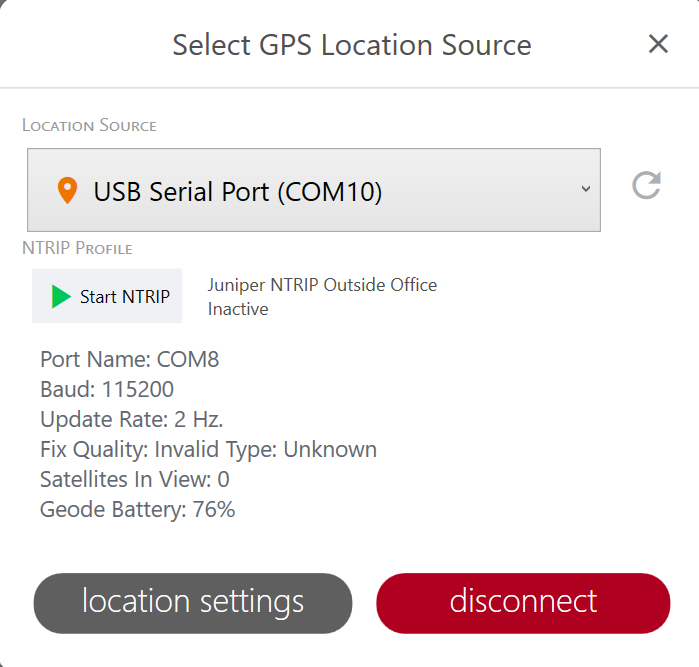
Uinta displays information about the receiver, including the accuracy, correction source, fix quality, and battery charge level.
Connect GPS in Uinta for Android
The following sections describe how to connect to a GPS receiver with an Android device.
Pair to a GPS Receiver (Android)
To pair your Android device to a GPS receiver, such as Geode or Spire:
- Power on the receiver.
- Enable Bluetooth on your Android device.
For devices running Android 12 or earlier, enable Location.
- Open Uinta.
- From the menu, select Connect & Manage GPS.
- In Location Source, select the receiver. If the receiver isn't listed, tap Refresh . The list may take up to 15 seconds to update.
Note: If the GPS receiver does not appear in the list of devices, ensure it is turned on and not paired with another device.
- Tap Connect.
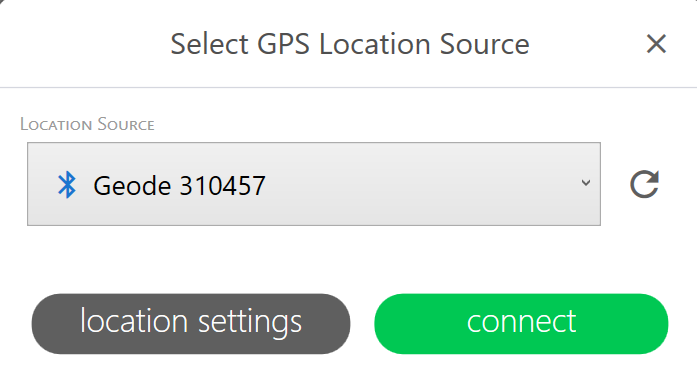
- Follow the prompts to finish pairing.
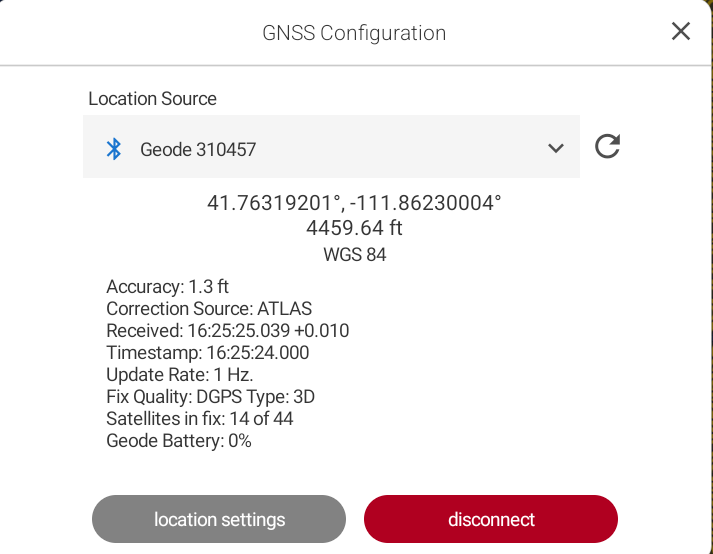
Uinta displays information about the receiver, including the accuracy, correction source, fix quality, and battery charge level.
Connect through Location Services (Android)
To connect to a GNSS receiver that is not from Juniper systems and cannot be connected directly, make the connection through the internal GPS receiver or Location Services:
- Connect to the receiver through its associated app.
- Set the recevier's app as a mock location provider.
For sample instructions based on the Trimble DA2 receiver, see Work with Trimble DA2 Receiver (Android). - Open Uinta.
- From the menu, select Connect & Manage GPS.
- Select the internal receiver or Location Services.
Note: Android Location Services uses a combination of GPS, Wi-Fi, Bluetooth, and other sources to pinpoint a location, making it a valid data collection source.- If you are using Uinta on an Archer 4 with the RTK-enabled GNSS and the receiver isn't listed, tap Refresh . The list may take up to 15 seconds to update.
Note: For more information on the RTK-enabled GNSS expansion, see "Connect to the Archer 4 GNSS Expansion" in the Juniper Connect User Manual.
- If you are using Uinta on an Archer 4 with the RTK-enabled GNSS and the receiver isn't listed, tap Refresh
- Tap Connect.
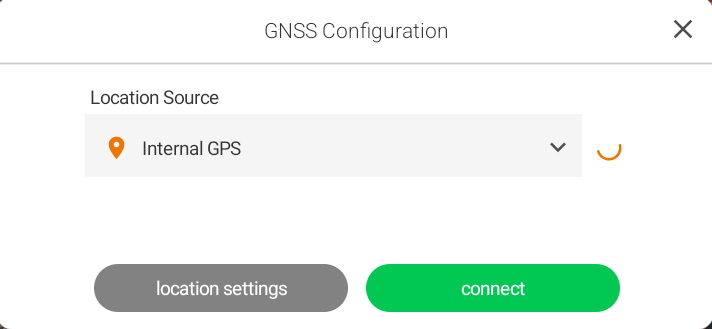
Uinta displays information about the receiver, including the accuracy, location, and fix quality.
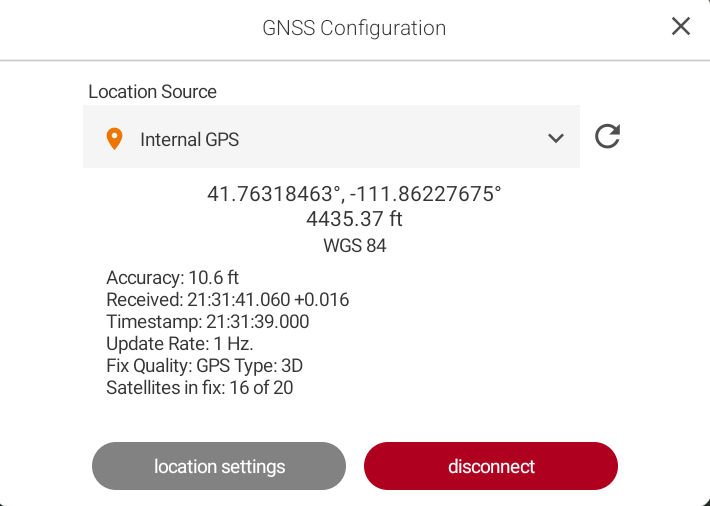
Connect GPS in Uinta for iOS
The following sections describe how to connect to a GPS receiver with an iOS device.
Connect to a GPS Receiver (iOS)
You can pair an iOS device to an external GPS receiver, such as Geode or Spire.
- Power on the receiver.
- Enable Bluetooth on the iOS device.
- Open Uinta.
- From the menu, select Connect & Manage GPS.
- In Location Source, select the receiver from the drop-down list.
- If the receiver doesn't appear in the list, tap Discover devices. Select the GPS receiver from the list and finish the pairing process.
- If prompted, accept the pairing code.
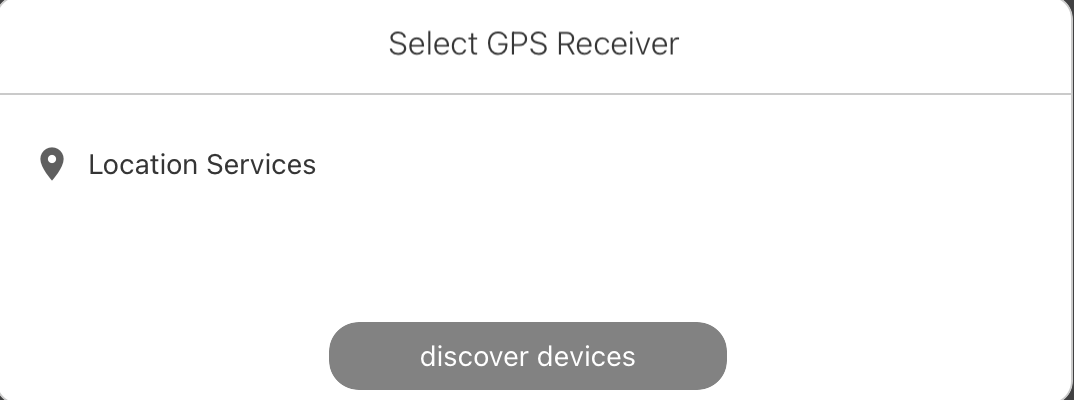
- Tap Connect.
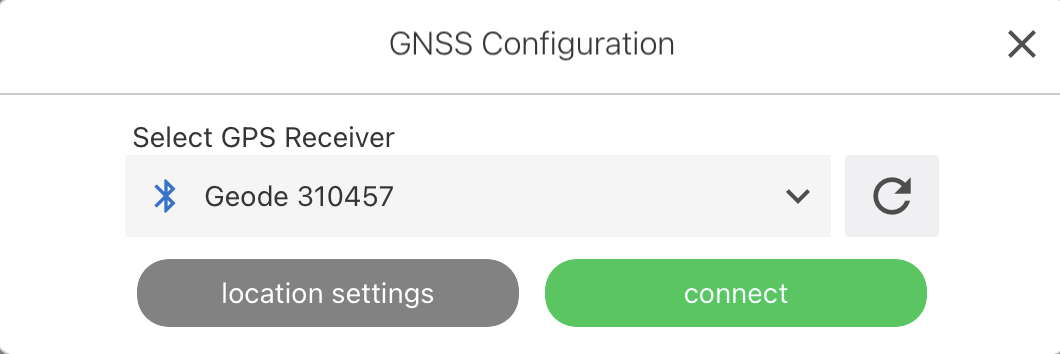
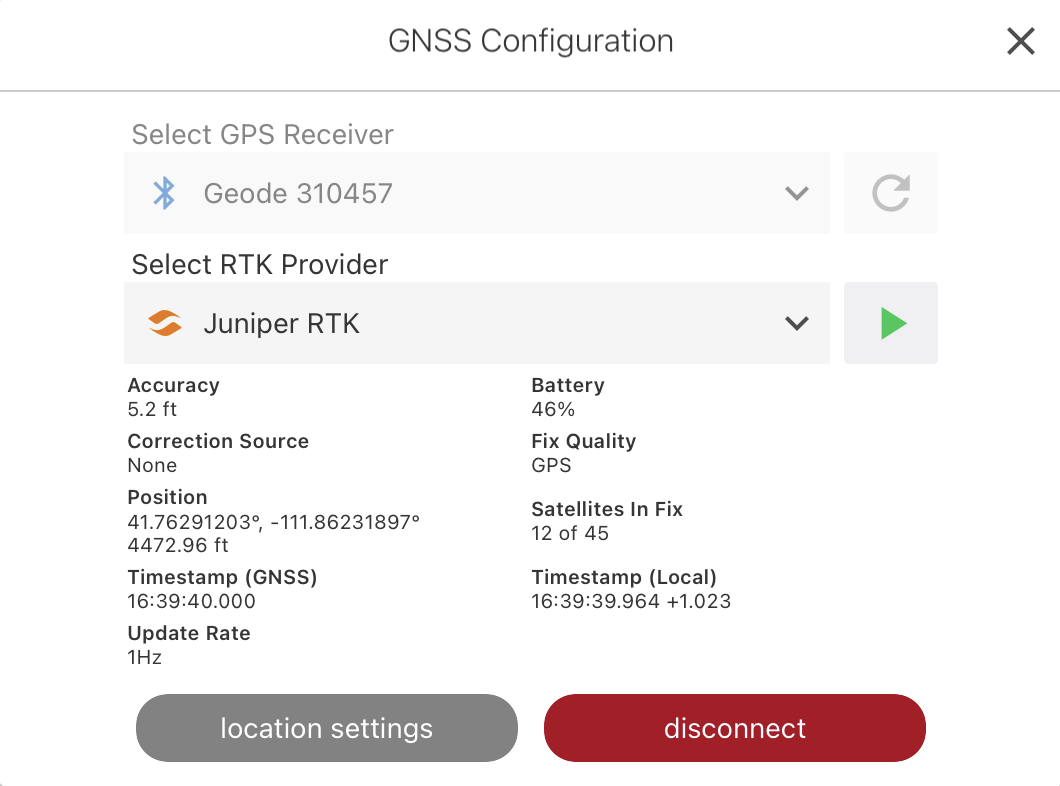
Uinta displays information about the receiver, including the accuracy, correction source, fix quality, and battery charge level.
Connect through Location Services (iOS)
To connect to a GNSS receiver that is not from Juniper systems, make the connection through the internal GPS receiver or Location Services:
- Connect to the receiver through its associated app.
- Set the receiver's app as a mock location provider.
For sample instructions based on the Trimble DA2 receiver, see Work with Trimble DA2 Receiver (iOS). - Open Uinta.
- From the menu, select Connect & Manage GPS.
- In Location Source, select the internal GPS or Location Services.
Note: Apple Location Services uses a combination of GPS, Wi-Fi, Bluetooth, and other sources to pinpoint a location, making it a valid data collection source. - Tap Connect.
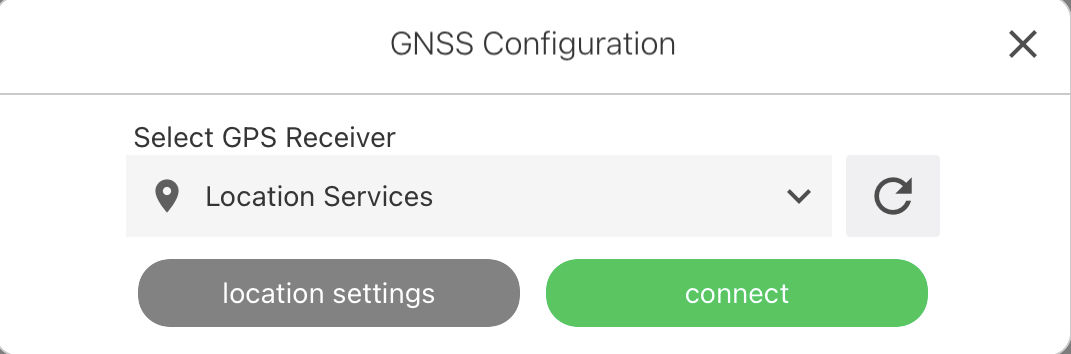
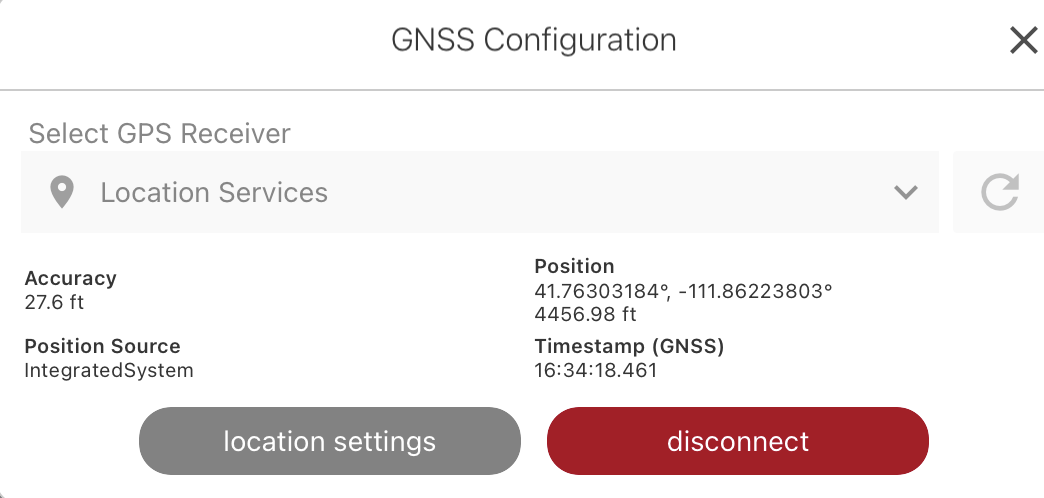
If asked, allow Uinta to use your location. Uinta displays information about the receiver, including the accuracy, satellites in fix, and fix quality.
Network RTK
Network RTK is a high-accuracy correction service that uses a network of ground-based reference stations to provide real-time corrections to mobile receivers. NTRIP is a communication protocol to deliver those corrections over the internet. Because positioning accuracy depends on the proximity to a reference station, Network RTK with NTRIP can select the nearest station or use modeling to create a virtual reference station close the user's receiver. The exact functioning depends on the network RTK provider.
The GNSS receiver uses RTK corrections from ground stations (such as CORS) to calculate highly accurate positions in real time. Depending on the signal quality, RTK can produce either a fix or float solution.
Network RTK requires a stable internet connection and, in most cases, a paid subscription to access correction services.
Apply Juniper RTK
Juniper RTK is available with any Juniper receiver. It requires a subscription.
- Go outdoors to an open area. Ensure you have an active internet connection.
- From the menu, select Connect & Manage GPS. Or, in Windows, select Settings > GPS Connection.
- Select your RTK-capable receiver from the Select GPS Receiver drop-down. (See Connect GPS in Uinta for Windows, Connect GPS in Uinta for Android, or Connect GPS in Uinta for iOS for instructions.)
-
Tap
 . (With Juniper RTK selected as the RTK Provider.)
Note: To ensure a successful connection to NTRIP, wait for the GPS LED to blink before tapping. On a Geode look for the amber LED. On a Spire look for the yellow LED.
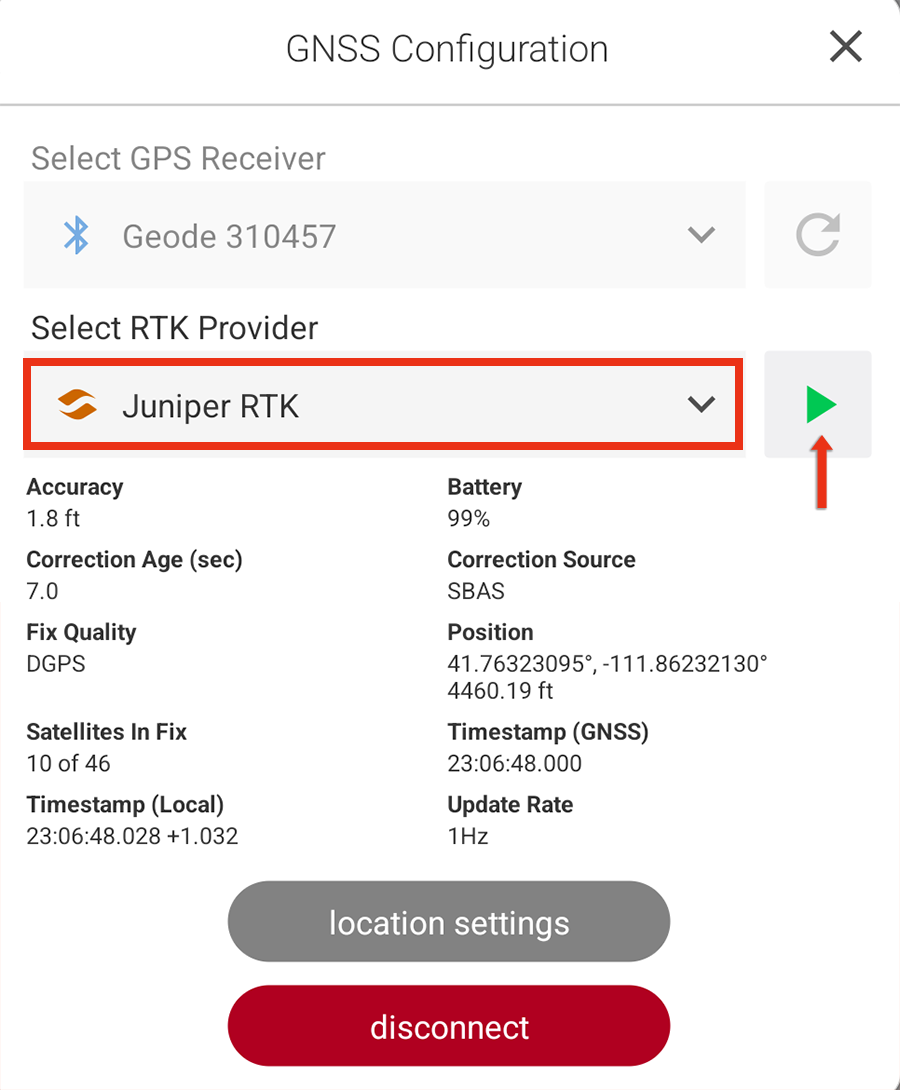
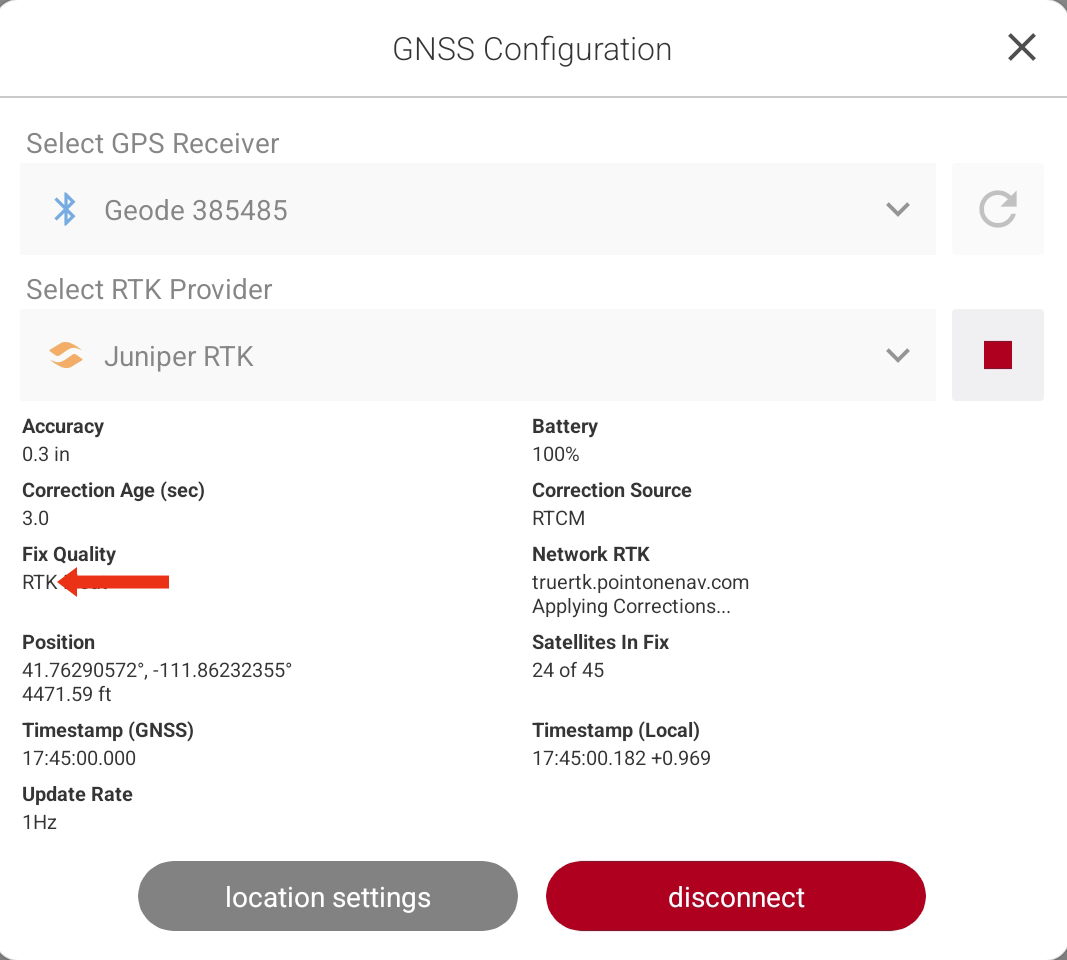
- Check that Fix Quality: RTK displays in the Select GPS Location Source dialog.
Note: The process of achieving an RTK fix can take a few minutes depending on your distance from the correction source, view of the sky, and internet connection. In good conditions, a connection is made in less than a minute.
Apply Network RTK (not Juniper RTK)
- Go outdoors to an open area. Ensure you have an active internet connection.
- From the menu, select Connect & Manage GPS. Or, in Windows, select Settings > GPS Connection.
- Select your RTK-capable receiver from the Select GPS Receiver drop-down. (See Connect GPS in Uinta for Windows, Connect GPS in Uinta for Android, or Connect GPS in Uinta for iOS for instructions.)
- Tap connect.
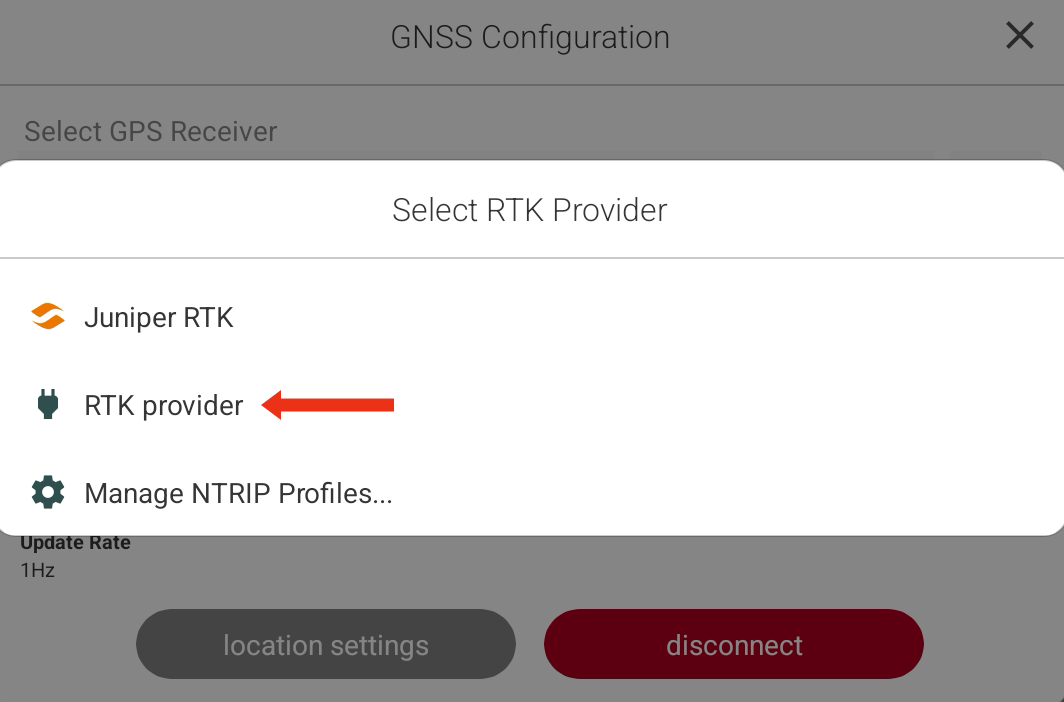
- Select your RTK provider.
Note: If your RTK provider is not listed, you haven't added your RTK provider. See Add an RTK Provider from Network RTK Settings.)
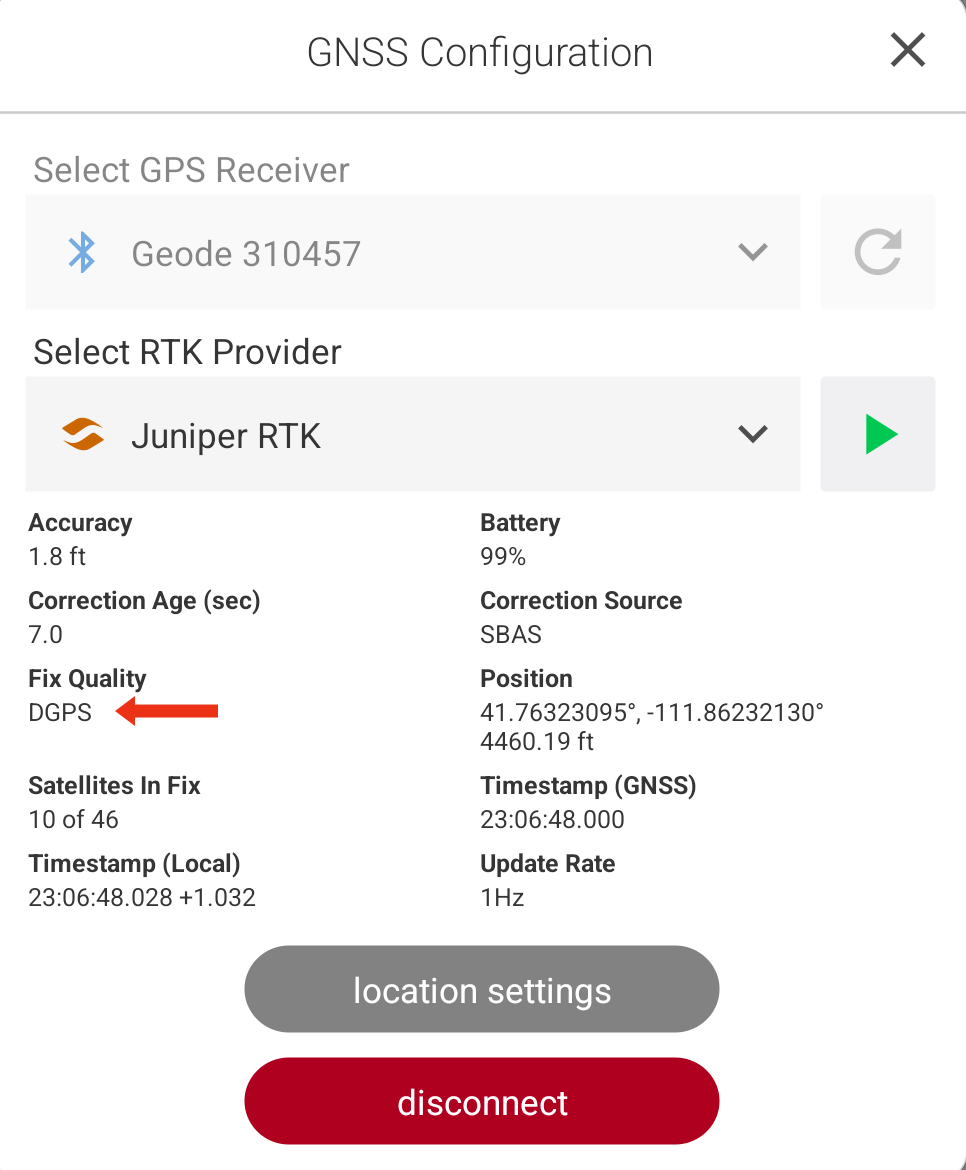
- Check that Fix Quality is DGPS or SBAS displays in the Select GPS Location Source dialog.
Note: The process of achieving an RTK fix can take a few minutes depending on your distance from the correction source, view of the sky, and internet connection. In good conditions, a connection is made in less than a minute.
- Tap
 .
.
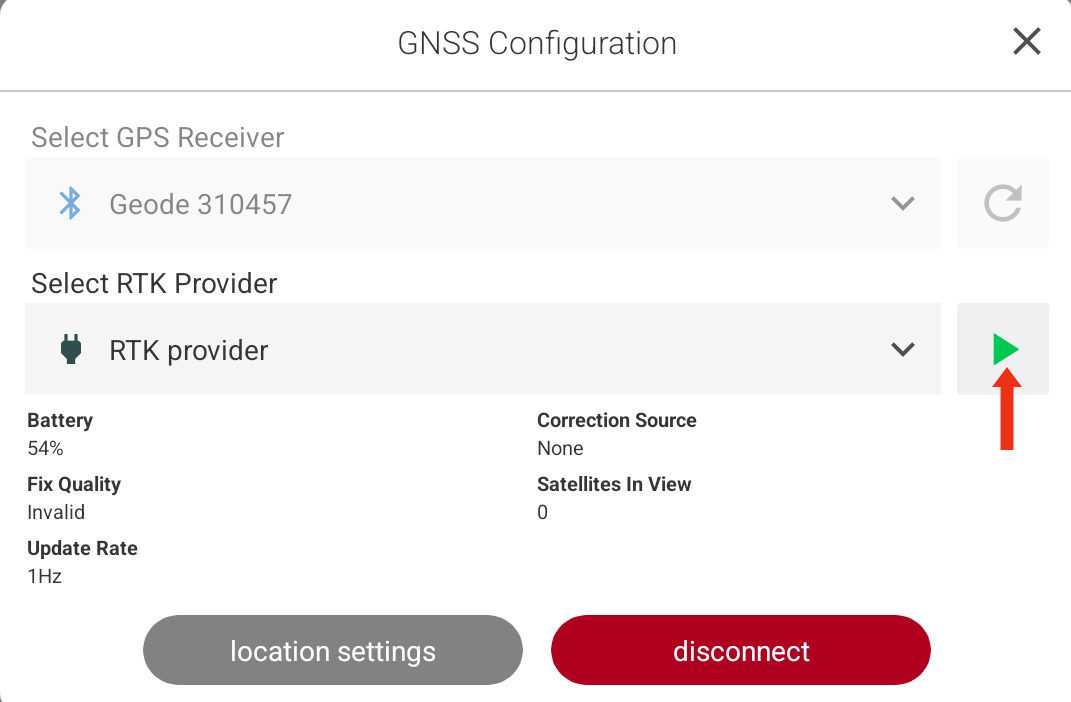
- Check that Fix Quality displays RTK.
Note: The process of achieving an RTK fix can take a few minutes depending on your distance from the correction source, view of the sky, and internet connection. In good conditions, a connection is made in less than a minute.
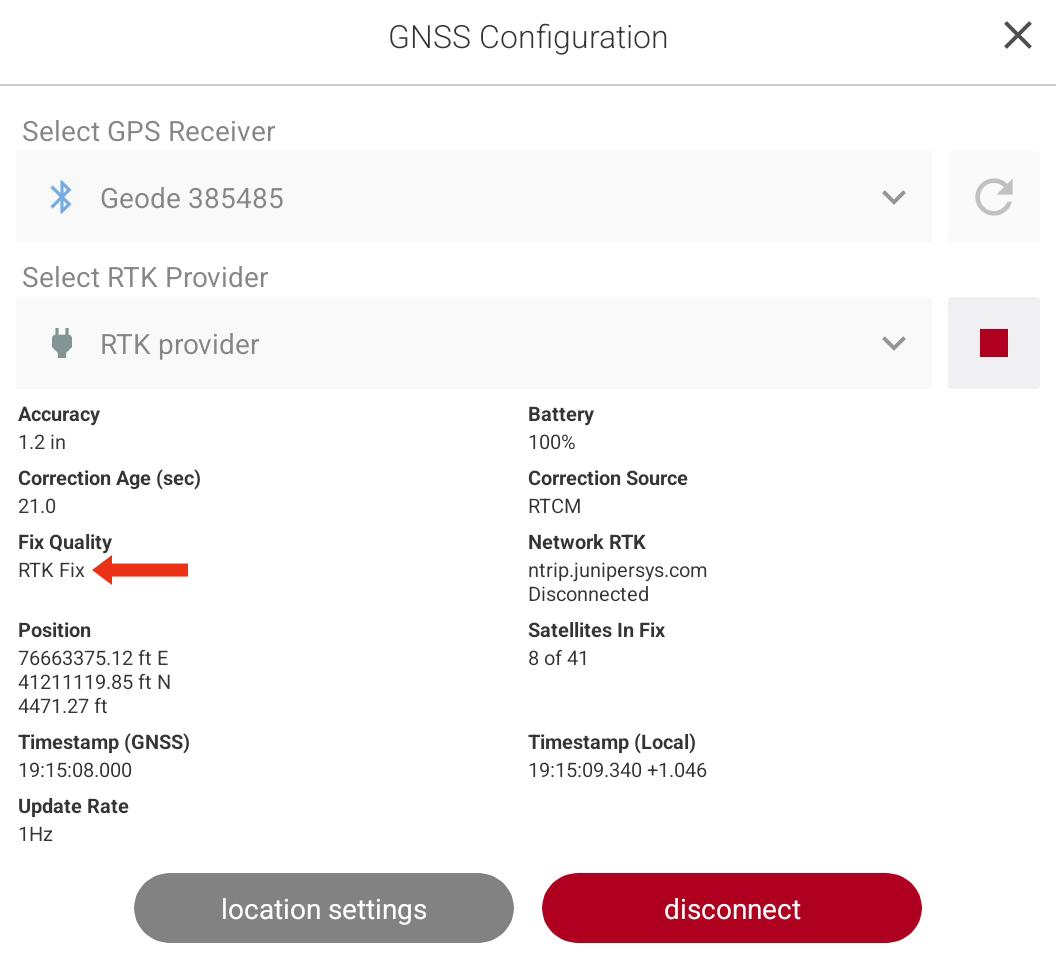
Add an RTK Provider from Network RTK Settings
Note: If you are using Juniper RTK, you do not need to adjust any of the Network RTK Settings.
When you enter the details required to connect to your RTK service provider, they will be saved in a profile. To enter the details required to connect to your RTK provider, activate a connection, or edit previously entered details:
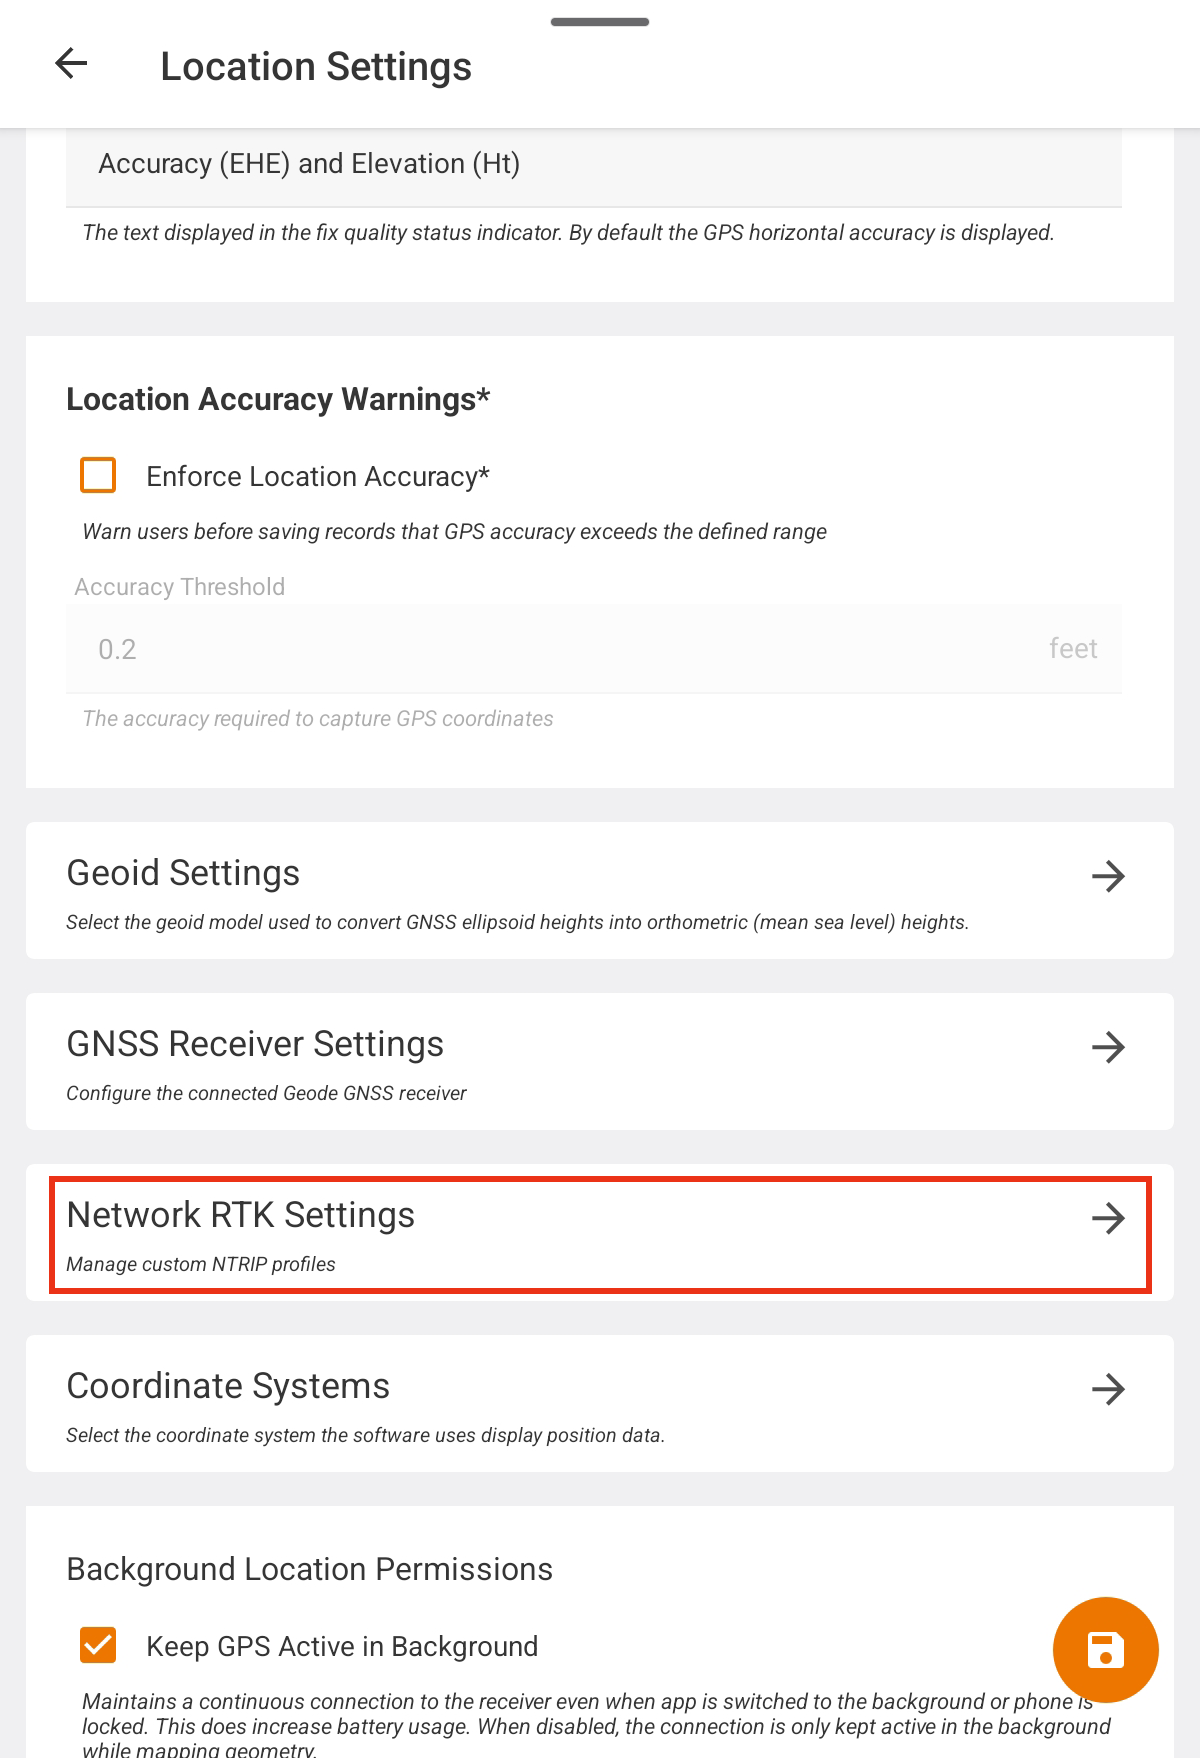
- Tap Network RTK Settings.
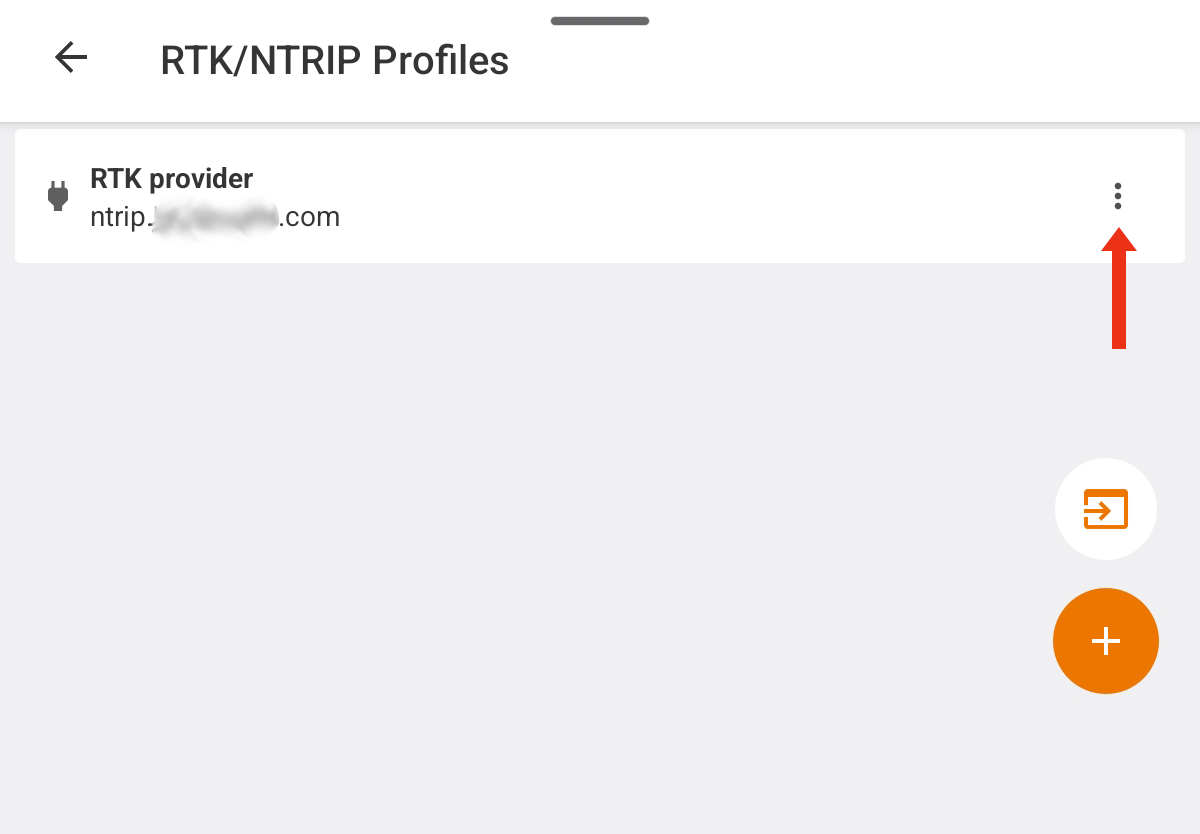
Uinta opens RTK/NTRIP Profiles.
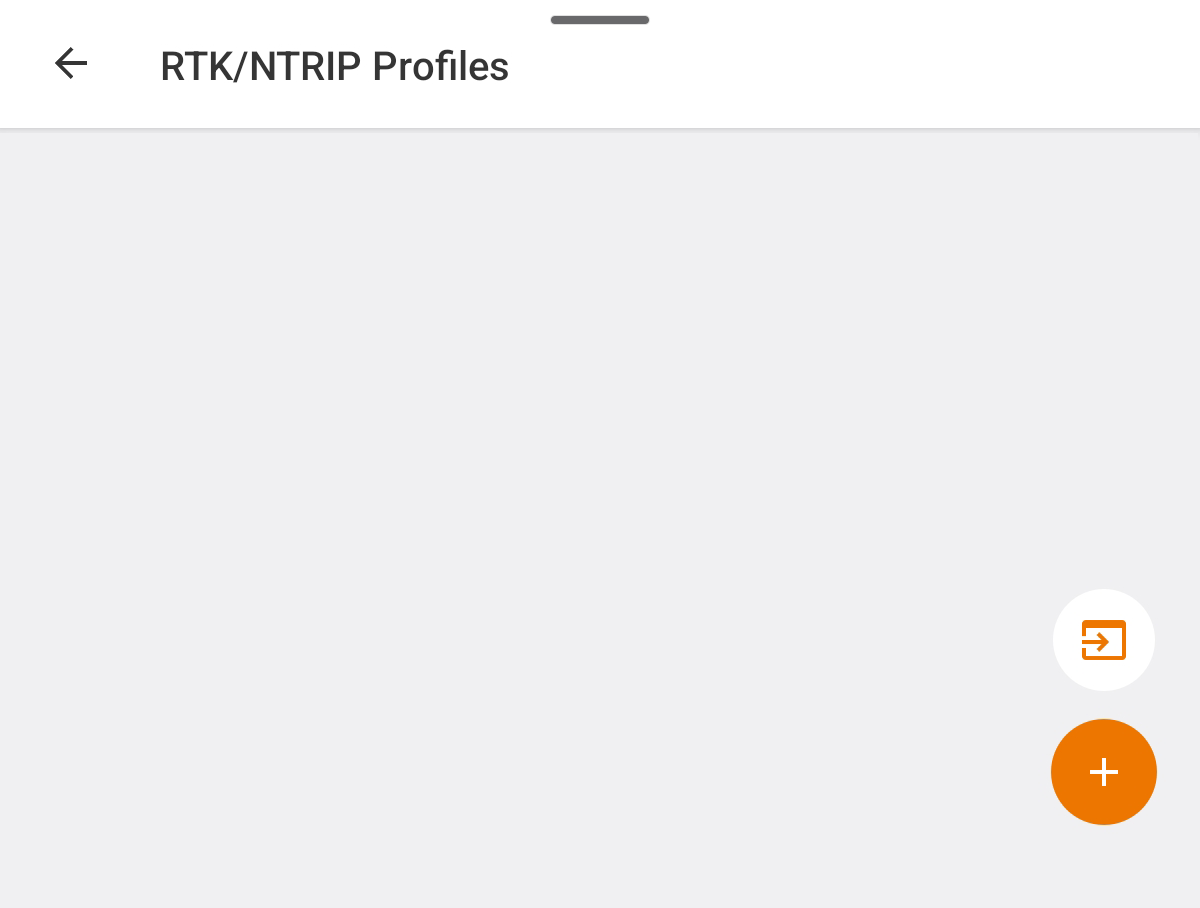
- Use
 to create a new profile. Import a profile with
  .
. - From Location Settings > Network RTK Settings, tap to create an NTRIP Profile.
- Enter the following information about your NTRIP service.
Note: Much of this information, such as the caster's address, will be provided to you by your RTK service provider.- A name for the profile (Profile Name)
- The address of your NTRIP caster (NTRIP Caster)
- The port being used
- Your username
- Your password
- By default, Uinta will send your position to your RTK provider. You can deselect, if your provider does not require it.
- Select Secure connection, if your RTK provider requires it.
- Select the mount point.
- Tap
 to download possible mount points.
 - Tap the Mount Point field to select a previously downloaded mount point.
- Tap
- Specify the Coordinate Reference System (CRS) used by your RTK provider. Select a CRS from the drop-down list. By default, Uinta uses 4326:WGS84. (See Coordinate Systems for more information.)
- Tap Coordinate Reference System.
- Tap the desired coordinate reference system, or Select Other to locate and load one not listed.
Note: If you are planning to export your data, be sure that you have selected the coordinate reference system that your RTK provider uses. See Use Uinta Coordinate Reference Systems for more information about how the CRS selected here impacts your data and corrections.
- Tap Test to check that Uinta can access the RTK provider and apply the settings. When the test is finished, choose whether to apply the corrections.
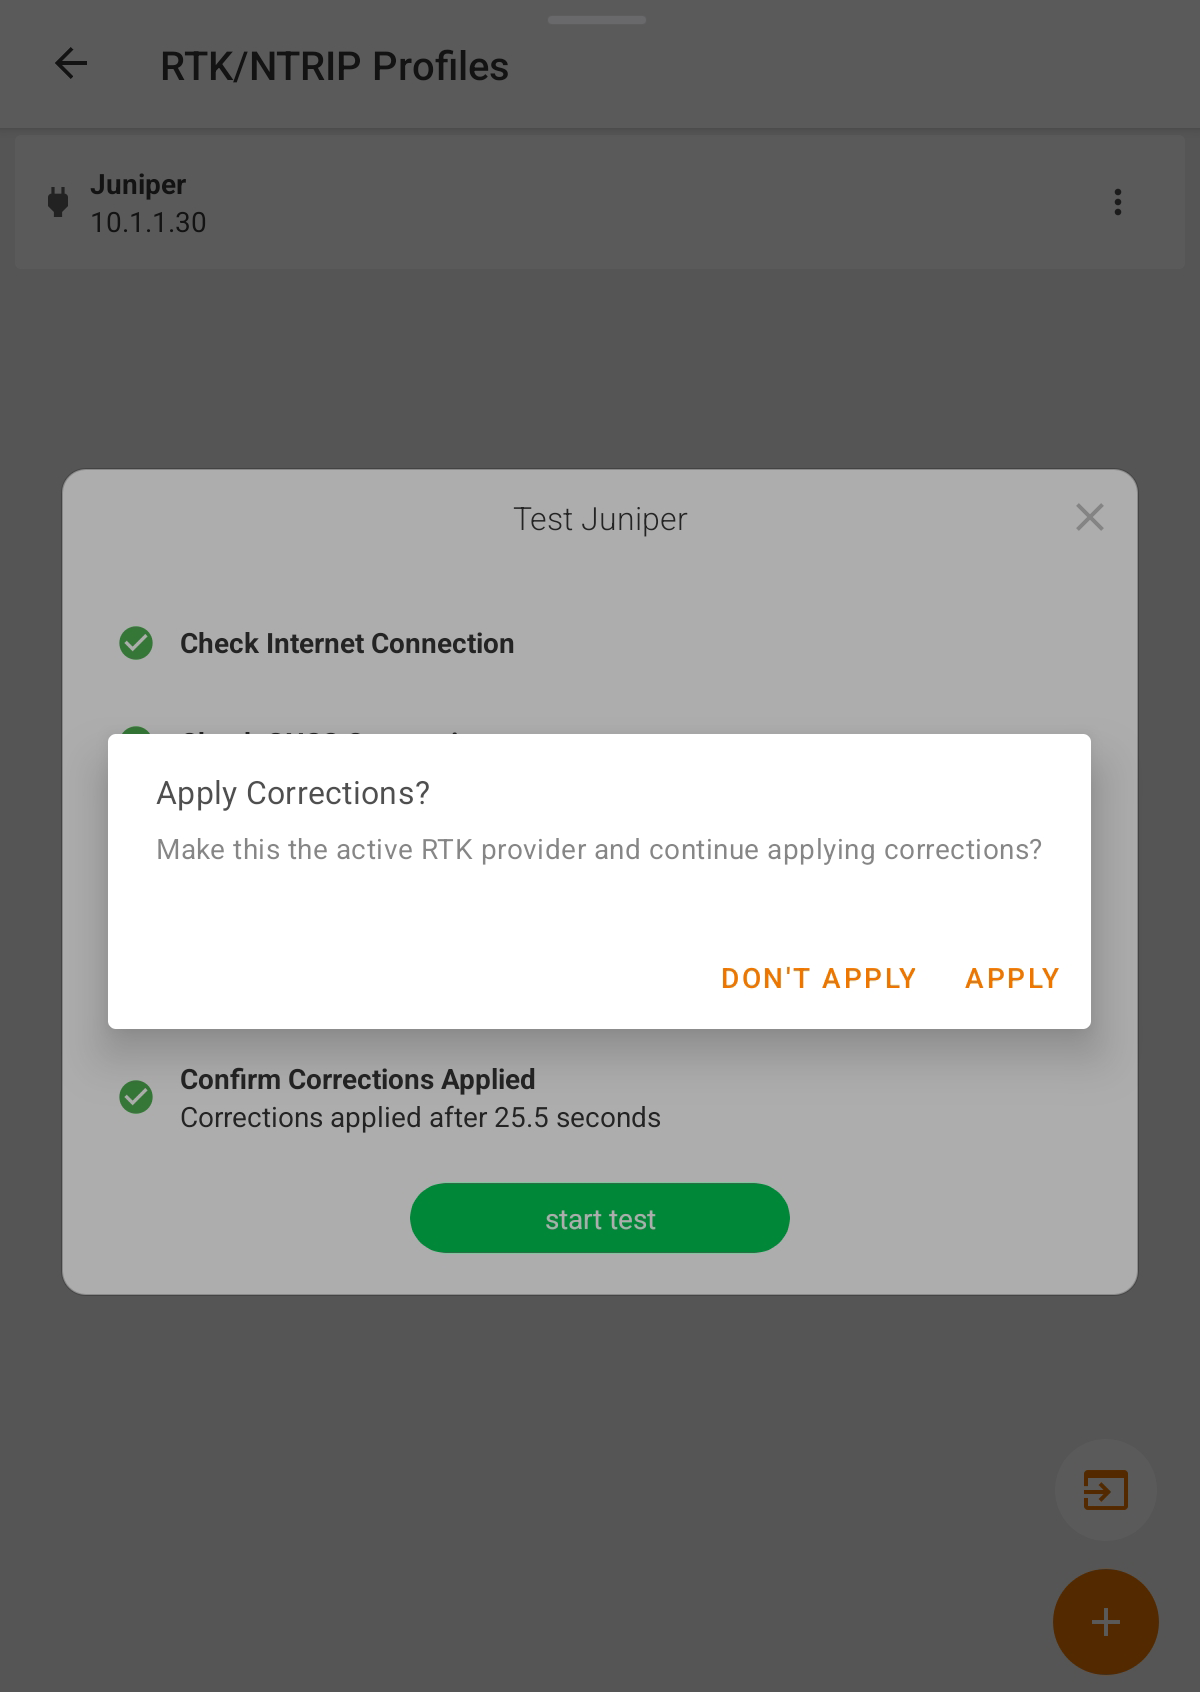
Once a profile is created, tap
 to edit, delete, copy, export, share, or test.