Customize a Project
After you create a project, customize the record types and fields to match the data you need to collect. A project can have as many record types and fields as you want.
Open Project Editor
Use the project editor to customize the record types and fields to fit your job.
To open the project editor:
- Open the project.
- Tap
 and select Project editor.
Or, tap  . In the Select Record Type dialog, tap
  and then tap Project editor
  .
.
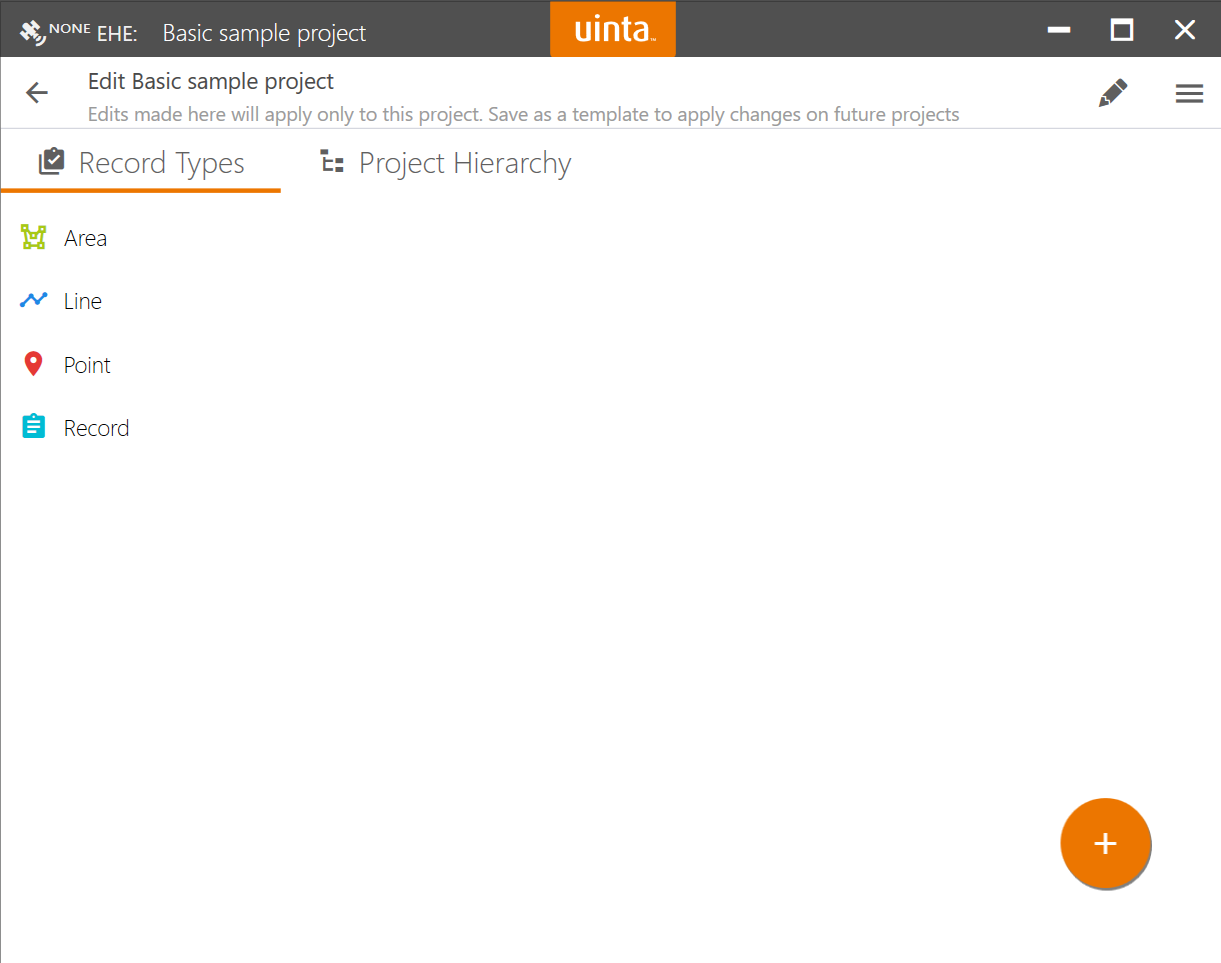
Add a Record Type
To add a record type to a project:
- Open the project, and then open the project editor.
- With no record types selected, tap .
Or, to add a record type from the project, tap . Then, tap and tap New record type  .
.
- In the New Record Type dialog, enter the name for the record type.
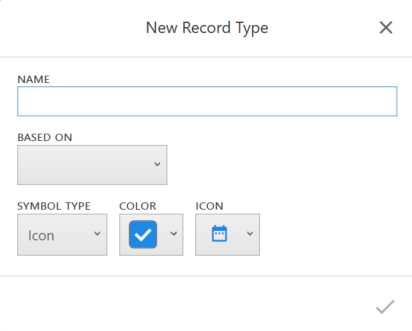
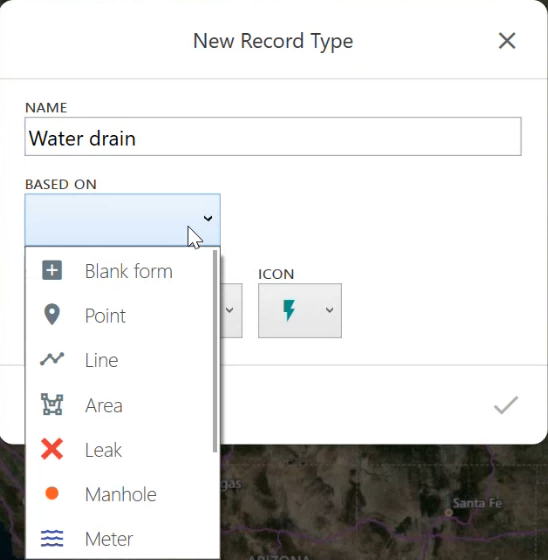
- In Based on, select the record type on which to base it.
- Select Group to organize the new record type with its base record type. For information on the benefits of grouping records, see Group Record Types.
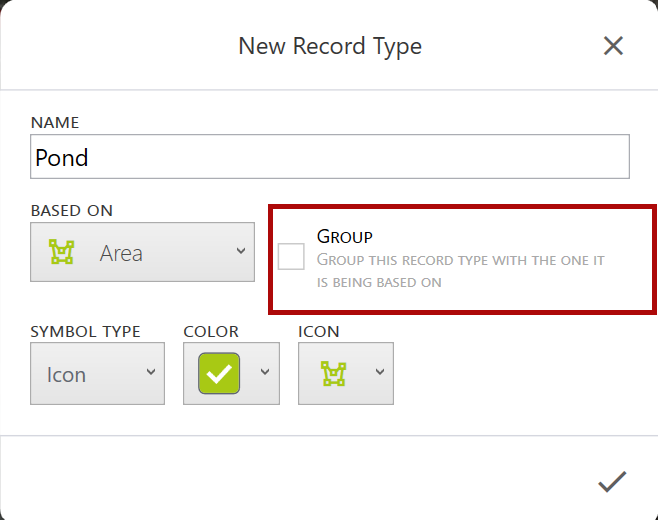
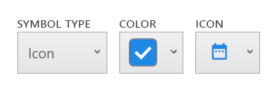
- Change the symbol type, color, and icon as desired.
- Tap
 .
.
Add Fields to a Record Type
To add fields to a record type:
- Open the project editor.
- Select the record type that you want to edit, and tap .
Uinta displays a list of fields in the record type.
- To add a field, tap Add field in Windows or tap
 in Android or iOS.
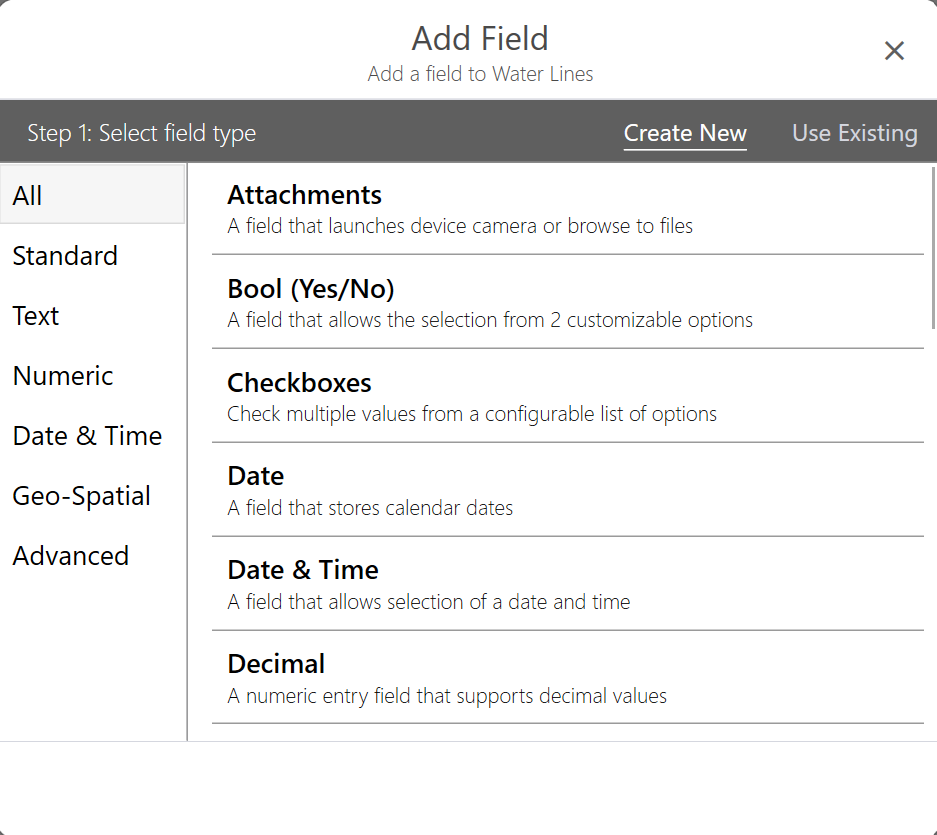
Creating a new field is the default. To use a field defined in other records, tap Use Existing.
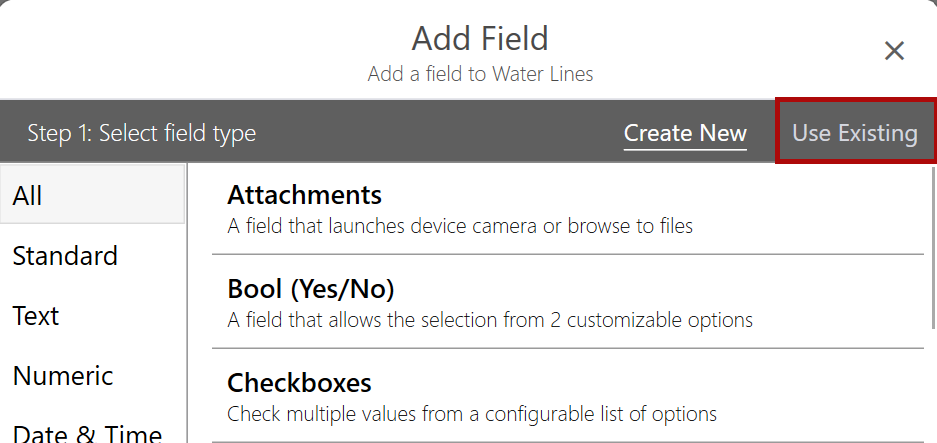
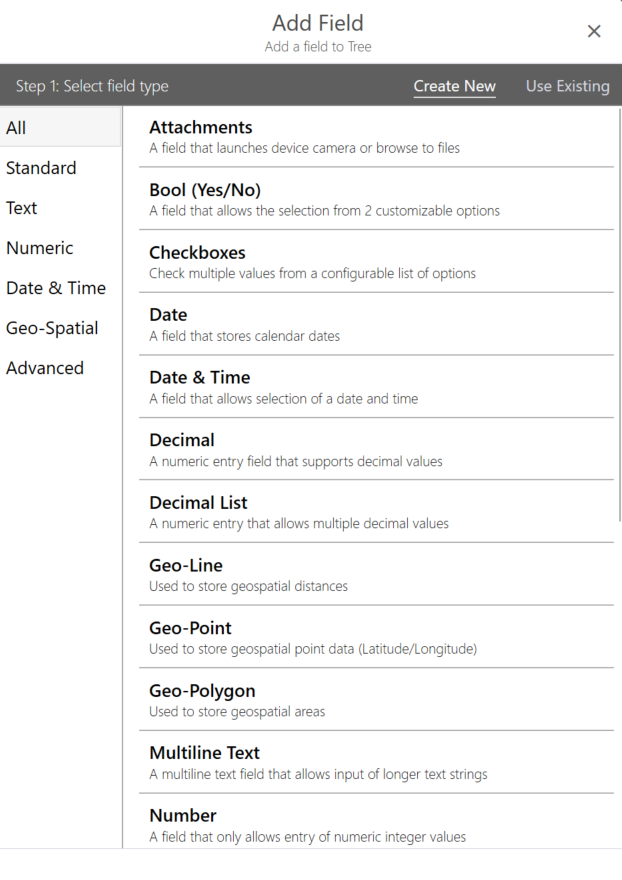
- Select the type of field that you want to add.
 CAUTION: Only add one geometry field—such as Geo-Line, Geo-Point, or Geo-Polygon—to each record type.
If you are creating a new field, narrow the list of field types by selecting a category.
- Tap
 .
. - Enter the name of the field or field instructions (optional).
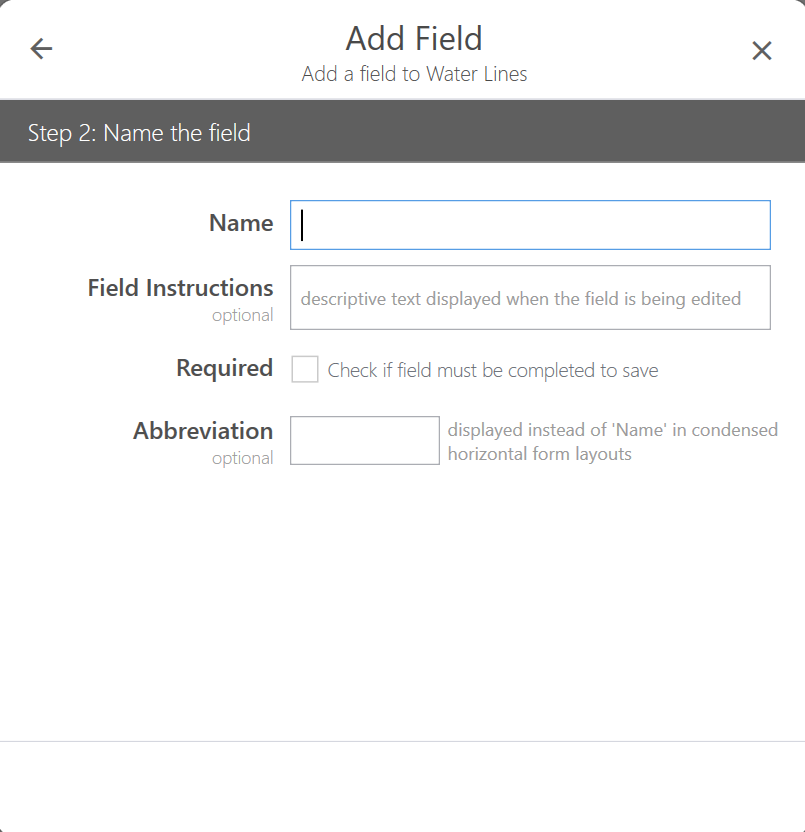
- Select Required if a user cannot leave the field blank.
- If the field requires additional information, tap . Finish configuring the field.
- Tap .
Add a Non-Spatial Record
Use a non-spatial record type, such as a Record, to create a custom data collection form that does not require a geo-line, geo-point, or geo-area. This record type is only visible from the List view.
To add a non-spatial record:
- Open the project in Map view or List view.
- Tap .
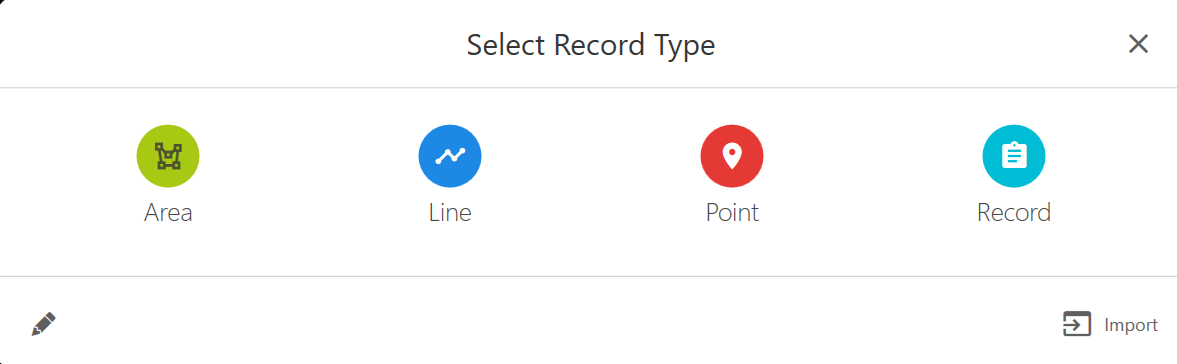
- From the Select Record Type dialog, select the non-spatial record type.
The name of the record type depends on how your project was set up. In the Basic sample project, the non-spatial record type is called Record.
- Enter the information for the record.
- Tap Save.
Edit a Record Type and Fields
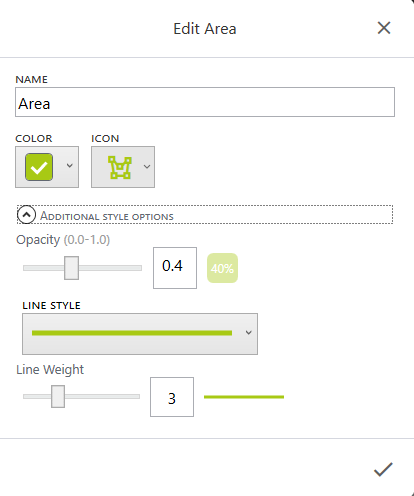
Open project editor to edit a record type and fields. To edit the name, color, icon, and applicable attributes such as line style, line weight, opacity or symbol type,
- Tap the record type you want to edit. In this example, we chose area.
- Tap .
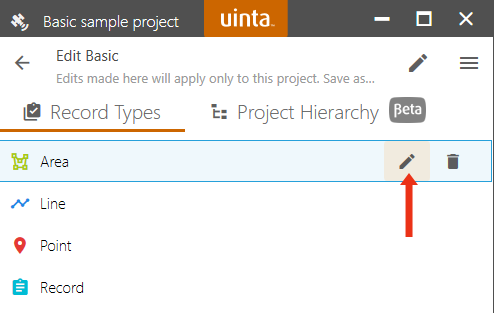
- Tap .
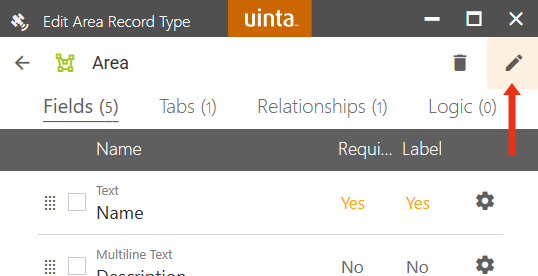
- Make changes. Tap
 to save.
Move or Delete a Record Type
To move or delete a record type:
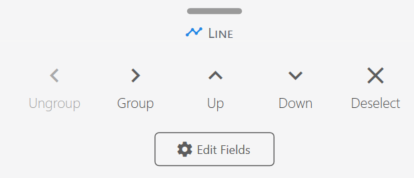
- Select the record type that you want to edit.
- Use the pop-up menu at the bottom of the screen to group/ungroup and move the selected record type.
- To delete the record type, tap
 next to the record type.
Edit a Field in a Record Type
To edit a field in a record type:
- Open the project in Map view or List view.
- Tap .
- From the Select Record Type dialog, select the non-spatial record type.
-
The name of the record type depends on how your project was set up. In the Basic sample project, the non-spatial record type is called Record.
- To edit the fields in the record type, tap .
- Tap the record type you want to edit.
For this example, we are using the Area record type and using a Windows device.
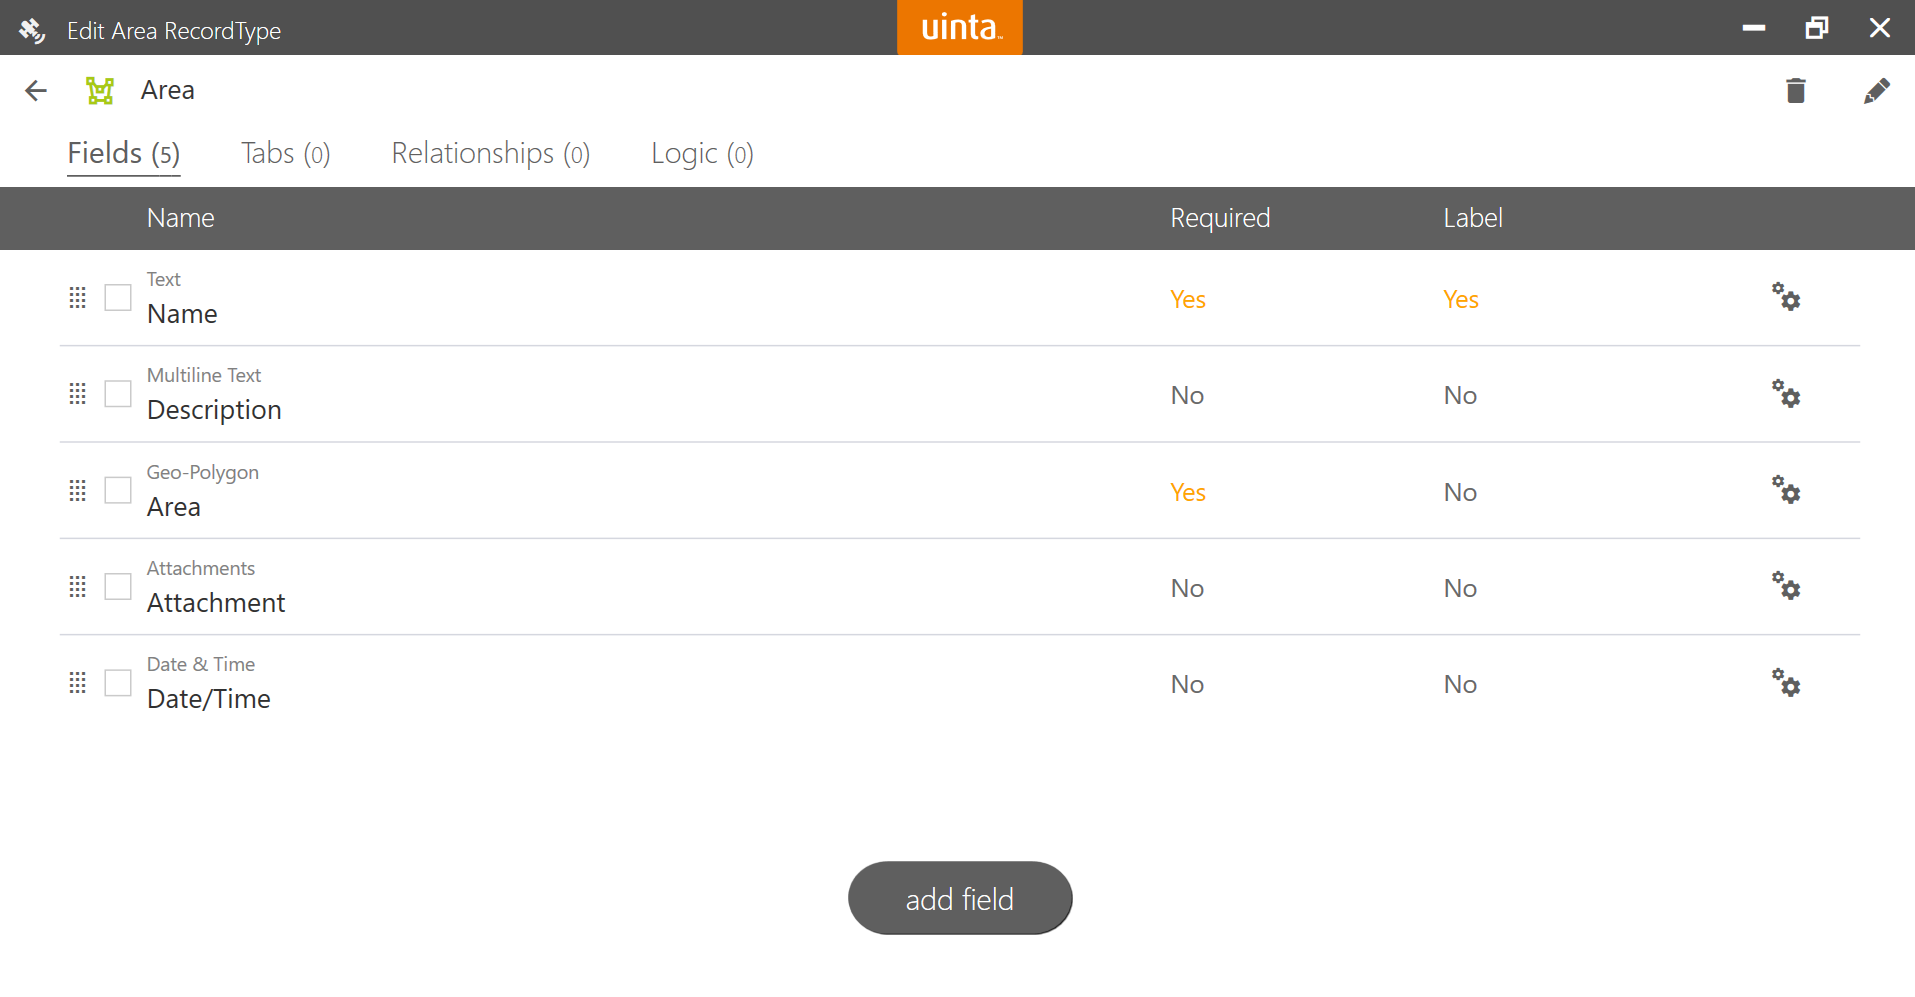
- Select the checkbox next to the field you want to edit to open the Editing pop-up menu.

- Tap Edit .
The note shows which record types share this field.
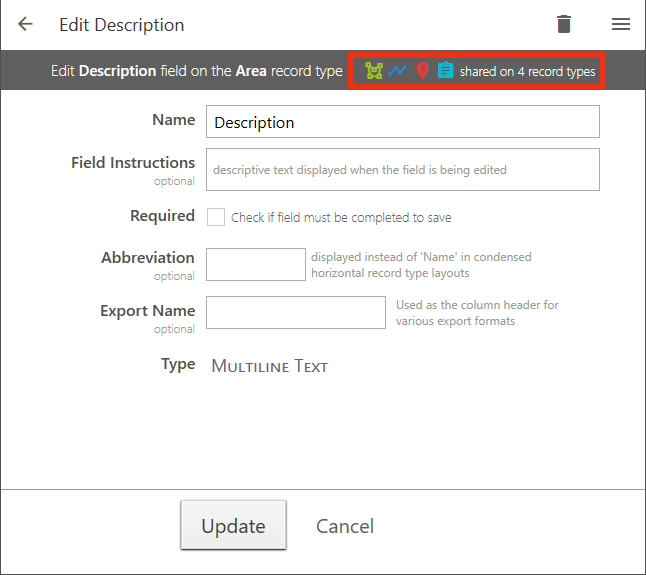
- Edit the field information.
For example, you can add field instructions, make the field required, or add the field name to the record label.
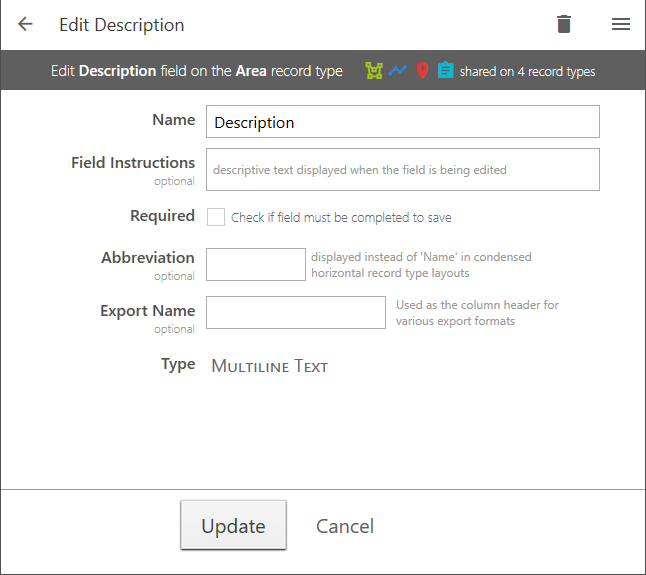
Note: To add the field name to the record when using Windows, tap  next to the name of the field you want to add to the label. Select Add to label.
- After you finish, tap Update.
- If the field is used by other record types, determine how you want to apply the changes and reply appropriately.
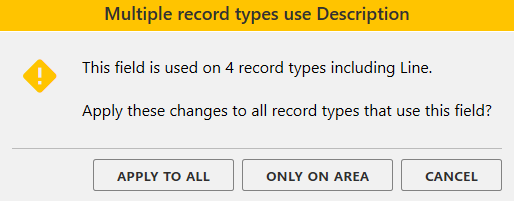
- If the field is used by other record types, determine how you want to apply the changes and reply appropriately.
- To close the editor, tap
 . If Uinta confirms that you want to save your changes, reply appropriately.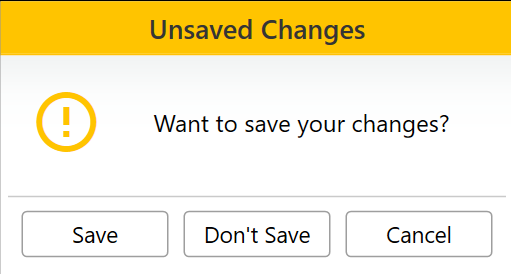
- Tap Save.
Delete a Field in a Record Type
To delete a field in a record type:
- Tap next to the record type.
- Select the checkbox next to the field you want to edit. Uinta displays the Editing pop-up menu.

- Tap Delete .
Uinta confirms that you want to delete the field.
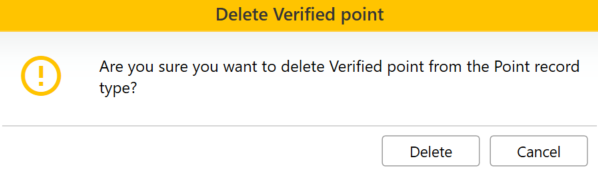
- Tap Delete.
Reorder the Fields in a Record Type
To reorder the fields in a record type:
- Tap next to the record type.
- To reorder the list of fields, select the checkbox next to the field and use the up or down buttons in the Editing pop-up menu to move the field.

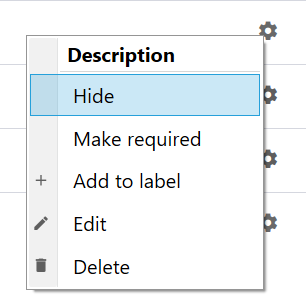
Hide Field in Data Entry Form
Note: You must use Windows to hide a field.
To hide the field in the data entry form:
- From the project editor, tap the record type that contains the field you want to hide.
- Tap .
- Select Hide.
Create a Tab
Note: The ability to create tabs is an advanced form design feature that is only available in Uinta for Windows. However, you can view and use templates and projects with tabs in Uinta for Android and iOS.
With tabs, you can group and organize data within a data entry form.
To create a tab:
- Open the project editor.
- Select the record type that you want to edit and tap next to the record type.
Uinta displays the fields in the record. - Select Tabs at the top of the screen.
- Tap Add tab.
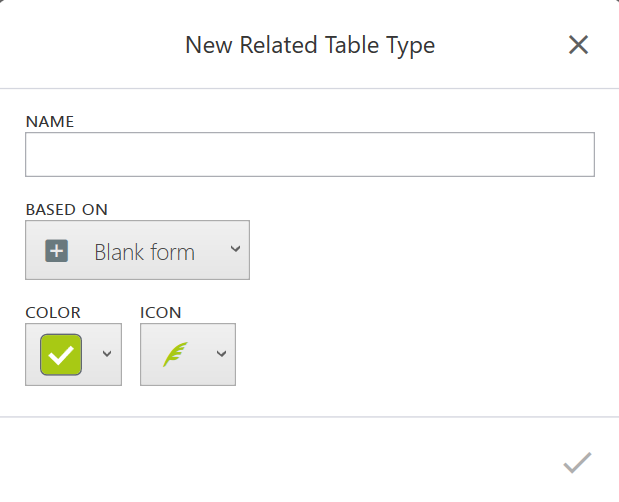
- Select one of the following options.
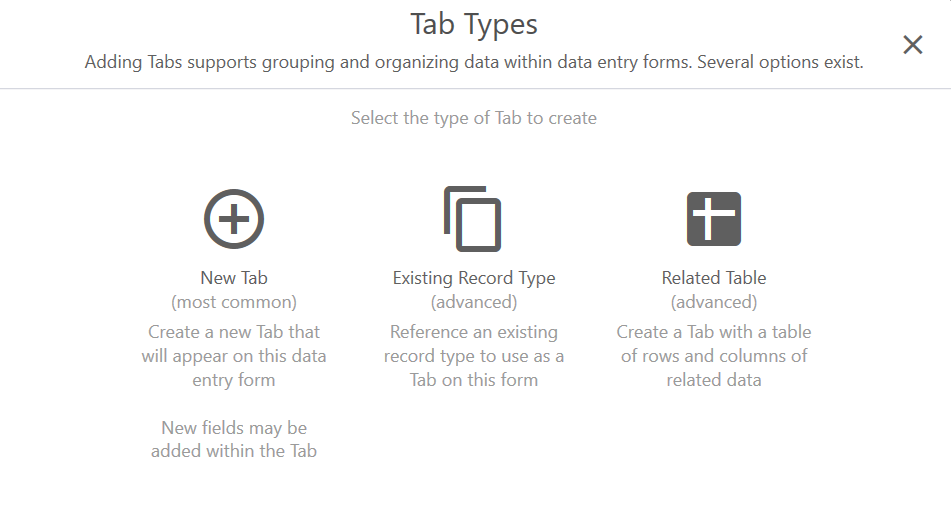
| Tab Options | |
| To | Steps |
| Add a tab to a record |
|
| Add an existing record type as a tab in this record |
|
| Add a table with reference data |
|
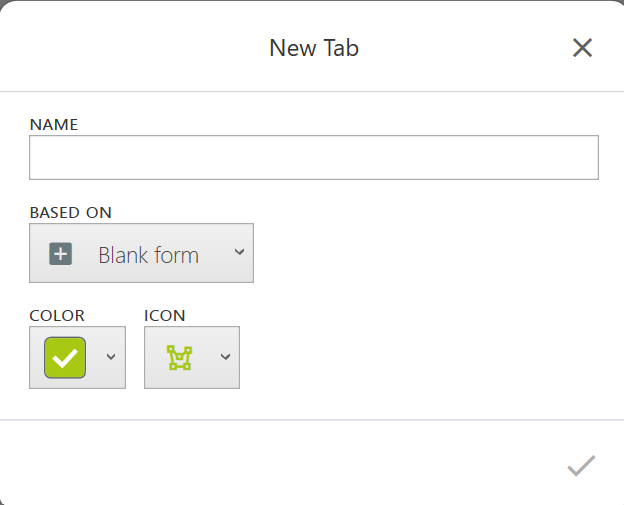
- To add fields to the tab, select the tab and tap Add field.
If you want to further customize the tab,
- Open the project editor. Uinta displays the fields in the record type.
- Select the record type that you want to edit and tap next to the record type.
- Tap Tabs.
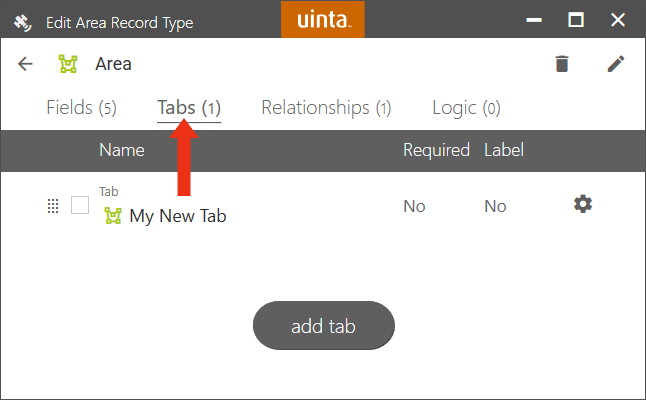
- Tap the tab you want to edit.
- Follow the directions in Add Fields to a Record Type.
- Tap to modify the tab name, symbol, color, or icon.
Once the tab is created, it can be customized from any operating system.
Create Conditional Logic in a Form
Note: Creating conditional logic is an advanced form design feature available in Uinta for Windows. However, any conditional logic added to templates and projects in Uinta for Windows will work in Uinta for Android and Apple iOS.
Conditional logic uses an "if, then" correlation to customize the fields that appear when you add a record. The information entered in one field can determine whether additional related fields appear on the screen.
To apply conditional logic to the fields in a project record:
- Open the project editor. Uinta displays the fields in the record type.
- Select the record type that you want to edit and tap next to the record type.
- Tap the Logic tab.
- Tap Add logic.
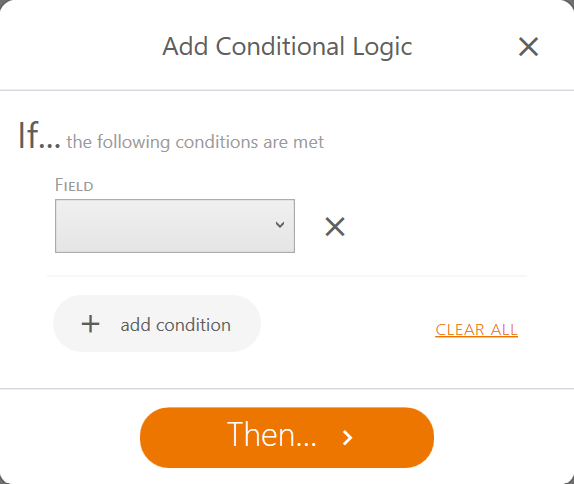
- In Field, select the field on which to base the conditional logic (the "if" clause).
- In Values, enter the value that triggers the conditional logic.
In the following example, the selected field is Needs repair? and the value is set to Yes.
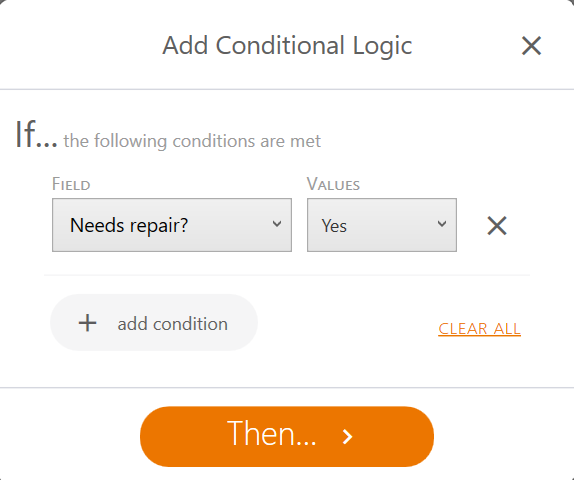
To add an additional field to the "if" clause, tap Add condition.
- Tap Then.
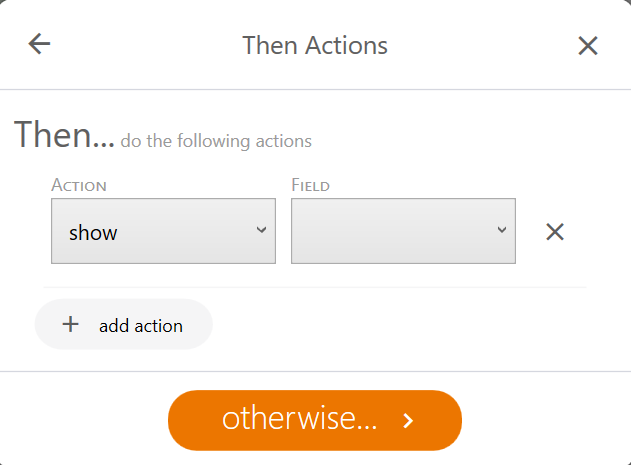
- In Action, select the desired action that occurs if the "If" clause is met.
- In Field, select the field that is affected by the action.
In the following example, the field Repair Notes displays when the field Needs repair? is set to Yes.
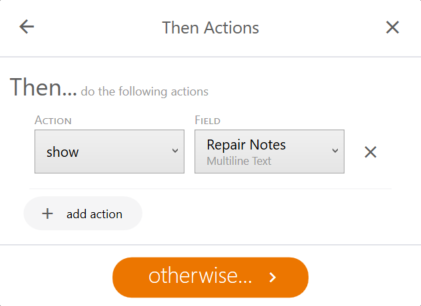
To add an additional action, tap Add action.
- Tap Otherwise.
- In Action, select the action that you want to occur if the "if" clause is not met.
- In Field, select the field affected by the action you entered.
In the following example, Uinta hides the field Repair Notes when the field Needs repair? is set to No.
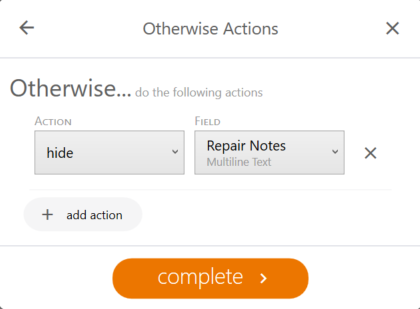
- Tap Complete.
- Review the conditional logic, and tap Save.
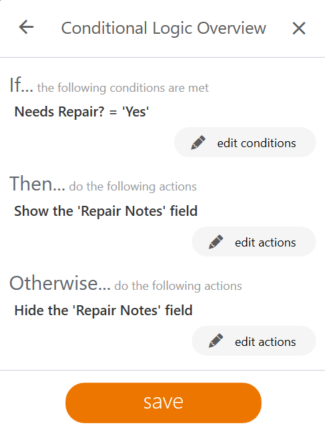
The Logic tab displays all conditional logic applied to the record type.
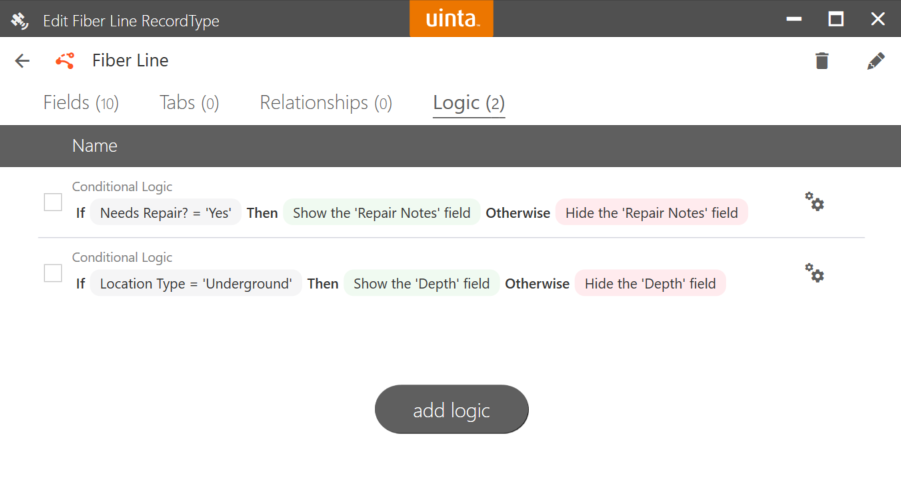
Group Record Types
For projects with many record types, you can group the record types into categories to organize the project and simplify the data collection process. In the following example, the record types are organized into four groups and each group has a subset of record types. The number shows the number of record types in that group. Tap the group to view the record types.
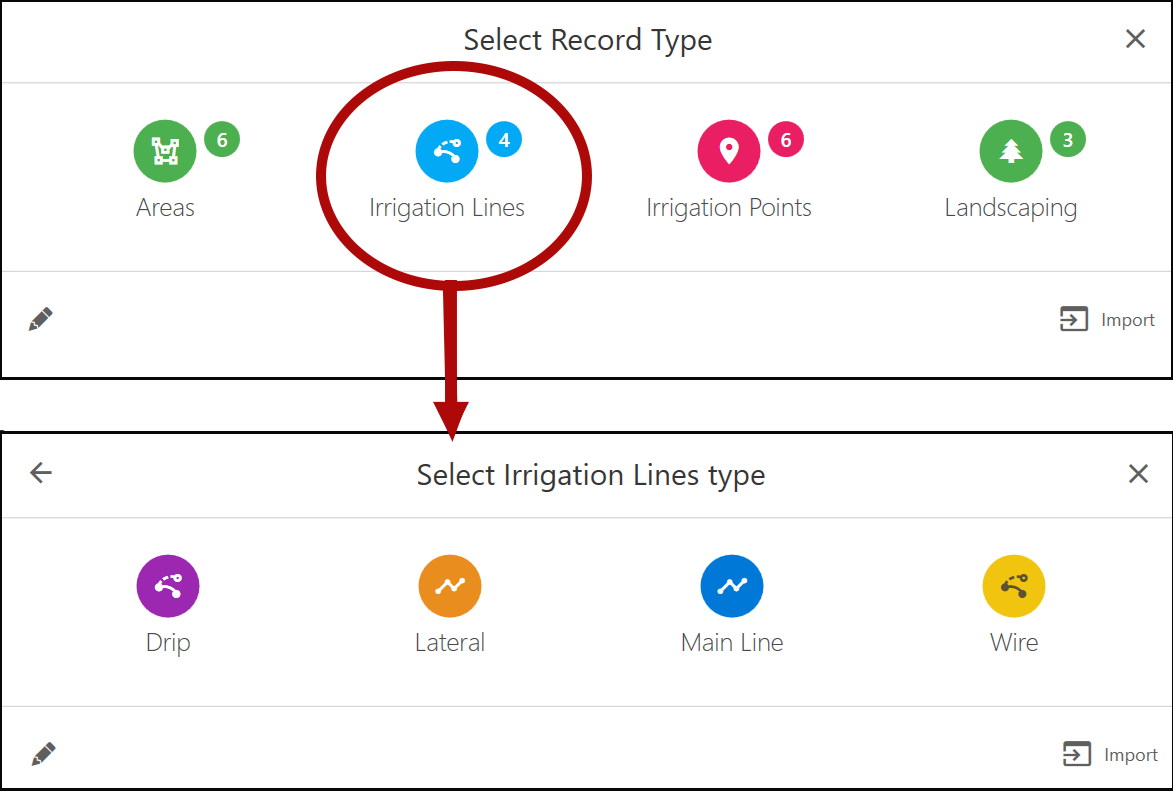
To group record types:
- Open the project editor.
- With no record types selected, tap .
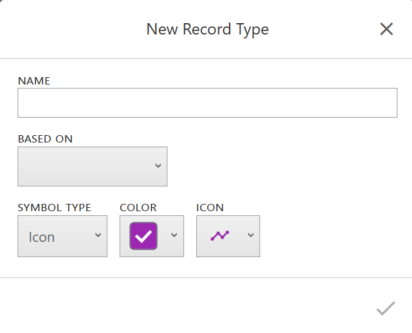
- Enter the group name.
- In Based on, select to create a record type without any fields.
- Select the symbol type, color, and icon.
- Tap .
Add a Record Type to the Group
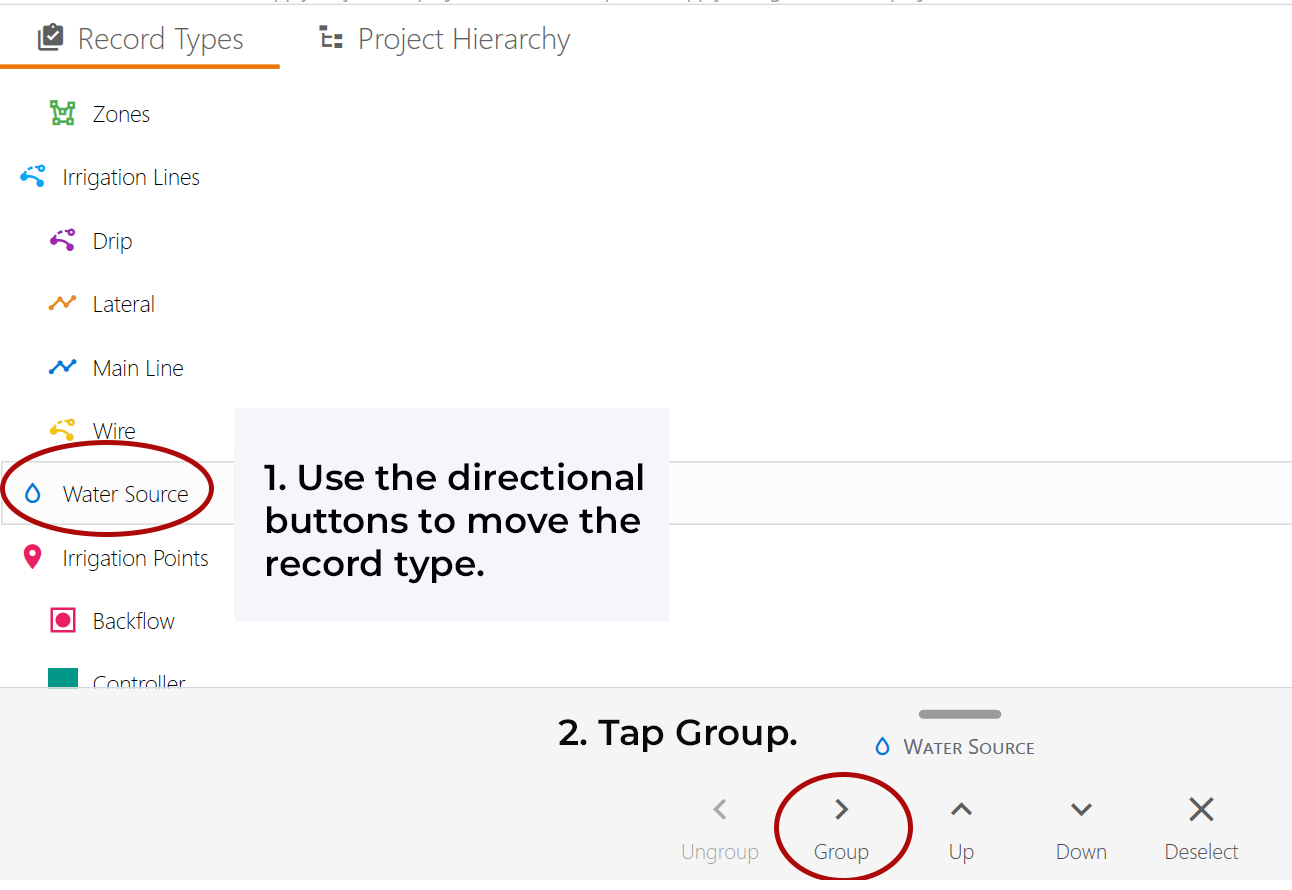
- Select the record type that you want to group.
- Use directional buttons in the pop-up menu to move the record type below the group name.
- Tap Group.
Add Project Hierarchy
Use project hierarchy to define a user's work flow and create levels of data within a project. This allows you to create sub-projects within a project database. You can add project hierarchy to a project or a template.
Note: Setting up project hierarchy is optional and an advanced topic. For additional information, contact uintasoftware@junipersys.com.
To create a project hierarchy in a template or project:
- Open the template, or open the project editor for the project.
- Select the Project Hierarchy tab.
- Tap .
- Select a record type that you want to be first in the user's work flow.
- Continue to build the work flow.
- Tap to close the project editor.