Harvest
You must create or import a map before you can harvest.
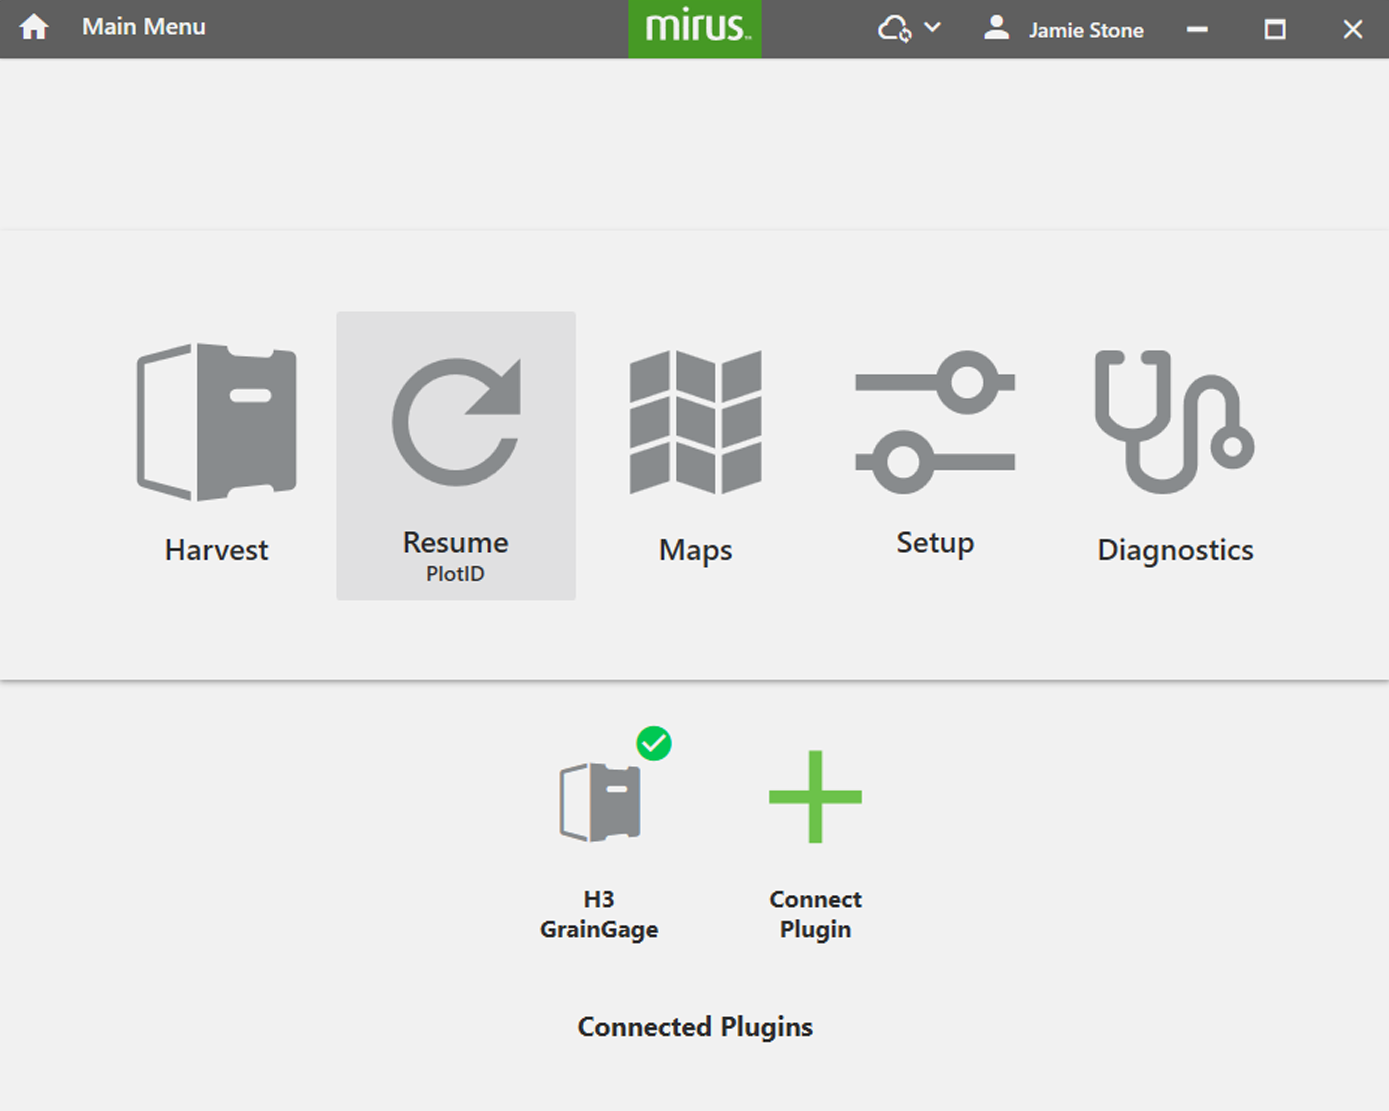
From the Mirus Home screen:
- Tap Harvest.
If the Harvest icon is not visible, see Enable the H3 GrainGage Plugin for instructions on loading the H3 GrainGage plugin.
Harvest can also be entered from Maps or Resume.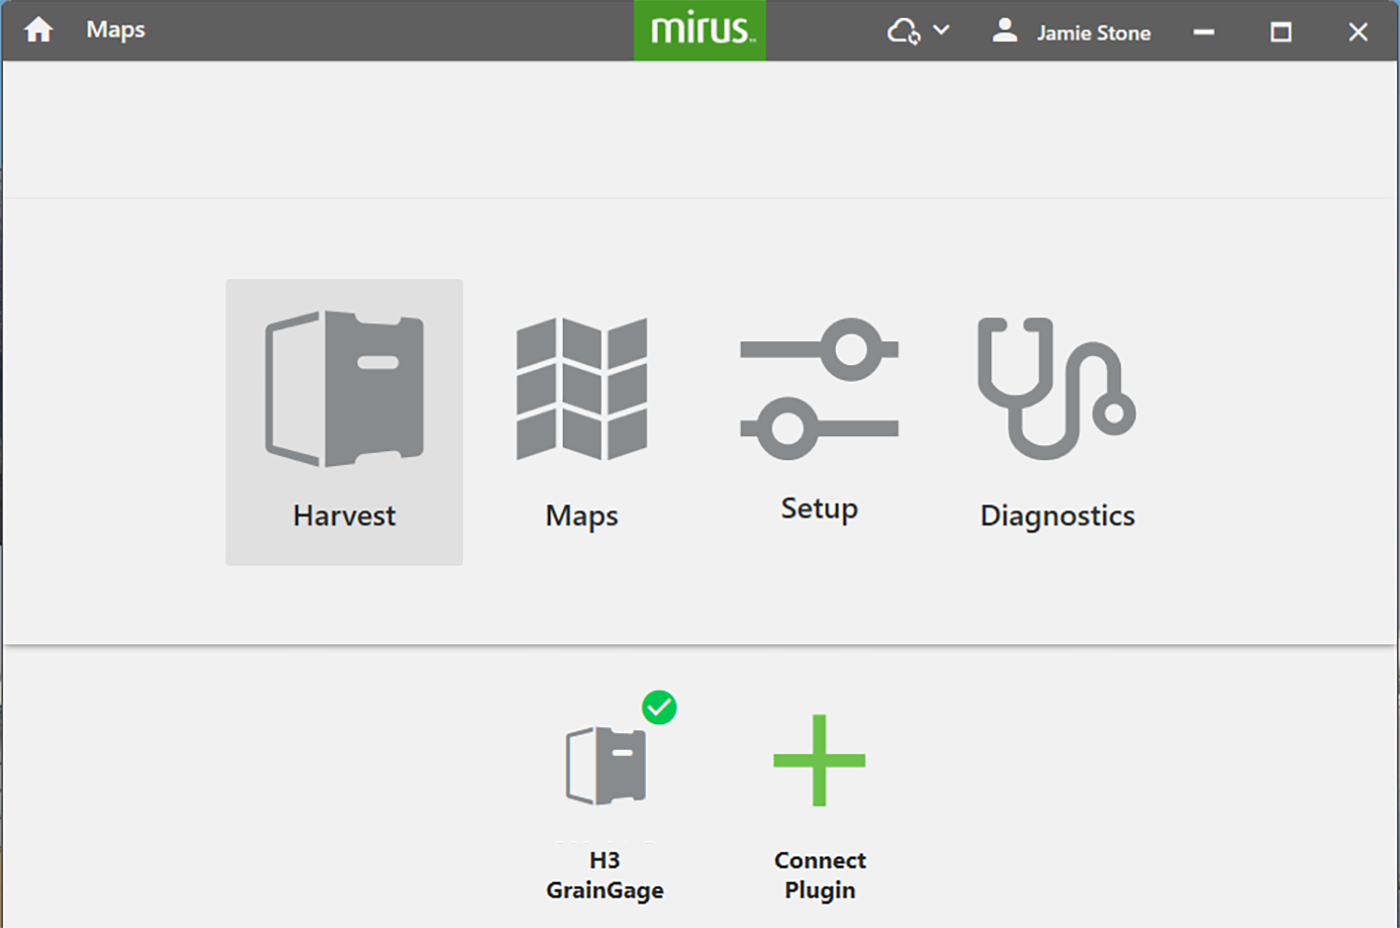
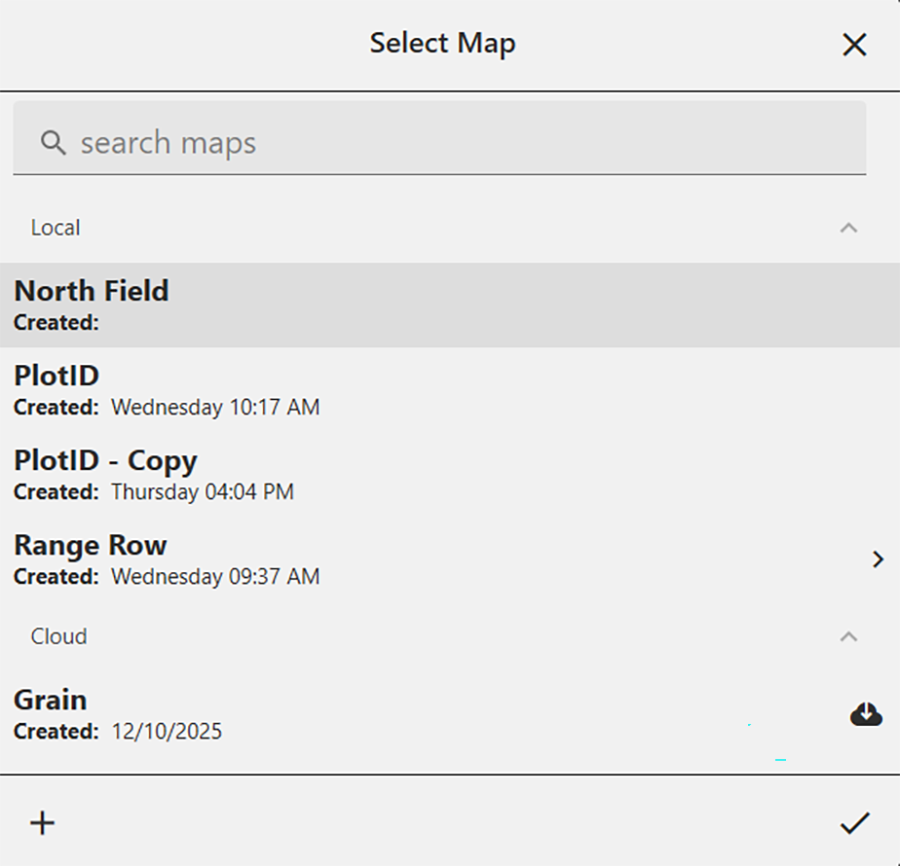
- Select a map.
To create a new map, tap .
.
For more information about creating or importing a map, see Create a Range Row Field Map, Create a Standard Plot ID Map or Import a Map.
- Tap
 .
.
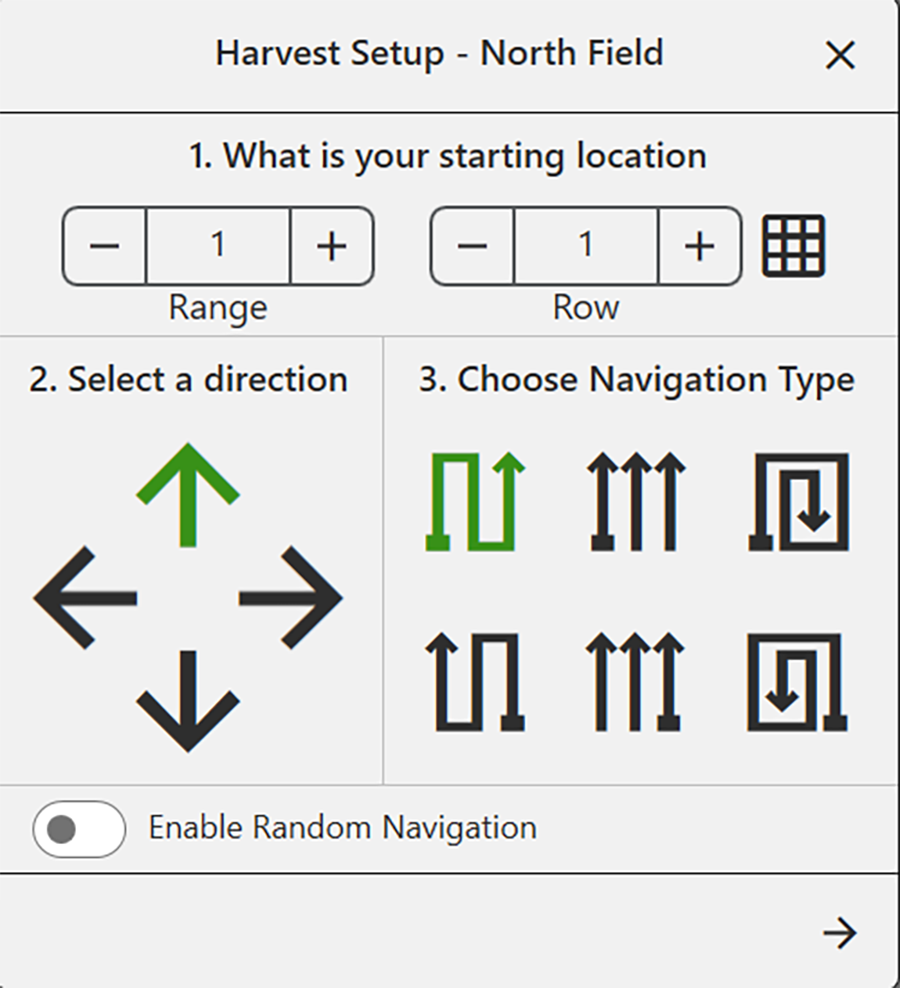
- Enter the starting location.
Use the matrix to choose the starting location.
- Select the direction of harvest.
- Choose a navigation type.
If you check Enable Random Navigation, you will be able to change your location on the main Harvest screen just by tapping on the desired plot. This is mostly used for note taking.
- Tap
 .
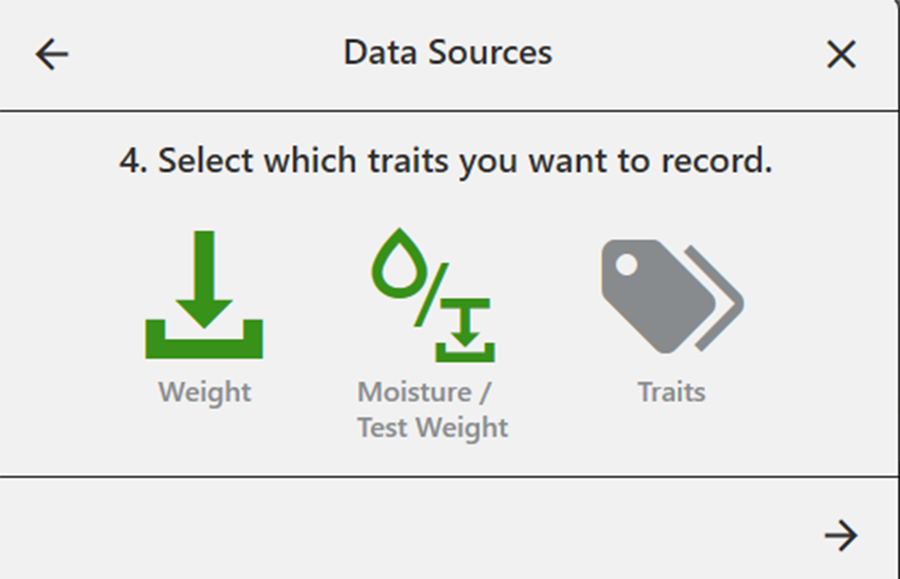
. - Select which attributes you plan to record.
Both moisture and test weight must be enabled even if only one trait is desired. The undesired trait can be modified post-process.
- Tap .
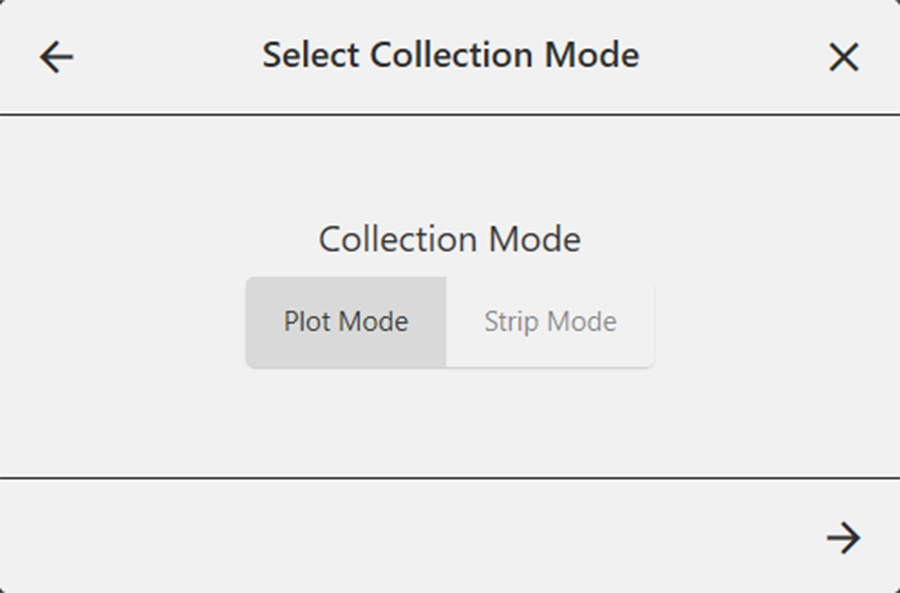
- Select your desired collection mode.
- Plot Mode. Select when the harvested grain from a plot will fit in one hopper (1 plot = 1 hopper). Two parallel plots are cut simultaneously and deposited into individual hoppers. The grain in each hopper is then weighed and measured in succession.
- Strip Mode. Select when the harvested grain in each plot will be too large to fit in one hopper. As you are harvesting, the level detect sensors in each hopper signal when the hopper nears capacity and signals the GrainGage to start a cycle.
- Tap .
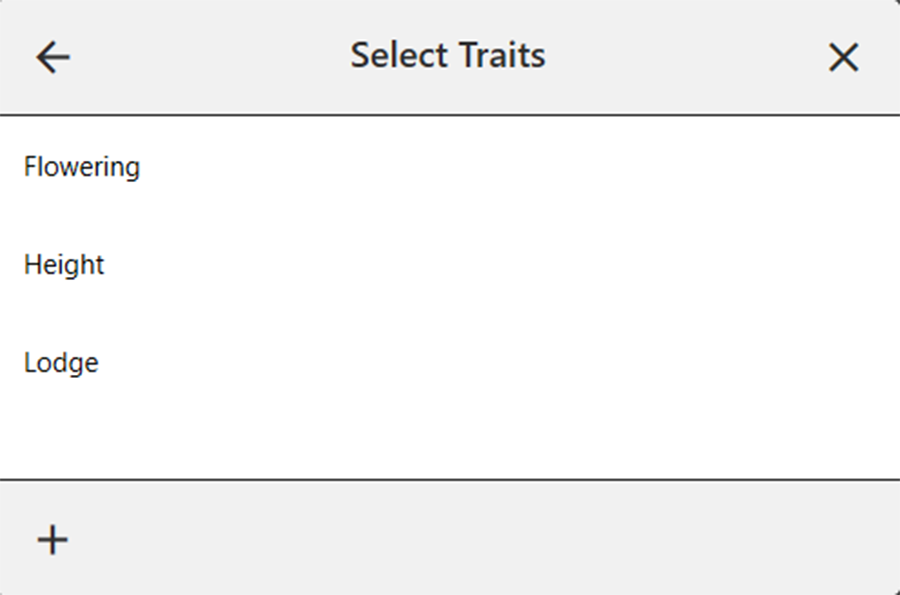
- If you select Traits, the Select Traits dialog box will appear. You can choose a previously configured trait or create a new one. For more information about configuring Traits from the Setup screen, see Create Traits. Tap .
- Select a moisture curve.
Tap.
You will only be able to see the SCiO calibration file if you are connected to an H3 GrainGage with a SCiO sensor installed.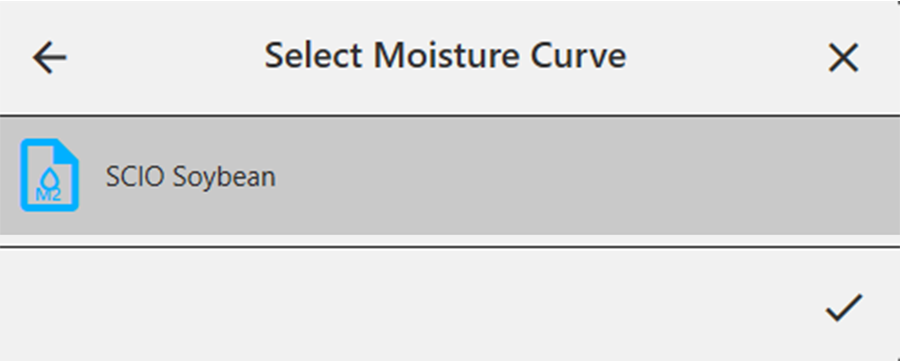
Mirus opens the Harvest screen and is ready to be configured or to collect data. The Harvest screen will open to the quad view the first time you enter Harvest. Thereafter, it will open in whatever view (quad, graph, list, spatial) that you were viewing when you last closed Harvest. If you have connected with a SCiO sensor, the SCiO data will display here too.
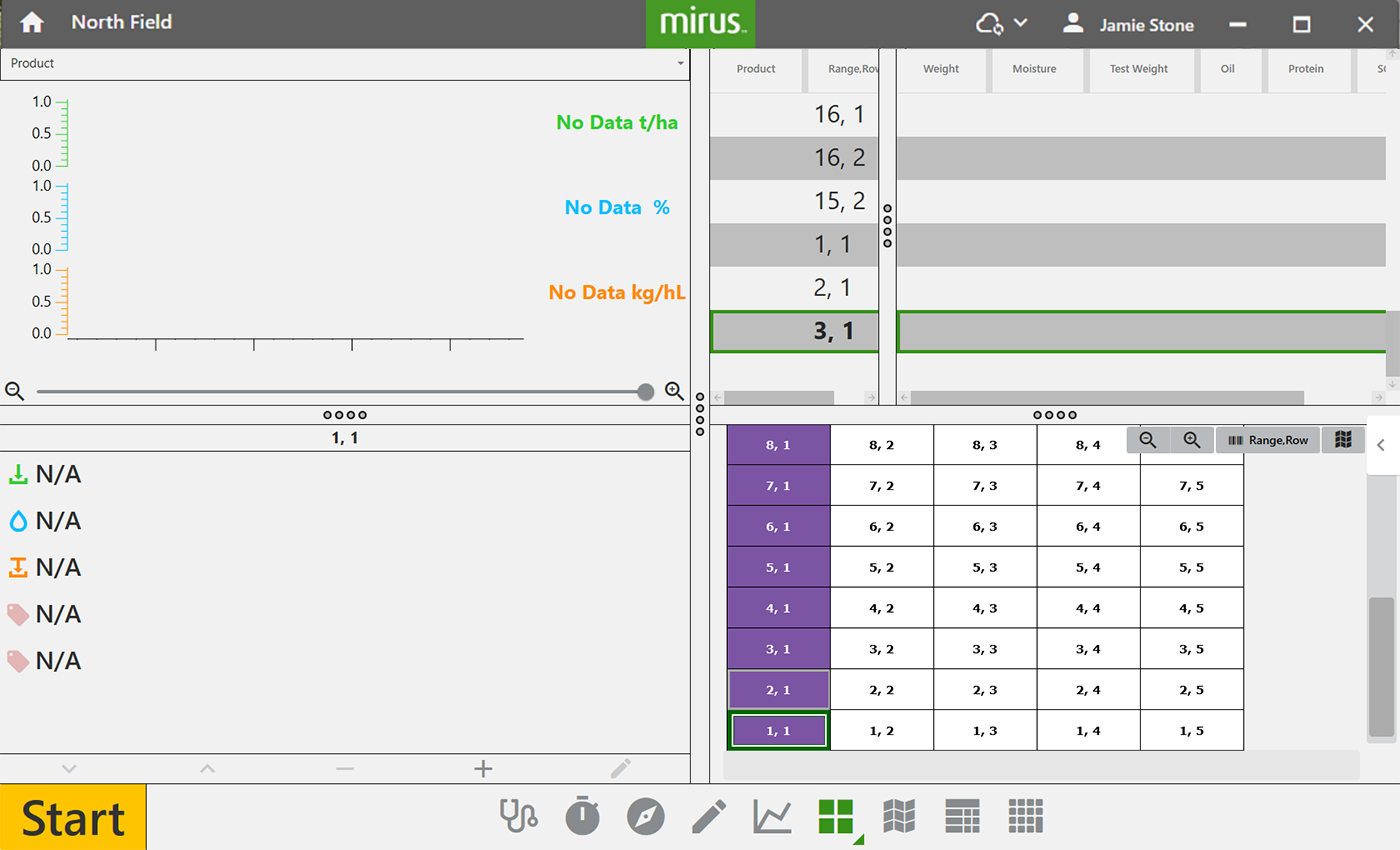
Throughout the Harvest screens, you will see the following color-coding:
- Green for weight
- Blue for moisture
- Orange for test weight
Configure Harvest Screen Options
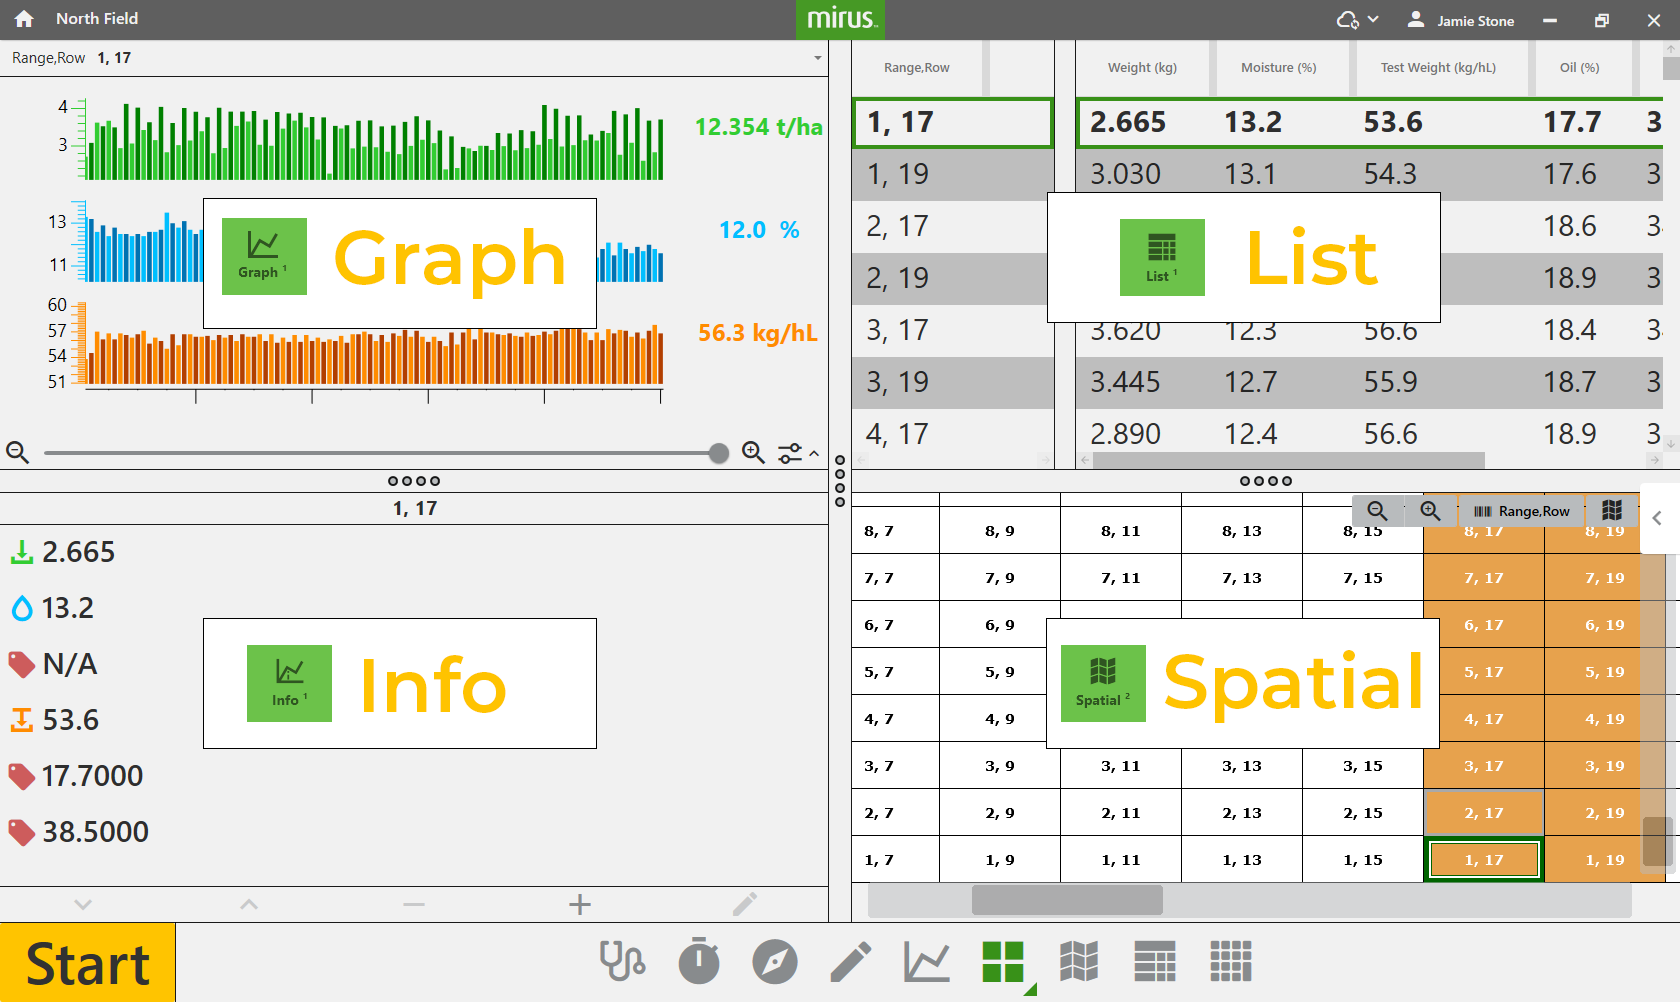
The Harvest screen provides several options for configuring how data is collected and presented during harvest. The default view of the Harvest screen shows four evenly-spaced sections that display the data for graph, list, info, and spatial views. (Descriptions and additional options are described below.)
|
Harvest Screen Options |
||
|---|---|---|
| Icon | Option | Description |
|
|
Start Cycle Countdown Go |
The button changes as you proceed through your field. Press and hold (or right-click) Start to configure the cycle settings or use Tap Start when you are ready to begin harvesting the field. If you are using the countdown timer, the set time will count backward, indicating the delay before the GrainGage cycles the grain. (See Configure Cycle Settings.) If you are not using a count down, tap Cycle Go indicates it’s time to move to the next plot. More details can be found in List View. |
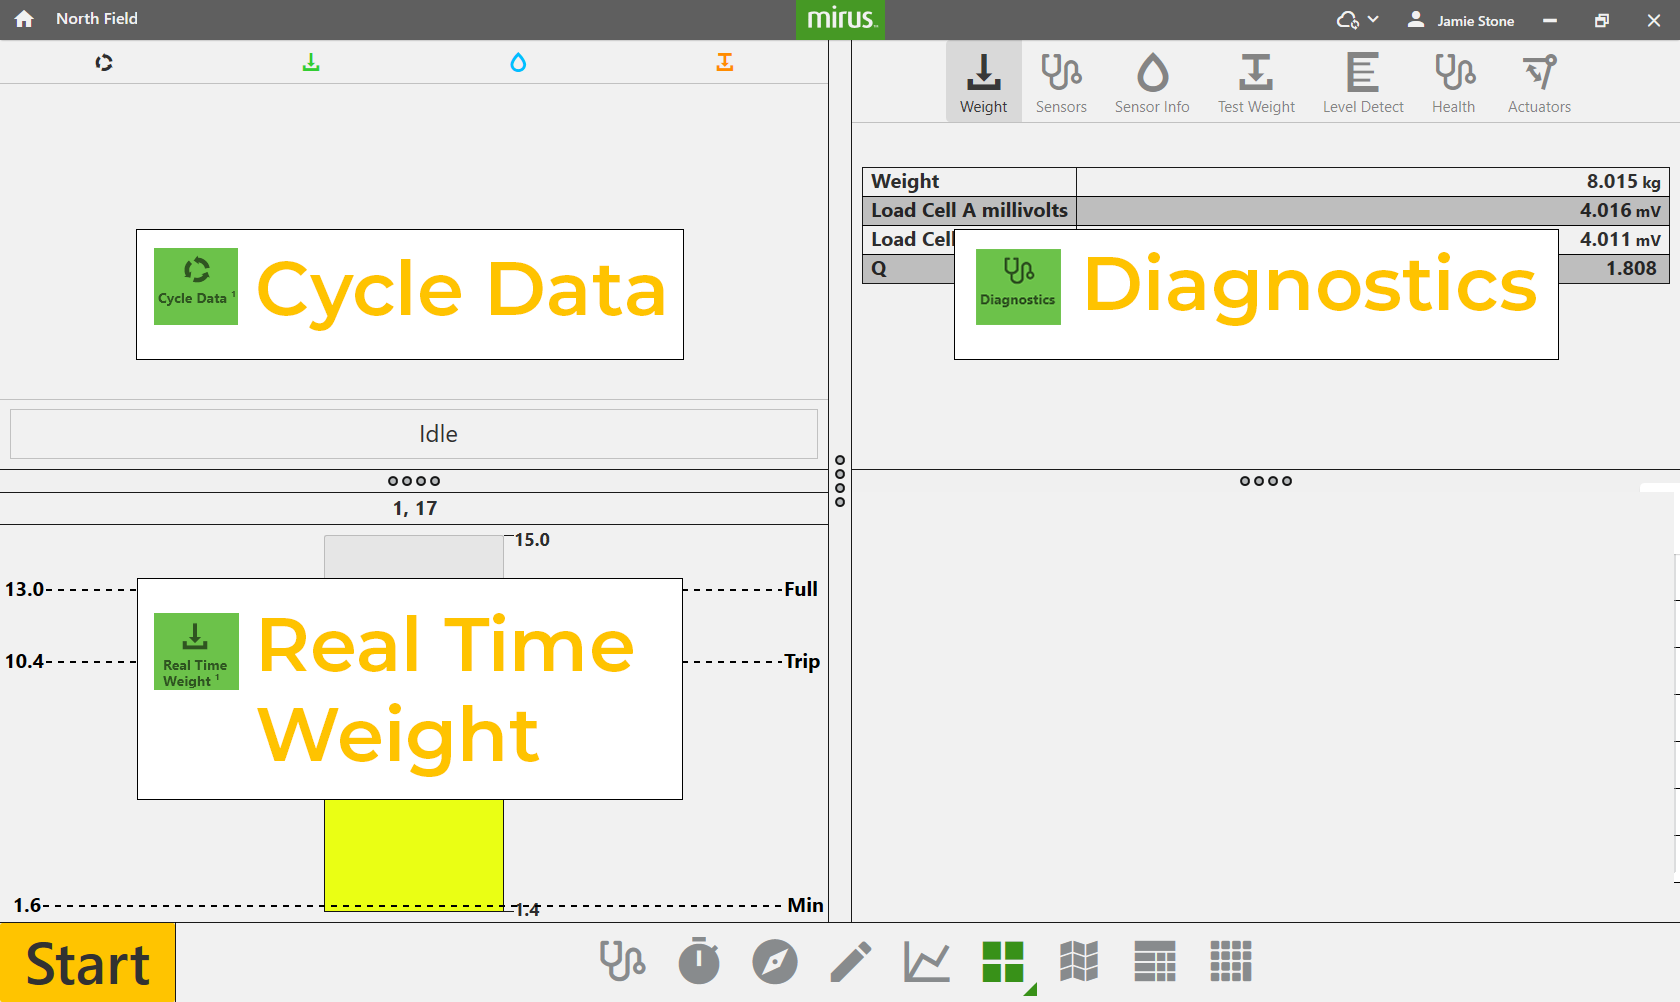
| Diagnostics | Opens the Diagnostics dialog box for monitoring during harvest. | |
| Cycle Settings | Allows the operator to change the Mode, Button Type, Position, and Countdown time for the Start/Cycle/Countdown/Go button. Also accessible by pressing and holding the Start button. | |
| Navigation | Opens the Change Location dialog box and allows the operator to make changes to location, direction, and navigation type. | |
| Observations | Opens a dialog box in which the operator can record notes for each plot during harvest. This is also where you can add information about any traits you configured. | |
| Graph View | Displays accumulating data as a graph. | |
| Quad View | The default view. Divides the display into four smaller windows. The operator can adjust the size of each window and customize them each to display data in Cycle Data, Diagnostics, Graph, Info, List, Spatial, or Real Time Weight view. This screen should be used during your harvest. |
|
| Spatial View | Opens the Spatial Display, also referred to as a heat map. This display can be configured to show attribute data plot by plot. | |
| List View | Displays accumulating data as a list. | |
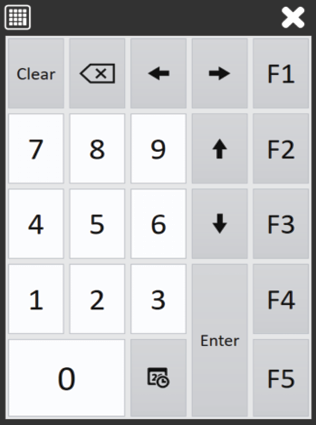
| Ten Key | Opens numeric keypad for fast entry of trait and note data. | |
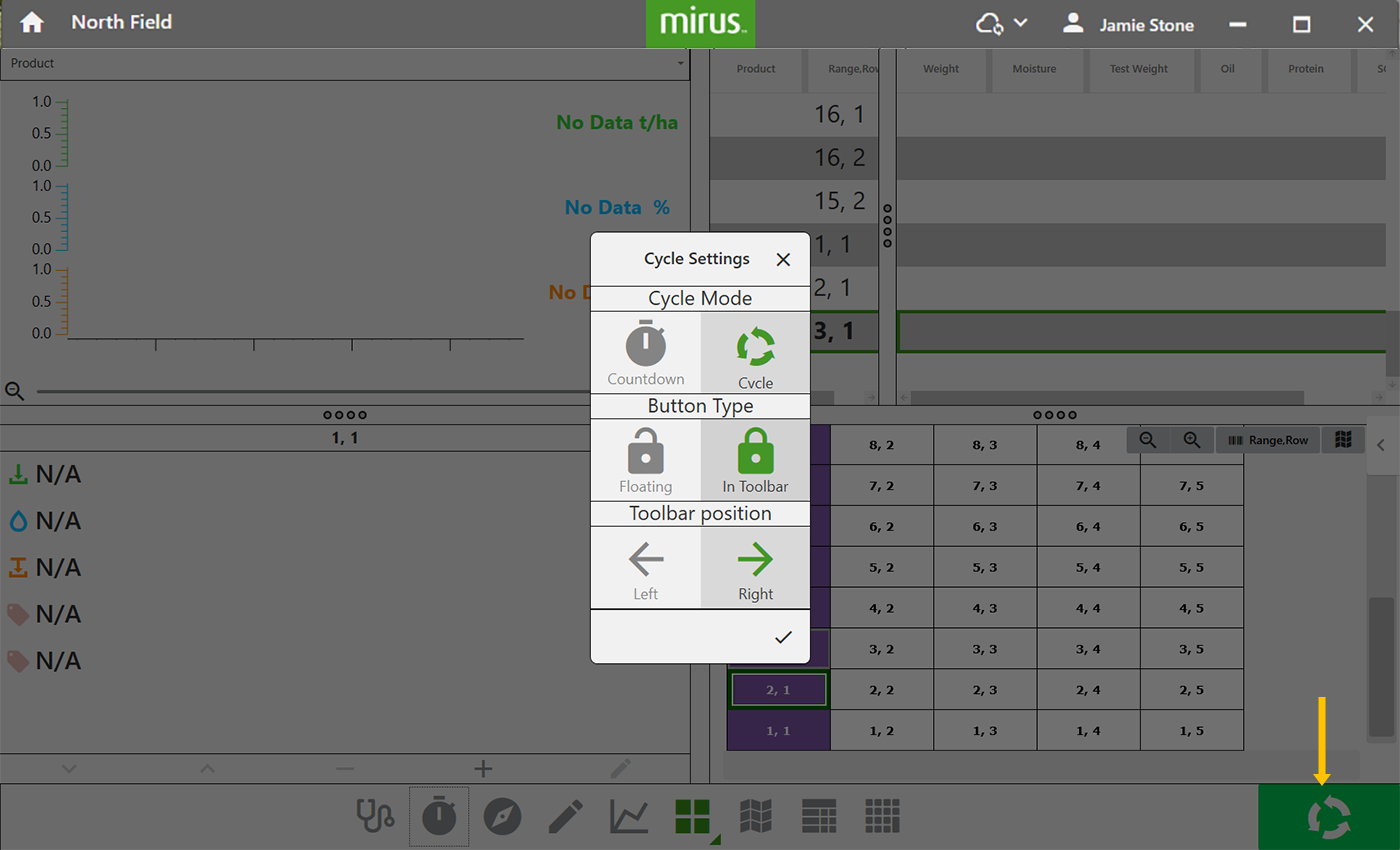
Configure Cycle Settings
The cycle settings determine the settings of the Start/Cycle/Countdown/Go button. These settings can change the Countdown Mode, Button Type, and Toolbar Position.
The Cycle button can be configured from the Start button (press & hold), ![]() , or Setup > Preferences > Harvest Cycle Button.
, or Setup > Preferences > Harvest Cycle Button.
|
Cycle Settings |
||
|---|---|---|
| Icon | Option | Description |
| Countdown |
The countdown timer sets a wait time at the start of each cycle to ensure that all of the grain from the current plot reaches the GrainGage before cycling. If you select Countdown, you can also set the length of the countdown to match the time that it takes with your equipment. |
|
| Cycle |
Manually indicate (tap Start button, press enter, press trigger) that the sample has filled the weigh bucket.
|
|
| Floating |
Put the Start/Cycle/Countdown/Go button in a separate dialog box that can be moved to any location on the screen. If you select Floating, you can also choose small, medium, or large as the size for the floating button. |
|
| In Toolbar |
The Start/Cycle/Countdown/Go button appears in the bottom corner of the Mirus window. If you select In Toolbar, you choose left or right as the position of the Start/Cycle/Countdown/Go button.
|
|
To configure the cycle settings:
- Tap
 in the toolbar.
 - Select your desired options.
- Tap .
If you select the positioning of the button in toolbar on the right, it will appear as noted below.
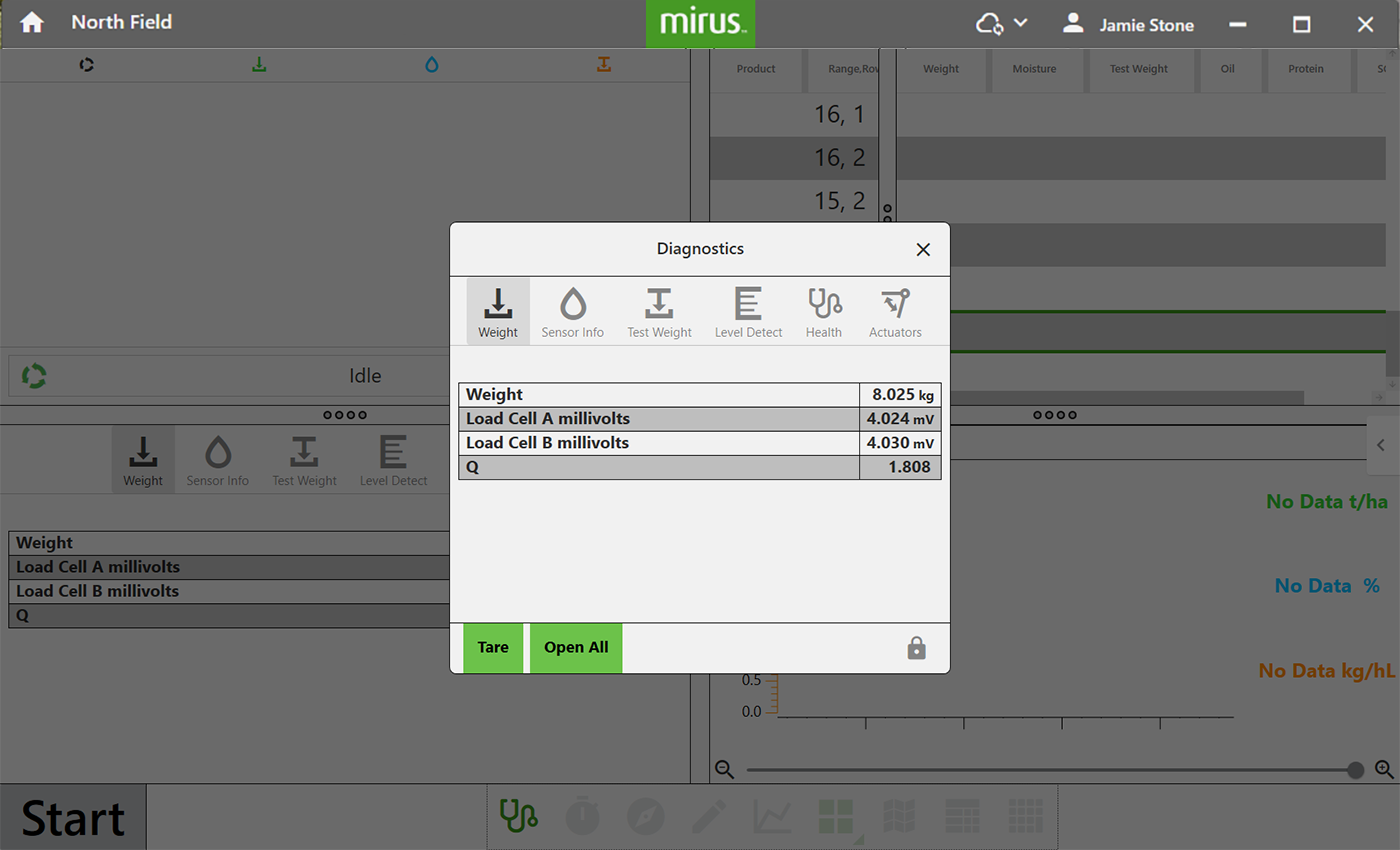
Diagnostics
To open the Diagnostics box:
- Tap
 .
.
The Diagnostics screen can also be displayed as one of the panels in the Quad view. - Select the tab for the diagnostic function you want to see.
If you open the Actuator tab, you can see the status of the gates and actuators while they cycle during the harvest.
The Diagnostics screen will not open while the GrainGage is cycling.
Navigation
To change your location, direction, or navigation type:
- Tap
 to open the Change Location dialog box.
 - Select the location on the map where you wish to resume data collection in one of two ways:
- Tap the plot in the map.
- Enter the range and row in the fields at the top of the dialog box.
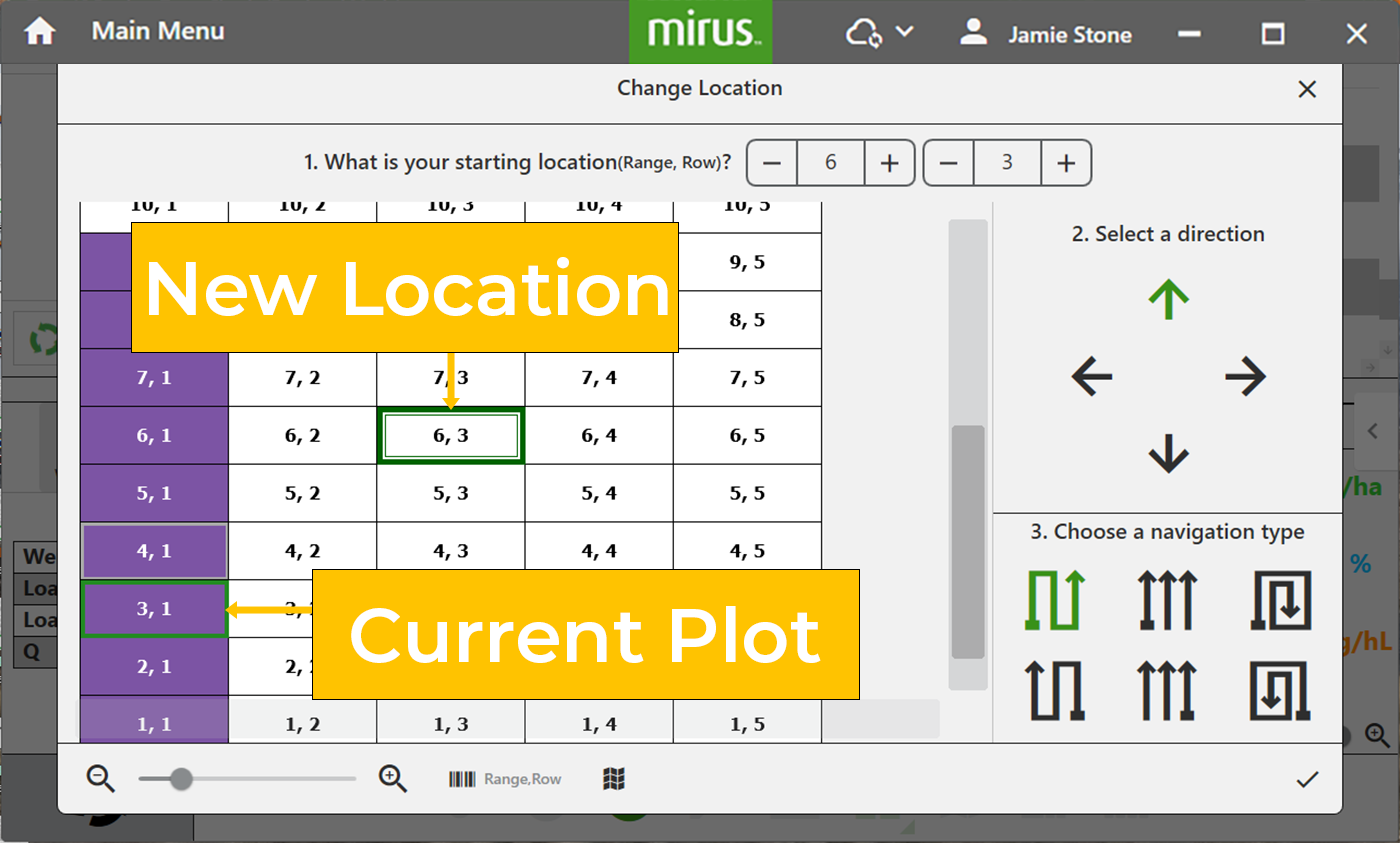
- Select an arrow to change direction.
- Select a navigation pattern by tapping one of the options.
- Tap .
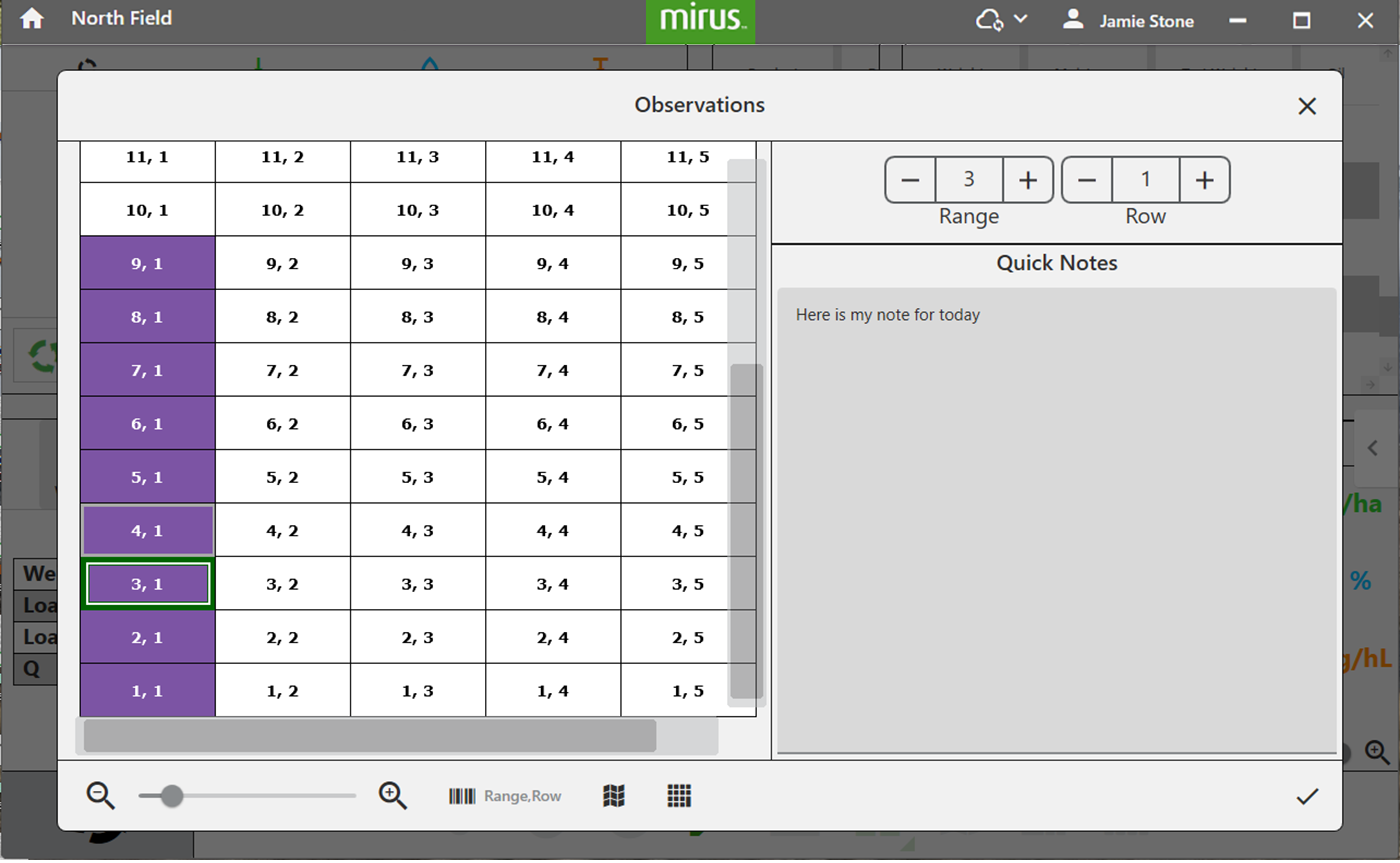
Observations
To open the Observations box:
- Tap
 .
.
- Tap in the dark gray Quick Notes to enter a quick note.
- Tap another plot in the spatial display to change locations.
- Use the
 or
or  to change the range, row location.
- Tap .
The Observations box shows the plot position and a Quick Notes text box to record observations by plot. You can also see attribute data, the color legend, and launch the ten-key box. Mirus stores the quick notes with the harvest data.
|
Observations |
||
|---|---|---|
| Icon | Option | Description |
| Zoom out | Enlarge the size of the plots shown. | |
| Zoom in | Decrease the size of the plots shown. | |
| Attributes | See different attribute data on the map. | |
| Legend | Defines what the colors on the map mean. | |
| Ten Key | Open the ten key box. | |
To use the ten key floating dialog box to enter quick notes:
- Tap
 .
. - Tap the dark gray field.
- Tap the numbers/values on the ten-key that you want to enter.
- Tap to save your note and close the Observation screen and the ten key box.
Quad View
Mirus provides the option of viewing four screens at once when Quad view is selected. (Quad view is the default view.) Each pane can be configured to display the data differently. The options are described in the following table.
|
Quad View |
|
|---|---|
| Panes | Description |
|
Displays the plot, weight, moisture, test weight, and trait data for each cycle. |
|
|
Displays the Diagnostics dialog box for monitoring during harvest. Also available as a full screen view from the Harvest toolbar. |
|
|
Shows the plot progression of weight, moisture, and test weight in a graph. Also available as a full screen view from the Harvest toolbar. |
|
|
Displays the weight, moisture, and test weight of the most recent plot. |
|
|
Displays accumulating data as a list. (Also available in the Harvest toolbar.) |
|
|
Displays attribute data with colors plot by plot. It is also referred to as a heat map. The colors are listed below:
Also available as a full screen view from the Harvest toolbar. |
|
|
Displays the real time weight of the weigh bucket. Also available as a full screen view from the Harvest toolbar. |
|
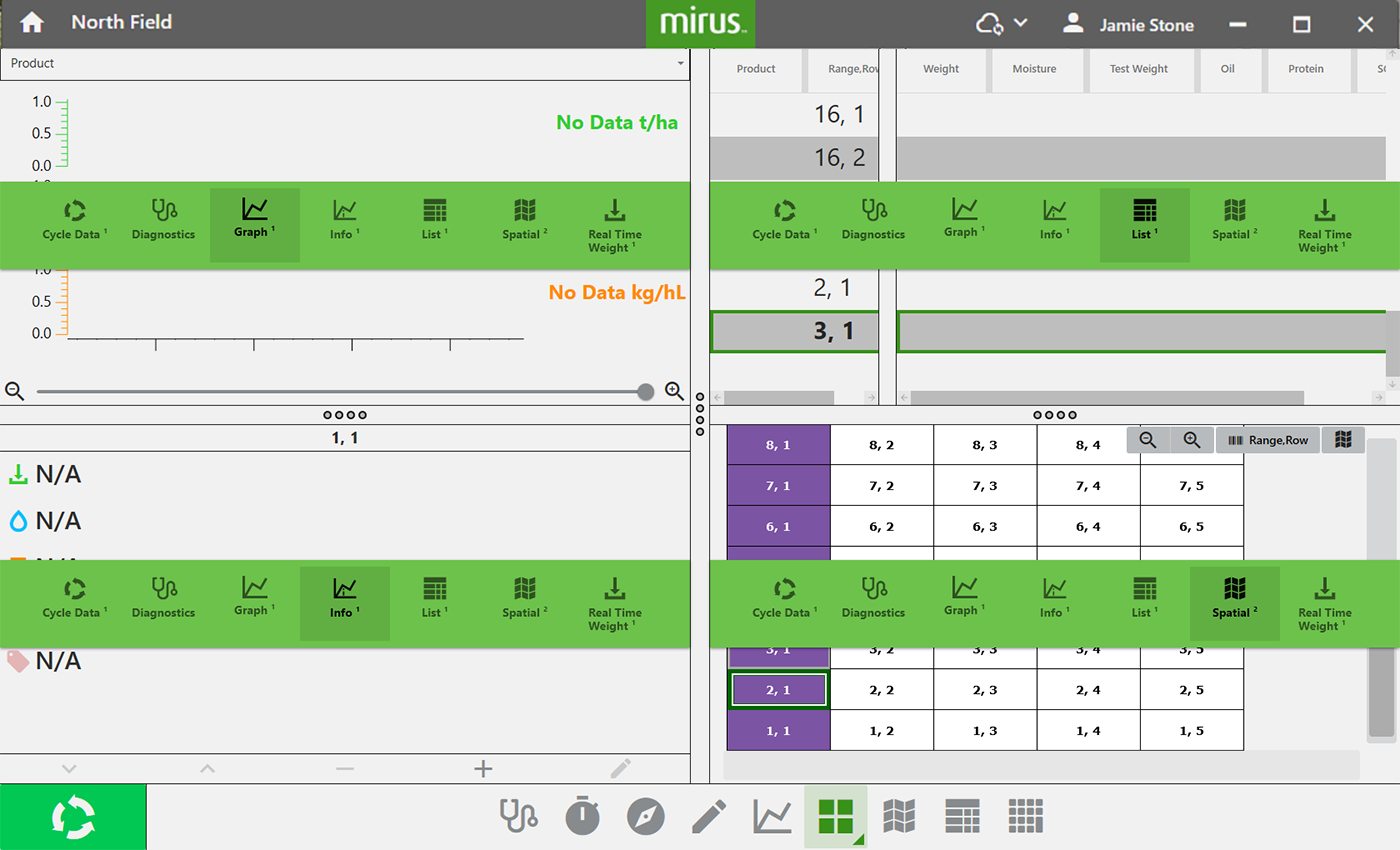
To configure the Quad view:
- Tap
 from the quad view of the Harvest screen.
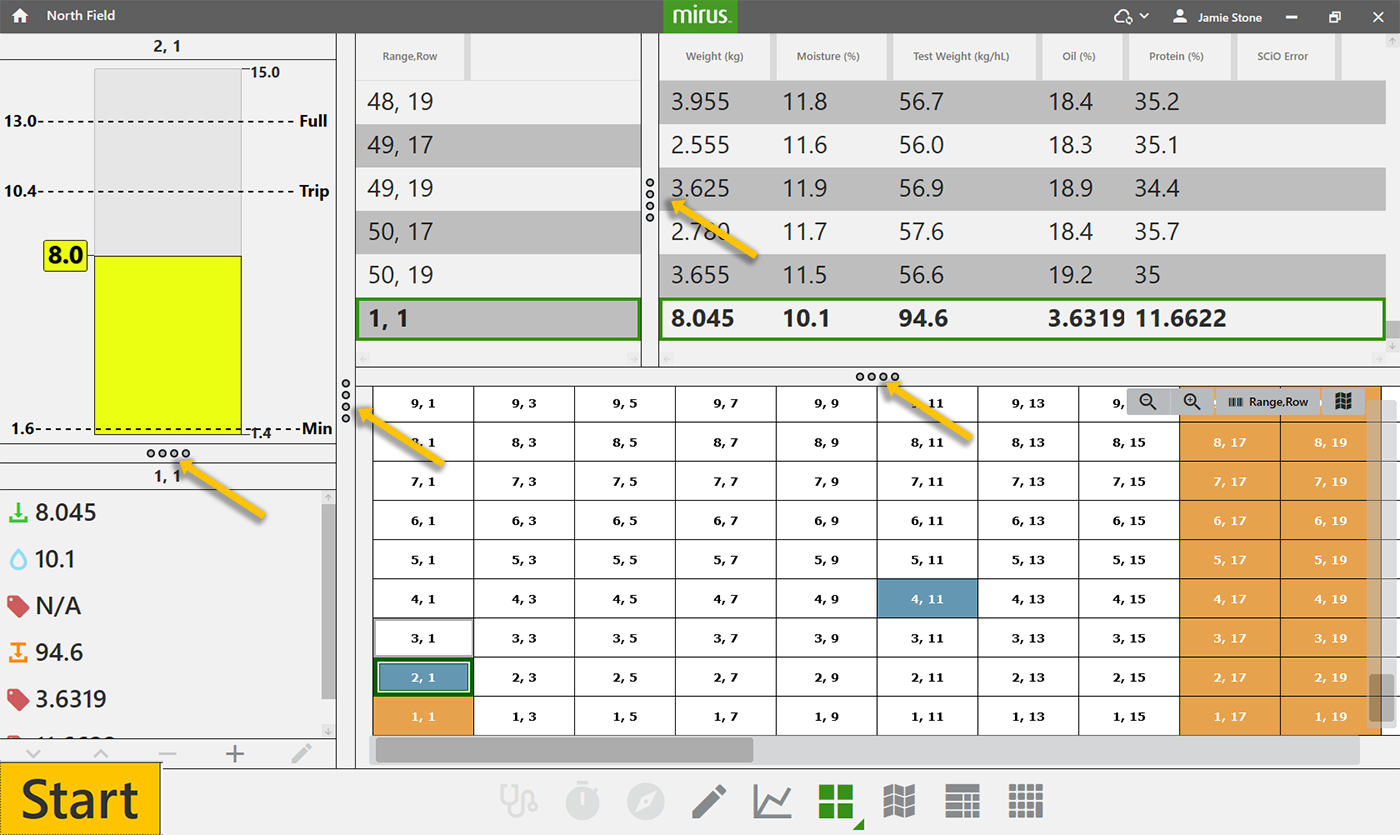
You can enlarge or shrink specific sections by dragging the borders.
- Tap the desired content icon in each pane. The currently displayed content is highlighted.
- Tap again to close the content selection icons.
The following pictures show examples of what each of the options looks like in the Quad View.
 You can change the relative size and proportion of the panes of Map view by moving the pane dividers.
Graph View
To view the harvest data in graph form, tap ![]() .
.
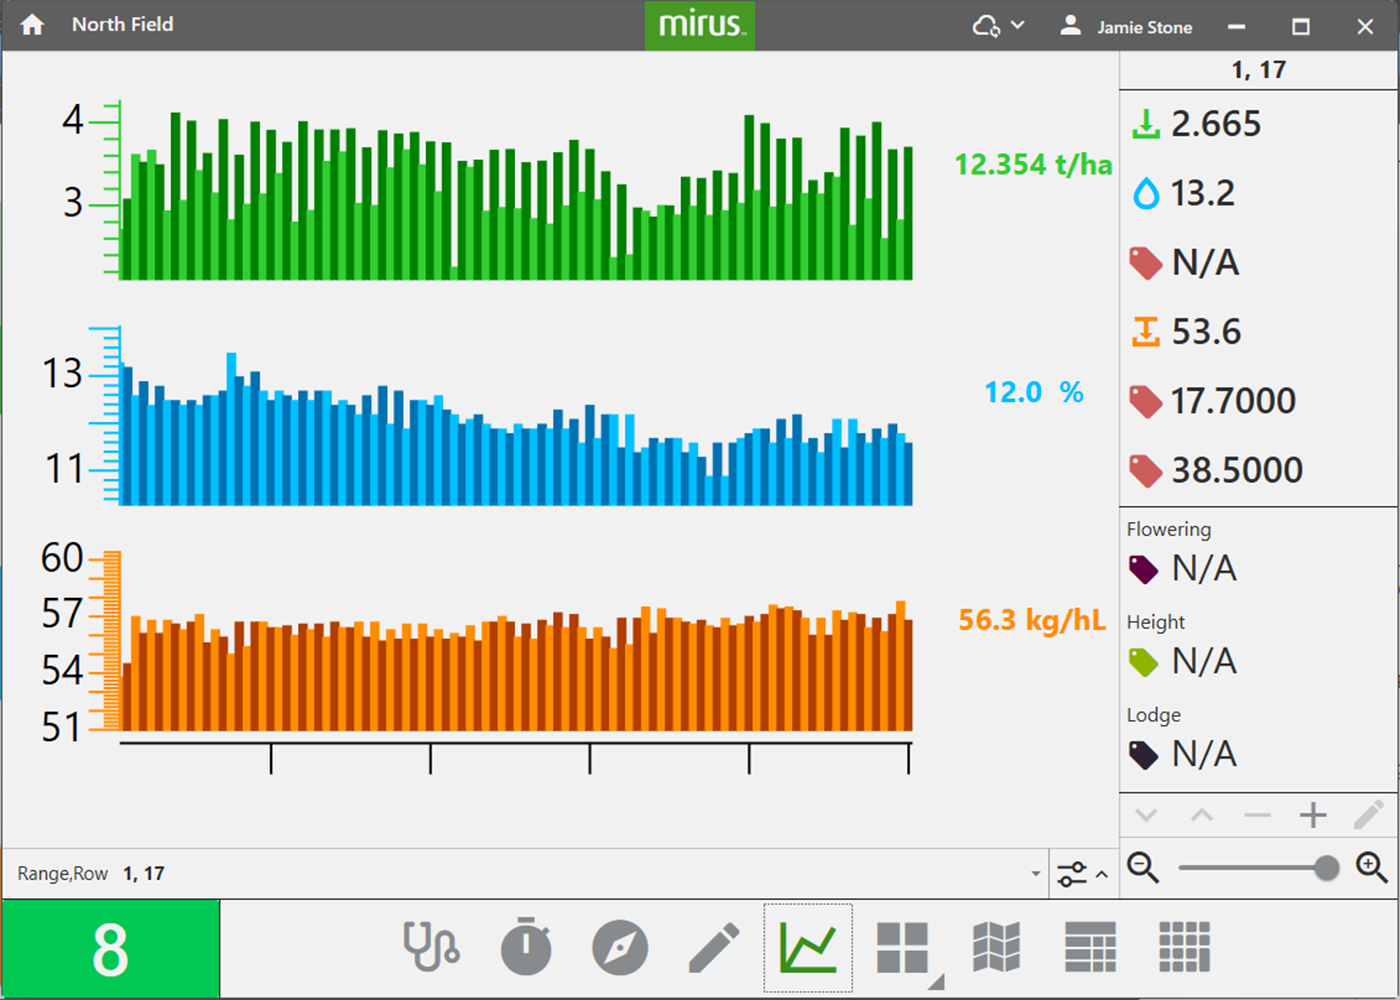
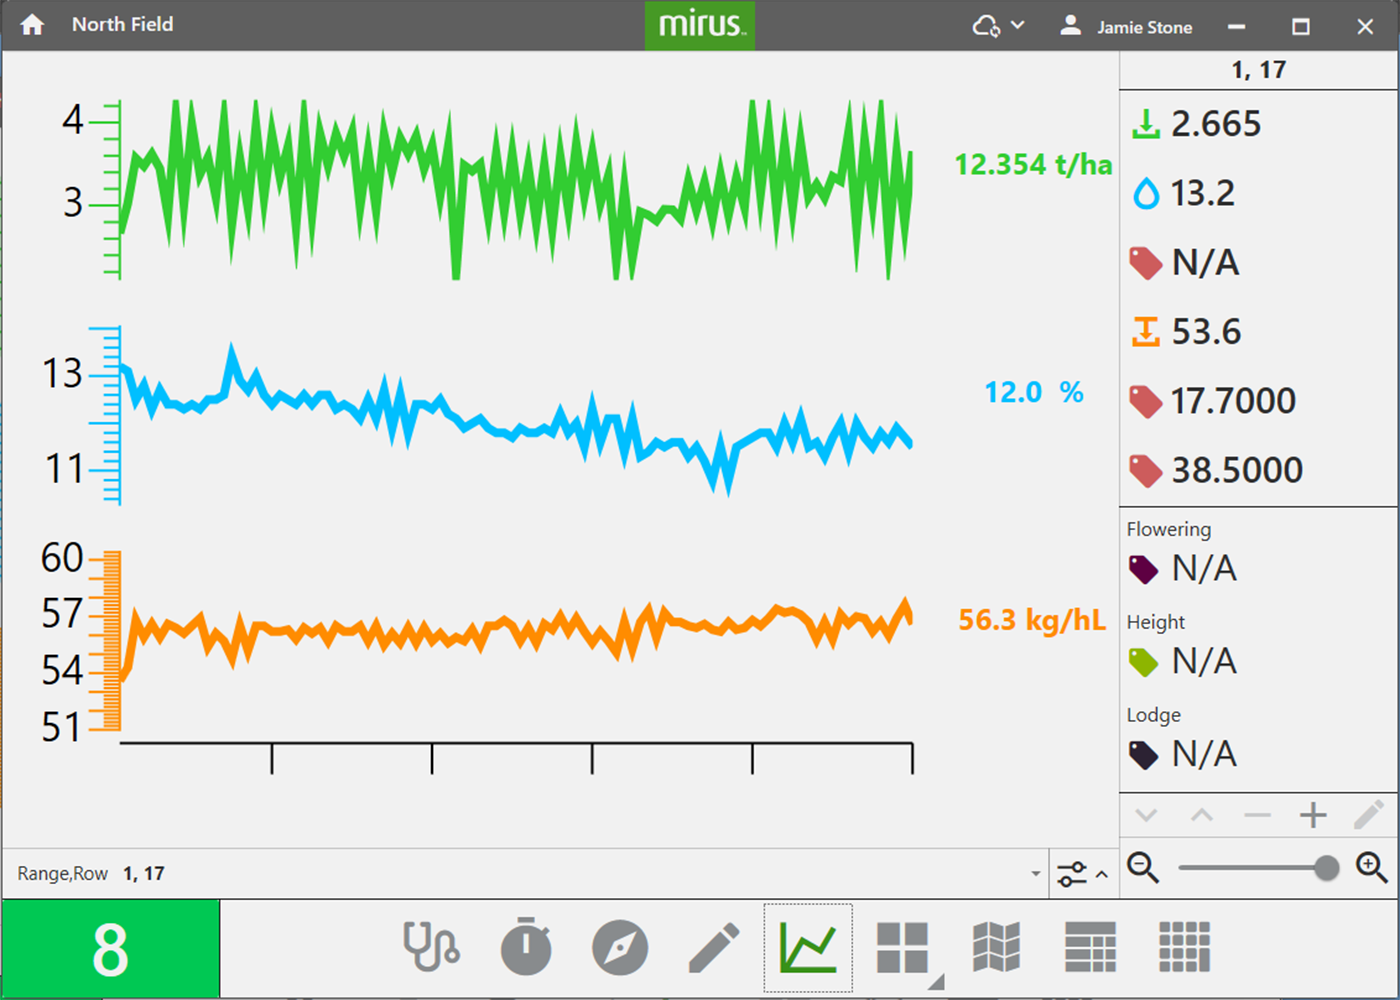
In the graph, each bar (or point in the line graph) represents a plot. The green is the weight. The blue graph is the moisture. The orange graph is the test weight.
The values at the end of the graphs are the average of all the plots. The green value is the yield based on the weight measurements and plot size. To set the yield parameters, see Configure Plot Size and Yield in Spatial View.
The values in the column on the right shows the data for the current plot.
|
Graph View Attributes |
||
|---|---|---|
| Icon | Option | Description |
| Plot Identifiers |
For imported maps that include more than one plot ID, select up to three IDs to display. Additional identifiers are displayed along the bottom of the graph. |
|
| Zoom Out | Enlarge the size of the plots shown. | |
| Zoom In | Decrease the size of the plots shown. | |
| Move Attribute Down | Move the currently selected trait down in the list. | |
| Move Attribute Up | Move the currently selected trait up in the list. | |
| Remove Attribute | Remove the currently selected trait. | |
| Add Attribute | Add a new or existing trait. For new traits, see Create Traits. | |
| Edit Attributes | Change the default value of the attribute, if one is included. | |
Tap a bar of data on the bar graph to switch to a line graph (shown below). Tap a line of data on the line graph to switch to a bar graph.
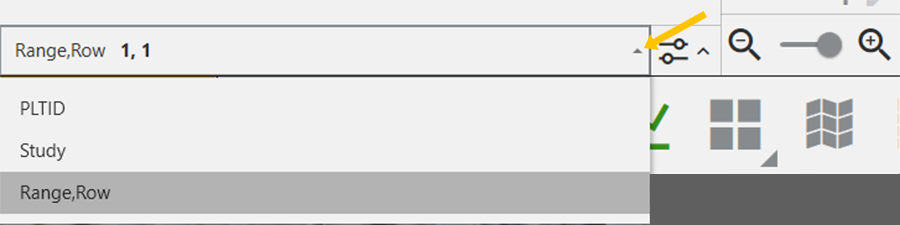
If you are using an imported map with multiple plot identifiers, you can view whichever identifier you want. To view a different identifier:
- Tap the drop-down arrow next to the plot identifier you want to change.
- Select an identifier from the list.
Changing the identifier will put the selected identifier in the first position (far left) in the List view.
If you are using an imported map with multiple plot identifiers, you can view up to three identifiers at the same time. To display multiple identifiers:
- Tap
 .
.
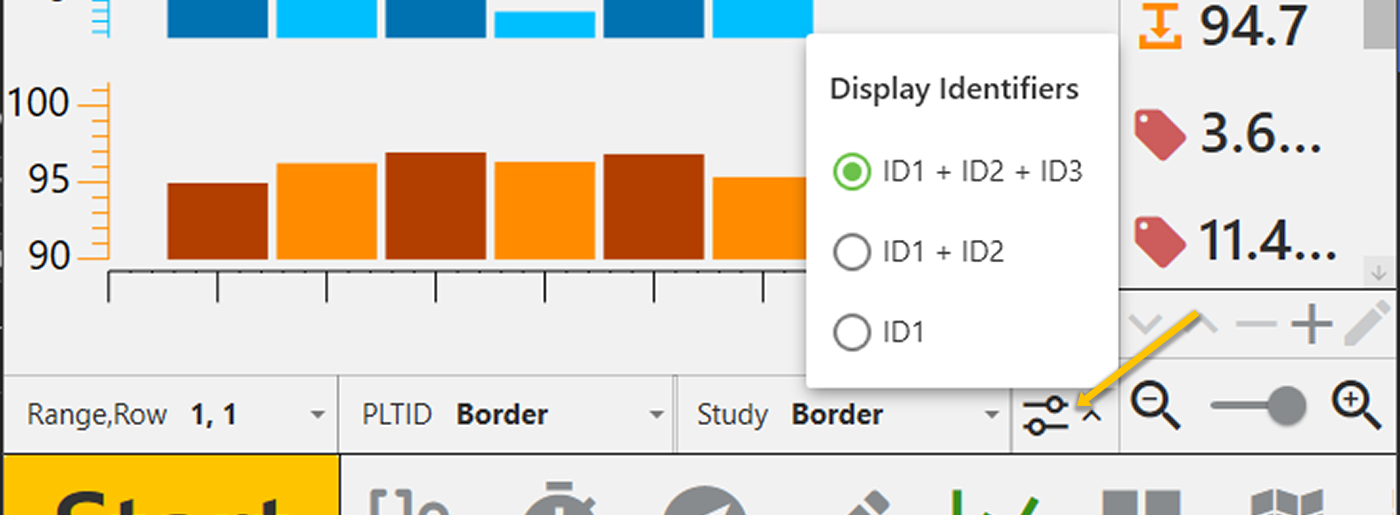
- Choose
- ID1 to show one plot identifier.
- ID1 + ID2 to show two plot identifiers.
- ID1 + ID2 + ID3 to show three plot identifiers.
To change the order that the plot identifiers are displayed, tap the drop-down arrow next to each plot identifier and select from the list. Changing the order here will also change the order in the List and Spatial views.
- Tap elsewhere on the screen to close the plot identifier options.
Spatial View
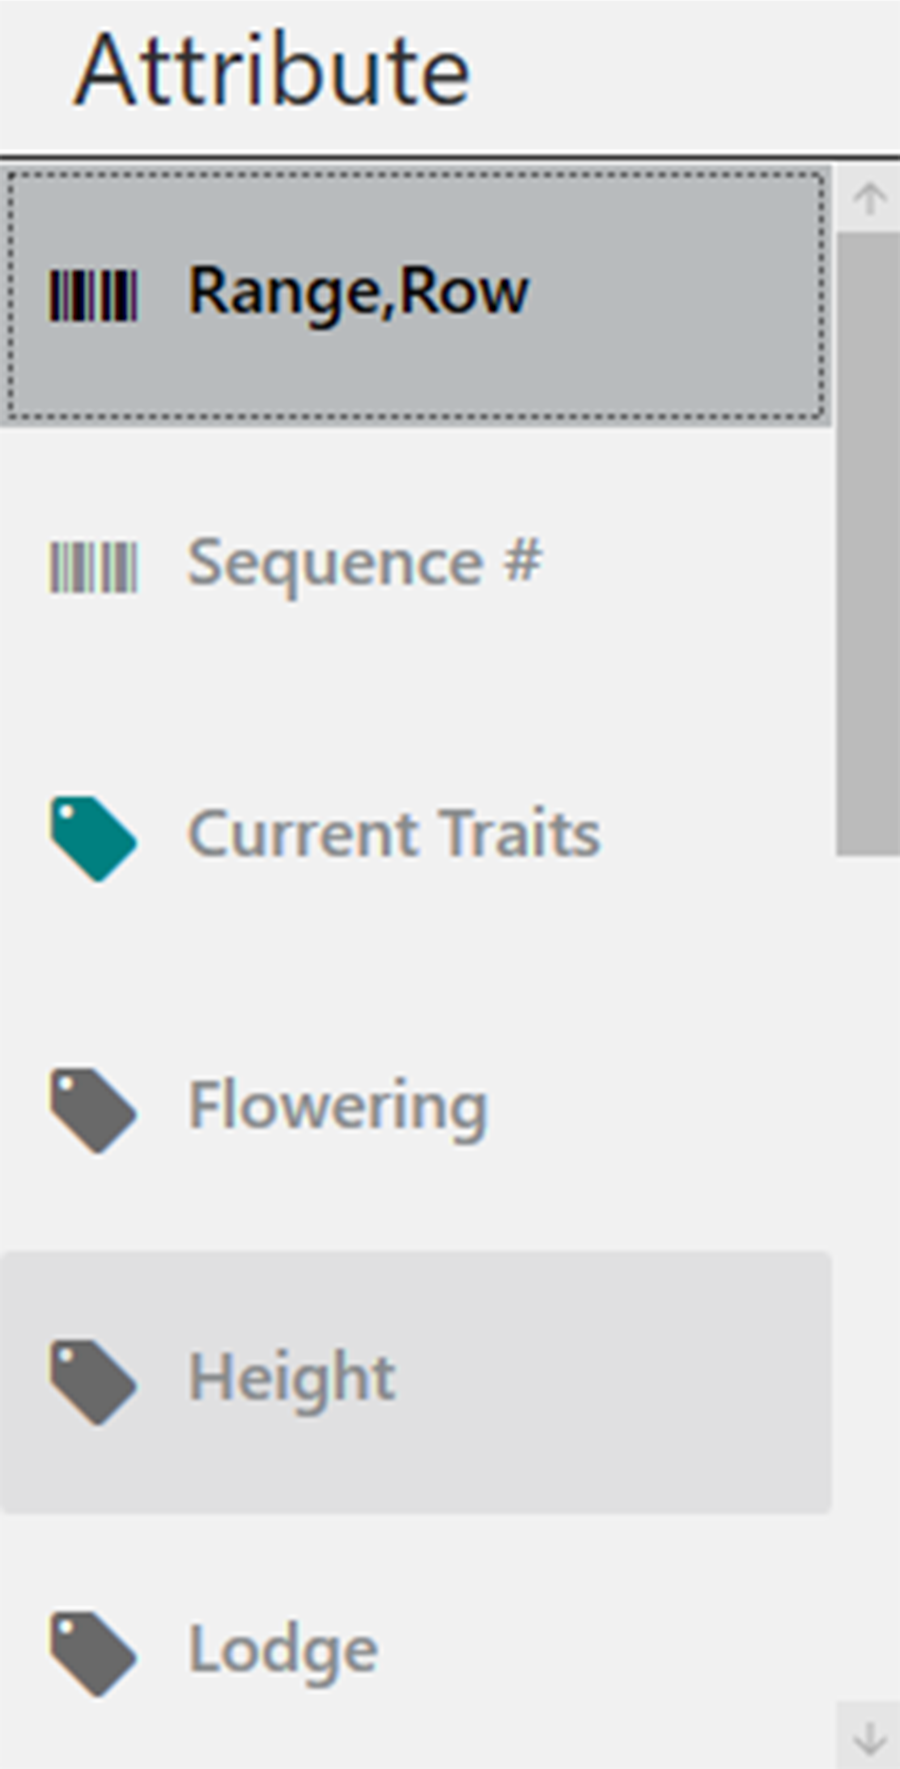
The spatial view shows your field divided two dimensional plots. The plots show the range row coordinates by default, but any attribute you select will display. If you want to change the order of the identifiers, use the three editable plot identifier fields at the bottom of the Graph view.
Configure Weight in Spatial View
As you harvest, you may want to adjust the minimum or maximum weight settings. Adjusting the minimum and maximum values helps to create a more detailed legend and define the scope of the graphs and maps. The narrower the minimum and maximum range, the more detailed the displayed information becomes.
When you adjust the maximum weight through the spatial display, it will show as you harvest to help you track how the GrainGage fills. By monitoring the real-time weight, you can prevent GrainGage overflow. (The minimum weight shown on the Real Time Weight display is adjusted with the Chamber Head Room under Setup > H3 GrainGage Sensors > Weight.)
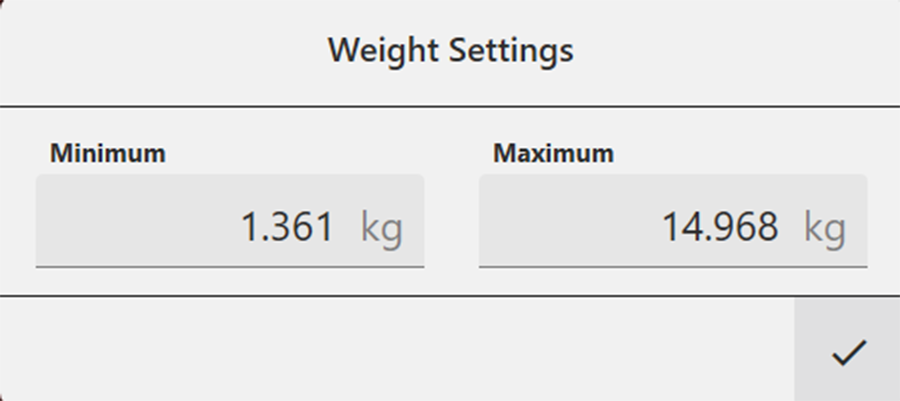
To set the minimum and maximum weight:
- Tap
 .
. - Select Weight.
- Tap in the Attribute bar.
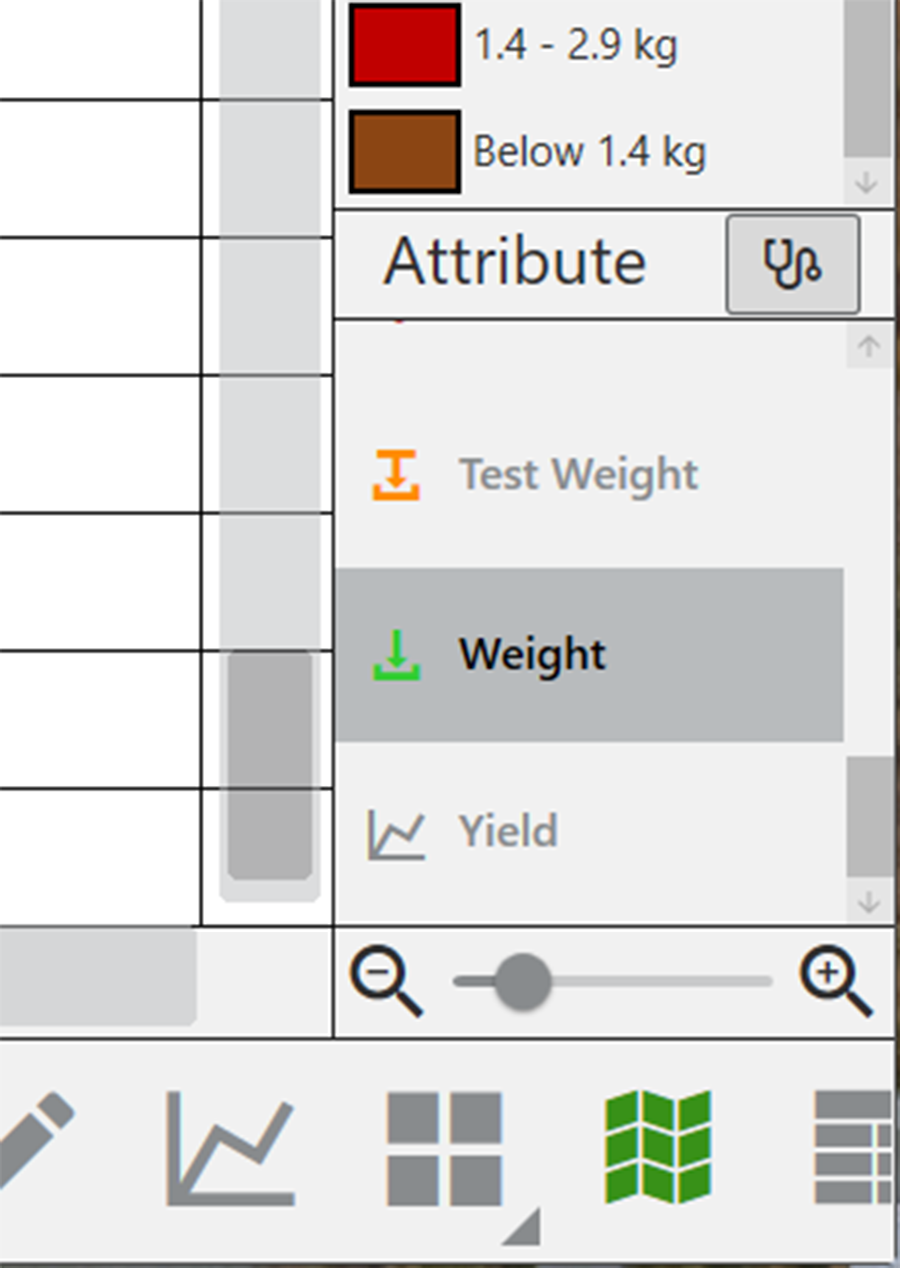
- Enter the desired weight.
- Tap the check icon .
Configure Moisture in Spatial View
Adjusting the minimum and maximum values helps to create a more detailed legend and define the scope of the graphs and maps. The narrower the minimum and maximum range, the more detailed the displayed information becomes.
To set the minimum and maximum moisture:
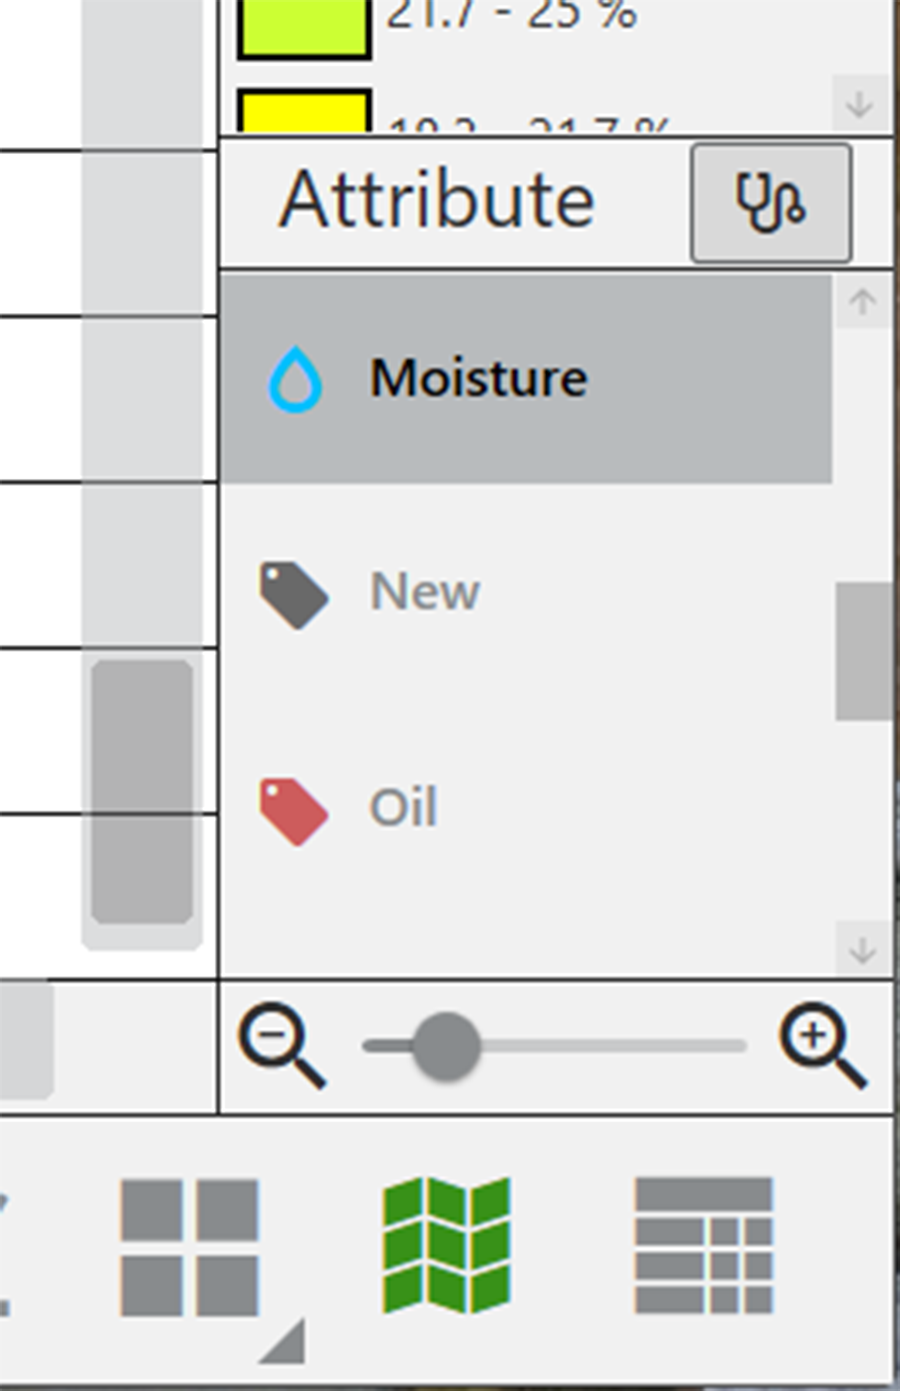
- Tap .
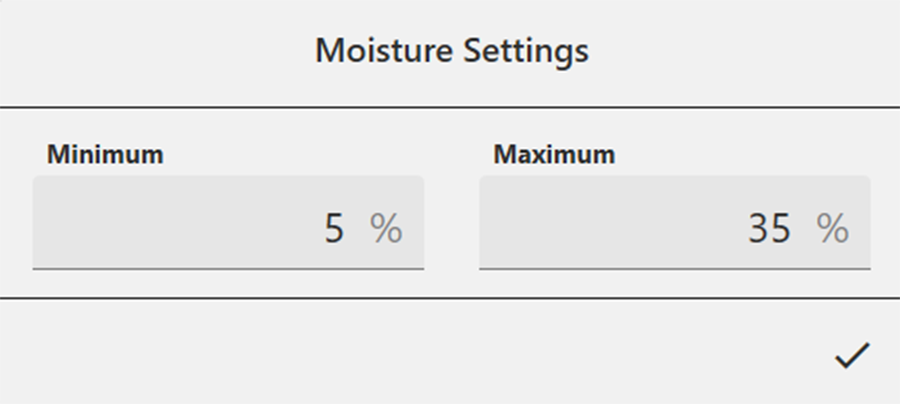
- Select Moisture.
- Tap in the Attribute bar.
- Enter the desired weight.
- Tap the check icon .
Configure Test Weight in Spatial View
Adjusting the minimum and maximum values helps to create a more detailed legend and define the scope of the graphs and maps. The narrower the minimum and maximum range, the more detailed the displayed information becomes.
To set the minimum and maximum test weight:
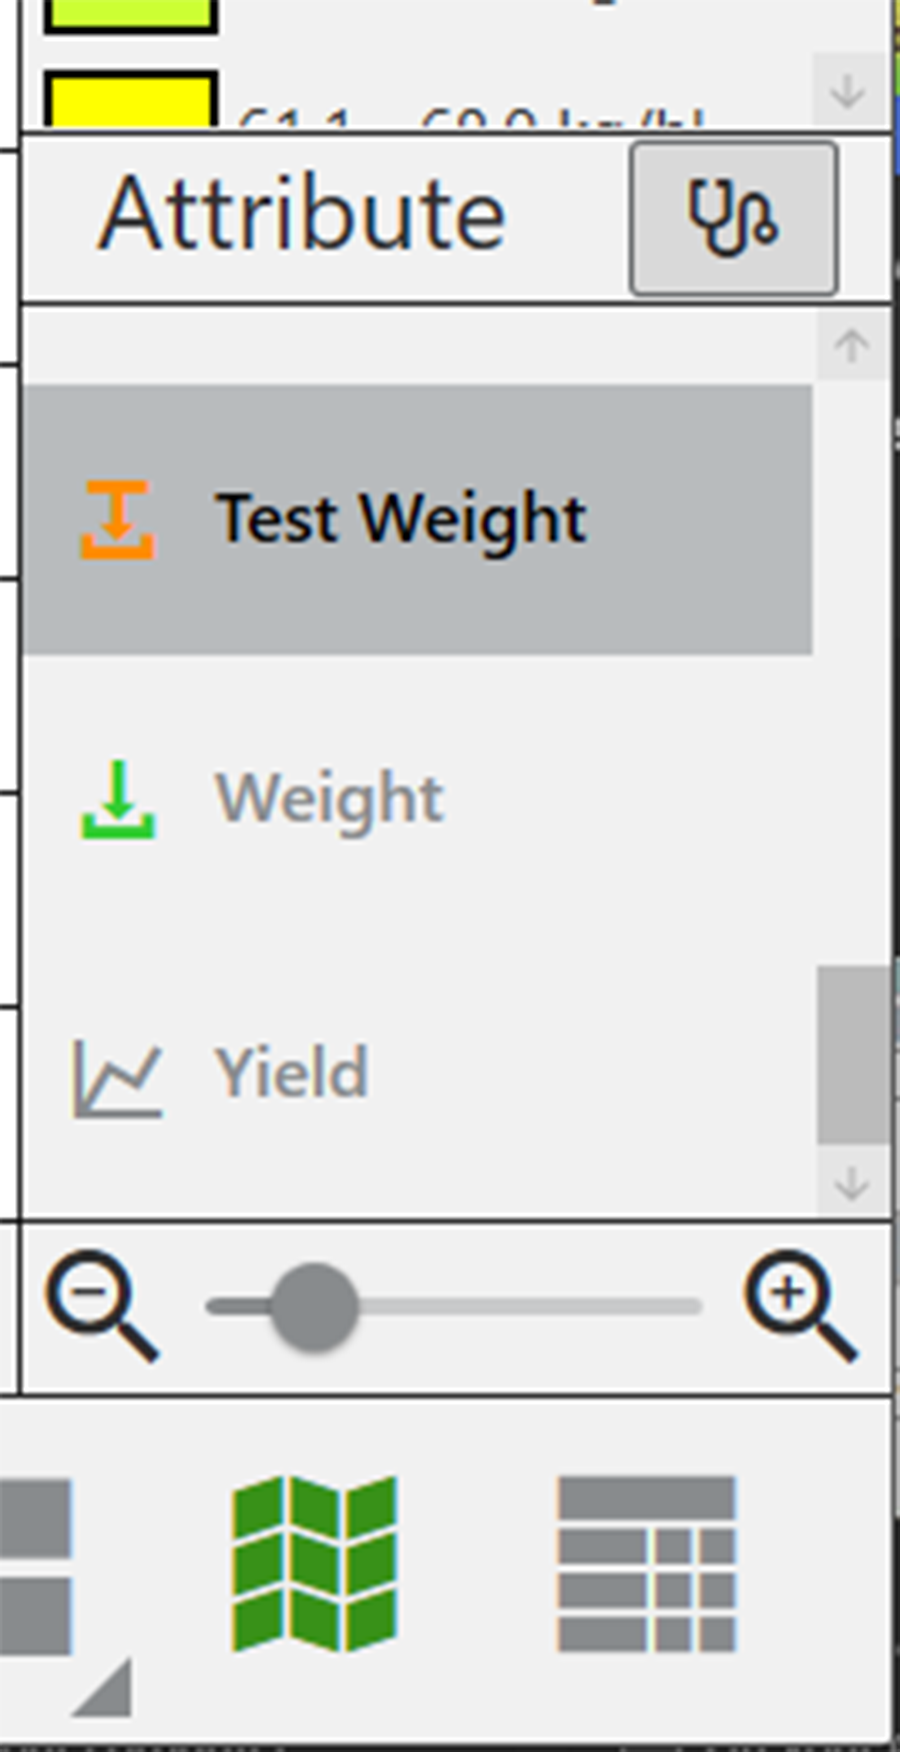
- Tap .
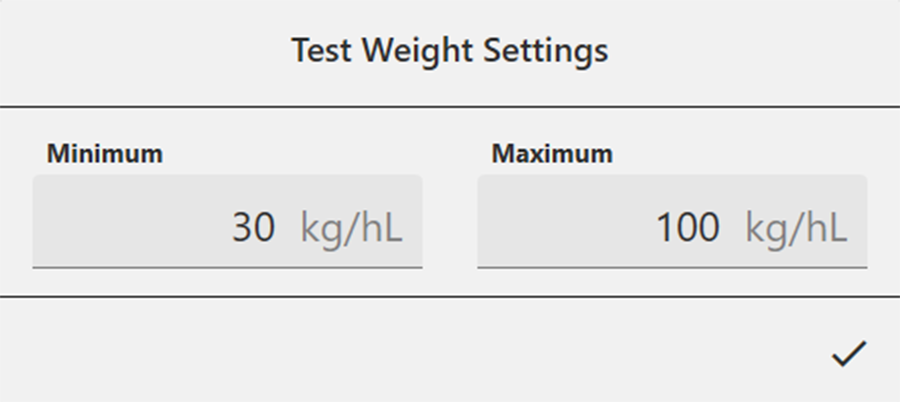
- Select Test Weight.
- Tap in the Attribute bar.
- Enter the desired weight.
- Tap the check icon .
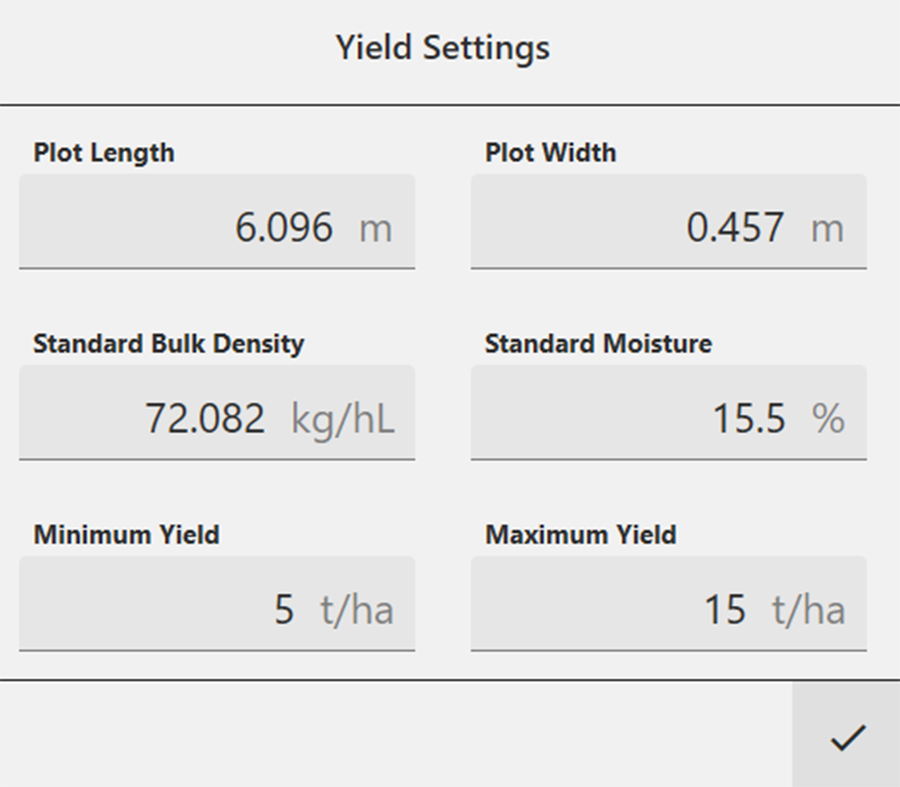
Configure Plot Size and Yield in Spatial View
Adjusting the minimum and maximum values helps to create a more detailed legend and define the scope of the graphs and maps. The narrower the minimum and maximum range, the more detailed the displayed information becomes.
The values set here help calculate the yield per acre (bu/ac, kg/ha) using the weight measurements divided by the plot area. For each minimum and maximum changed, the Legend will change to match the correct values.
For examples of standard bulk density and standard moisture values, see .
To set the minimum and maximum plot size and yield:
- Tap .
- Select Yield.
- Tap in the Attribute bar.
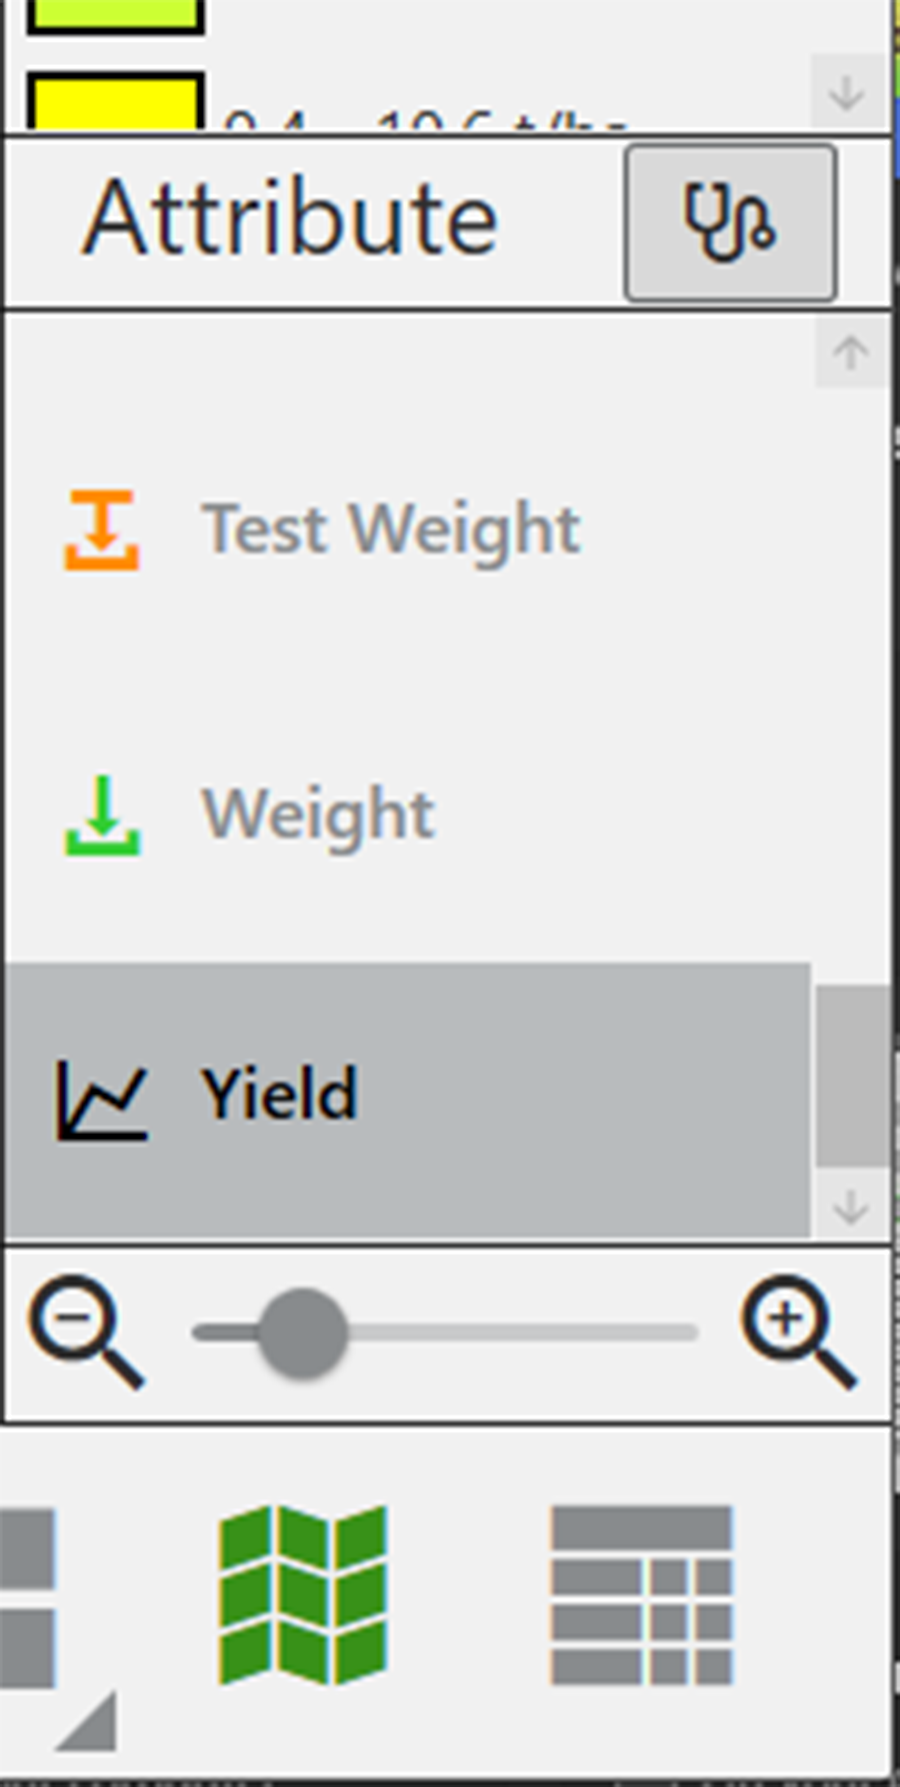
- Enter the desired yield-related values.
- Tap the check icon .
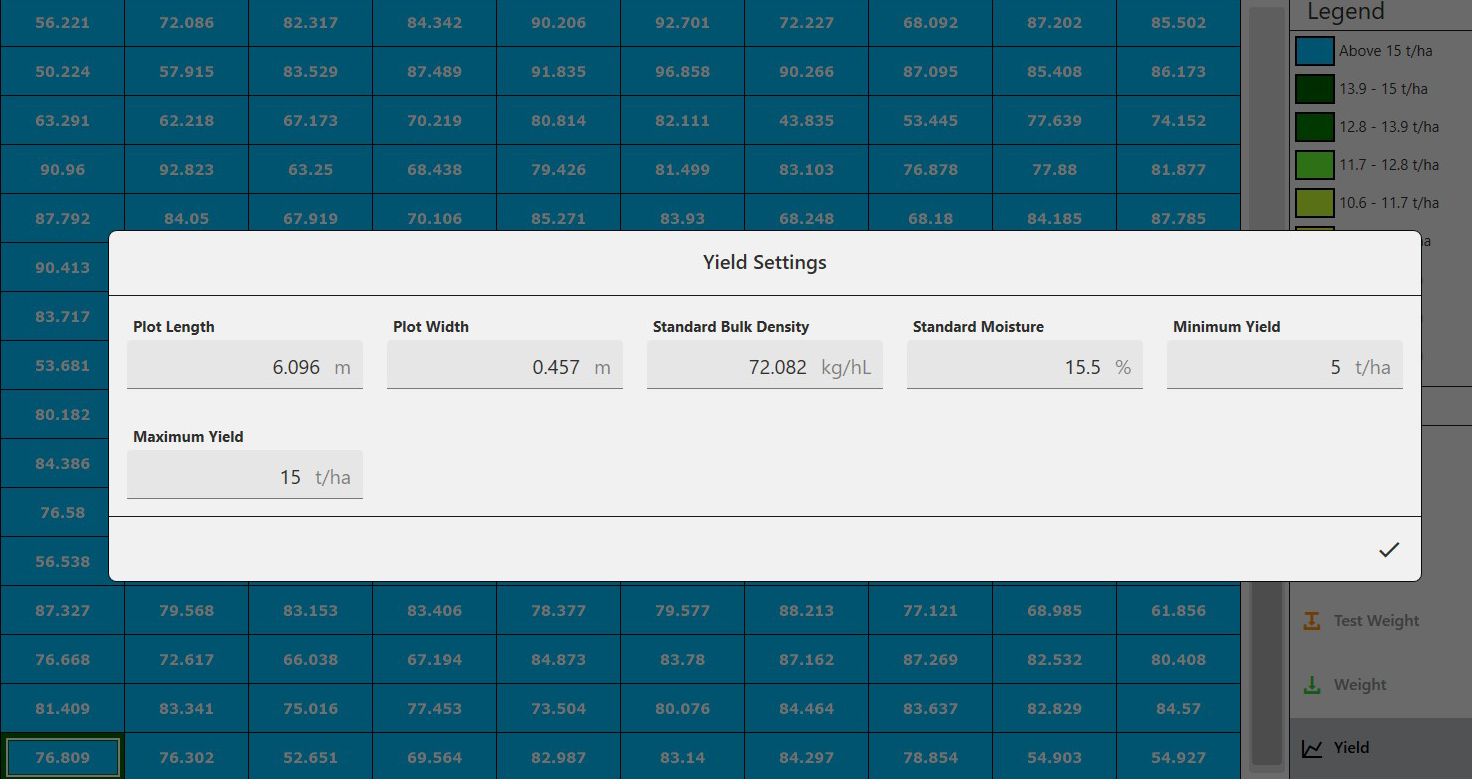
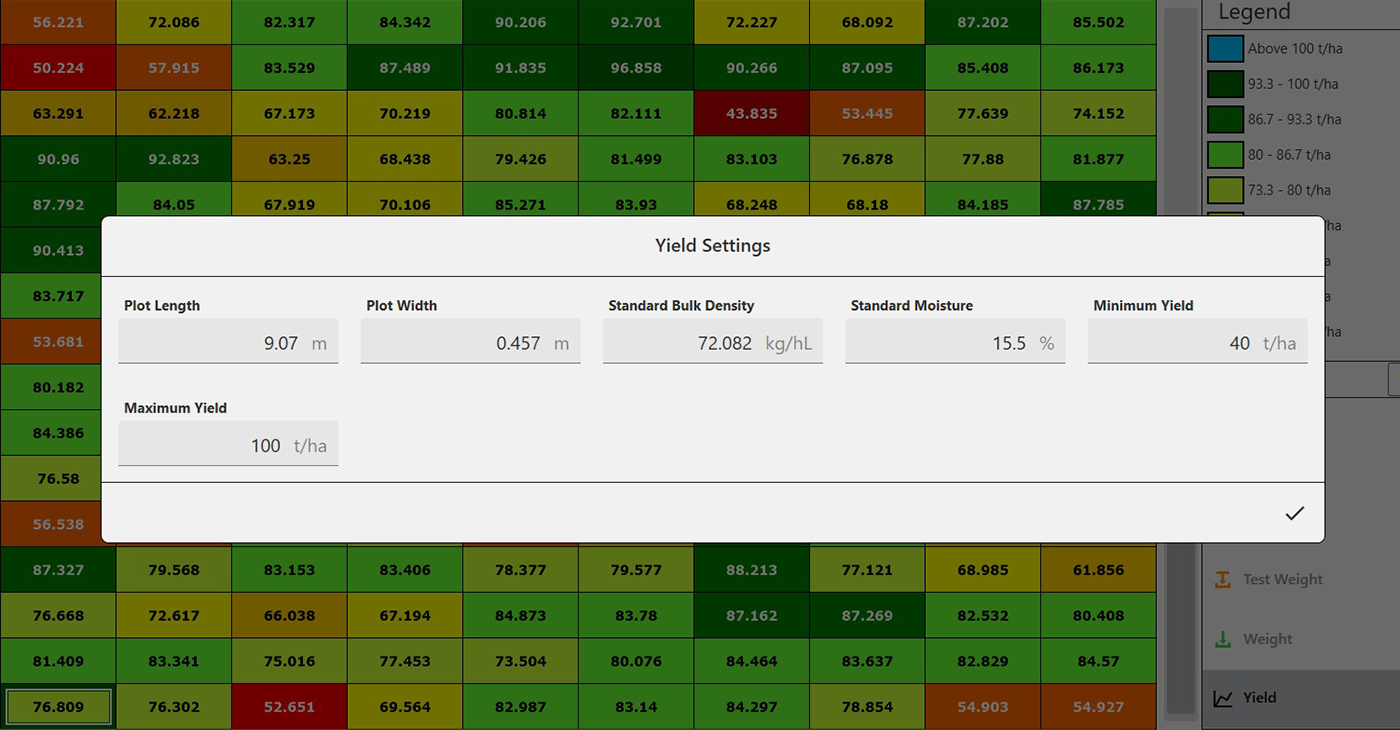
Changing the minimum/maximum yield values can make the yield difference by plot more apparent. Compare the following two screens. The first shows the yield with default values. The second shows the yield with adjusted minimum yield and maximum yield values.
List View
In List View, you can see the data in the form of a spreadsheet. If you want to change the order of the identifiers, drag the tab to the desired location.
The order of the tabs can also be changed with the three editable plot identifier fields at the bottom of the Graph view.
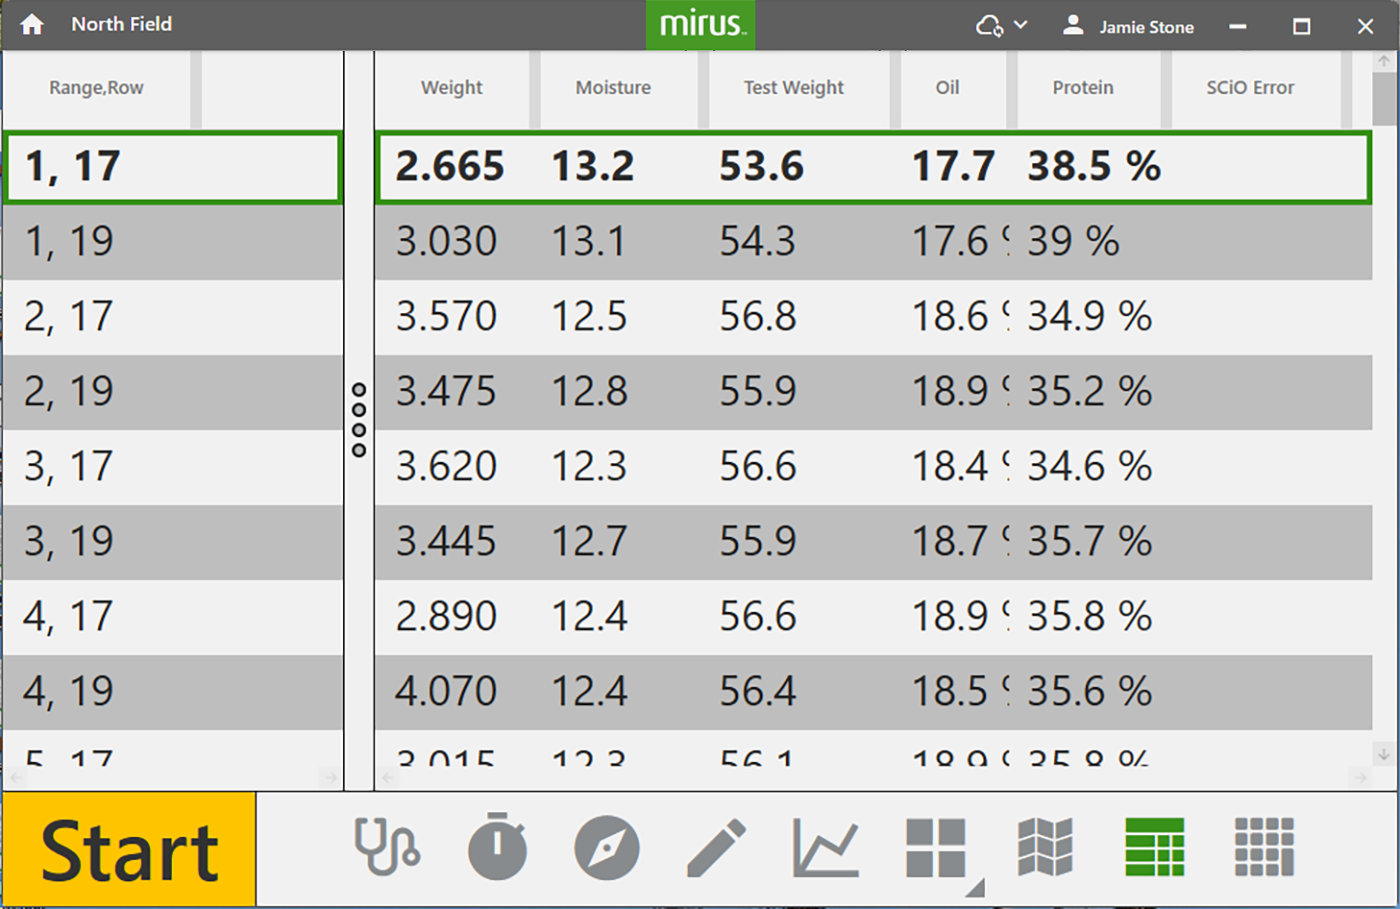
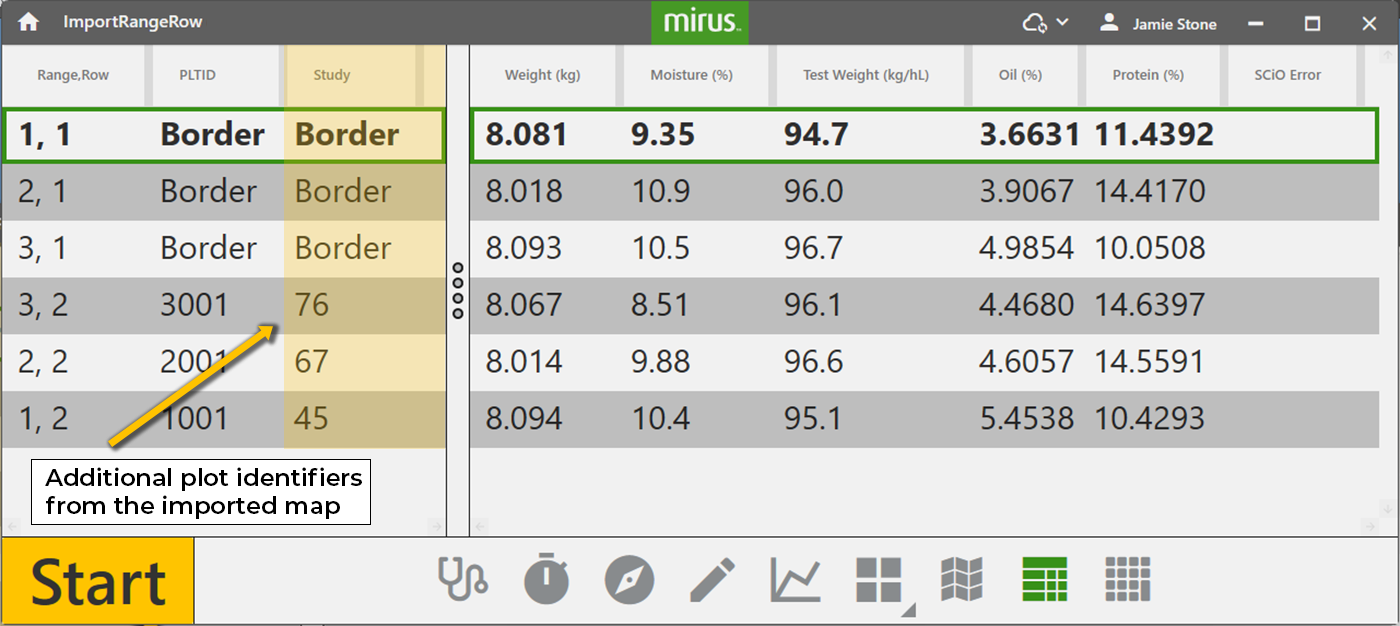
If you are using an imported map with multiple plot identifiers, Mirus displays the range/row and plot ID first followed by any additional identifiers in alphabetical order. If you want to change the order of the identifiers, use the three editable plot identifier fields at the bottom of the Graph view.
Collect Harvest Data
As you harvest, Mirus will help you progress through your field in a way that will ensure the integrity of the data you collect. We recommend using the countdown timer to ensure that the GrainGage fills, measures, and empties completely for each plot.
Harvest with Countdown Timer
To harvest with the countdown timer:
- Open the Mirus Harvest screen.
- Select a map, configure the harvest setup, choose traits, and choose a moisture curve. See Harvest for specifics.
- Start the thresher and throttle up.
- Tare the GrainGage if necessary.
- Tap
 .
. - Harvest the first plot.
- When the head is stopped in the alley and clear, start the countdown timer by pressing remote enter or tapping the countdown timer button
 .
.
It is critical the countdown timer is set long enough for all the grain to be delivered to the GrainGage before reaching zero. - When prompted with a green Go button
 , start into the next plot.
 - Repeat for each plot.
The following table explains each stage of the Start/Countdown/Go button during harvest.
|
Countdown Mode |
|||
| Button Stage | Operator Action | Harvest Stage | |
| 1 | Enter press. | Harvest begins. | |
| 2 |
Enter press at the end of the plot after all the grain has cleared the head. |
The GrainGage is waiting for the trip point to be met or an Enter press at the end of the plot. If the trip point is met, the GrainGage will automatically cycle. The GrainGage can cycle several times through the plot until the weight trip occurs. Note: The amount of grain in the weight bucket can be seen on the Real Time Weight screen. An Enter press begins the countdown. |
|
| 3 |
Wait until the countdown ends. |
The countdown indicates the amount of time set to complete the grain delivery to the GrainGage before the cycle starts. Note: If the weight trip is triggered during the countdown, the timer will continue as the GrainGage cycles. If the timer has reached zero before the weigh cycle finishes, the flush cycle will begin after the weigh cycle is complete. |
|
| 4 | N/A | The yellow indicator briefly appears to show the isolation gate is closing and the GrainGage is starting to cycle. | |
| 5 | Proceed to the next plot. | The isolation gate is closed. The GrainGage is running the flush cycle and it is ready to harvest the next plot. | |
| 6 | The process repeats from #2. | The isolation gate is opened. The GrainGage is ready for the next plot. | |
Harvest with Cycle Button
Note: It is best to use the countdown timer. See Harvest with Countdown Timer. Using the countdown timer typically gives a more consistent clean-out time from plot to plot which can improve the quality of your data.
To harvest with the Cycle button:
- Open the Mirus Harvest screen.
- Select a map, configure the harvest setup, choose traits, and a moisture curve. See Harvest for specifics.
- Start the thresher and throttle up.
- Tare the GrainGage if necessary.
- Tap in Mirus.
- Harvest the first plot.
- Press Remote Enter or tap Cycle
 when all the grain is in the GrainGage.
 - When prompted with a green Go button , start into the next plot.
- Repeat for each plot.
The following table explains each stage of the Start/Cycle/Go button during harvest.
|
Cycle Mode |
|||
| Button Stage | Operator Action | Harvest Stage | |
| 1 | Enter press when ready to harvest. | Harvest begins. | |
| 2 |
Enter press after all the grain has been delivered to the weigh bucket. |
The isolation gate closes. If the trip point is met, the GrainGage will automatically cycle. The GrainGage can cycle several times through the plot until the weight trip no longer occurs. Note: The amount of grain in the weigh bucket can be seen on the Real Time Weight display. Make sure the weight peaks and stabilizes before you press Cycle. |
|
| 3 | Wait for the cycle to end. | The red cycle indicator appears to show the ongoing cycle. | |
| 4 | Proceed to the next plot. | The isolation gate is closed. The GrainGage is running the flush cycle and is ready to harvest the next plot. | |
| 5 | The process repeats from #2. | The isolation gate is opened. The GrainGage is ready for the next plot. | |
Resume Harvest
Once you have entered Harvest, you will find a new option Resume on the Home Screen. Use Resume to enter the Harvest screen using the map indicated and all of your previous options for starting location, direction, navigation type, traits, collection mode, and moisture curve.