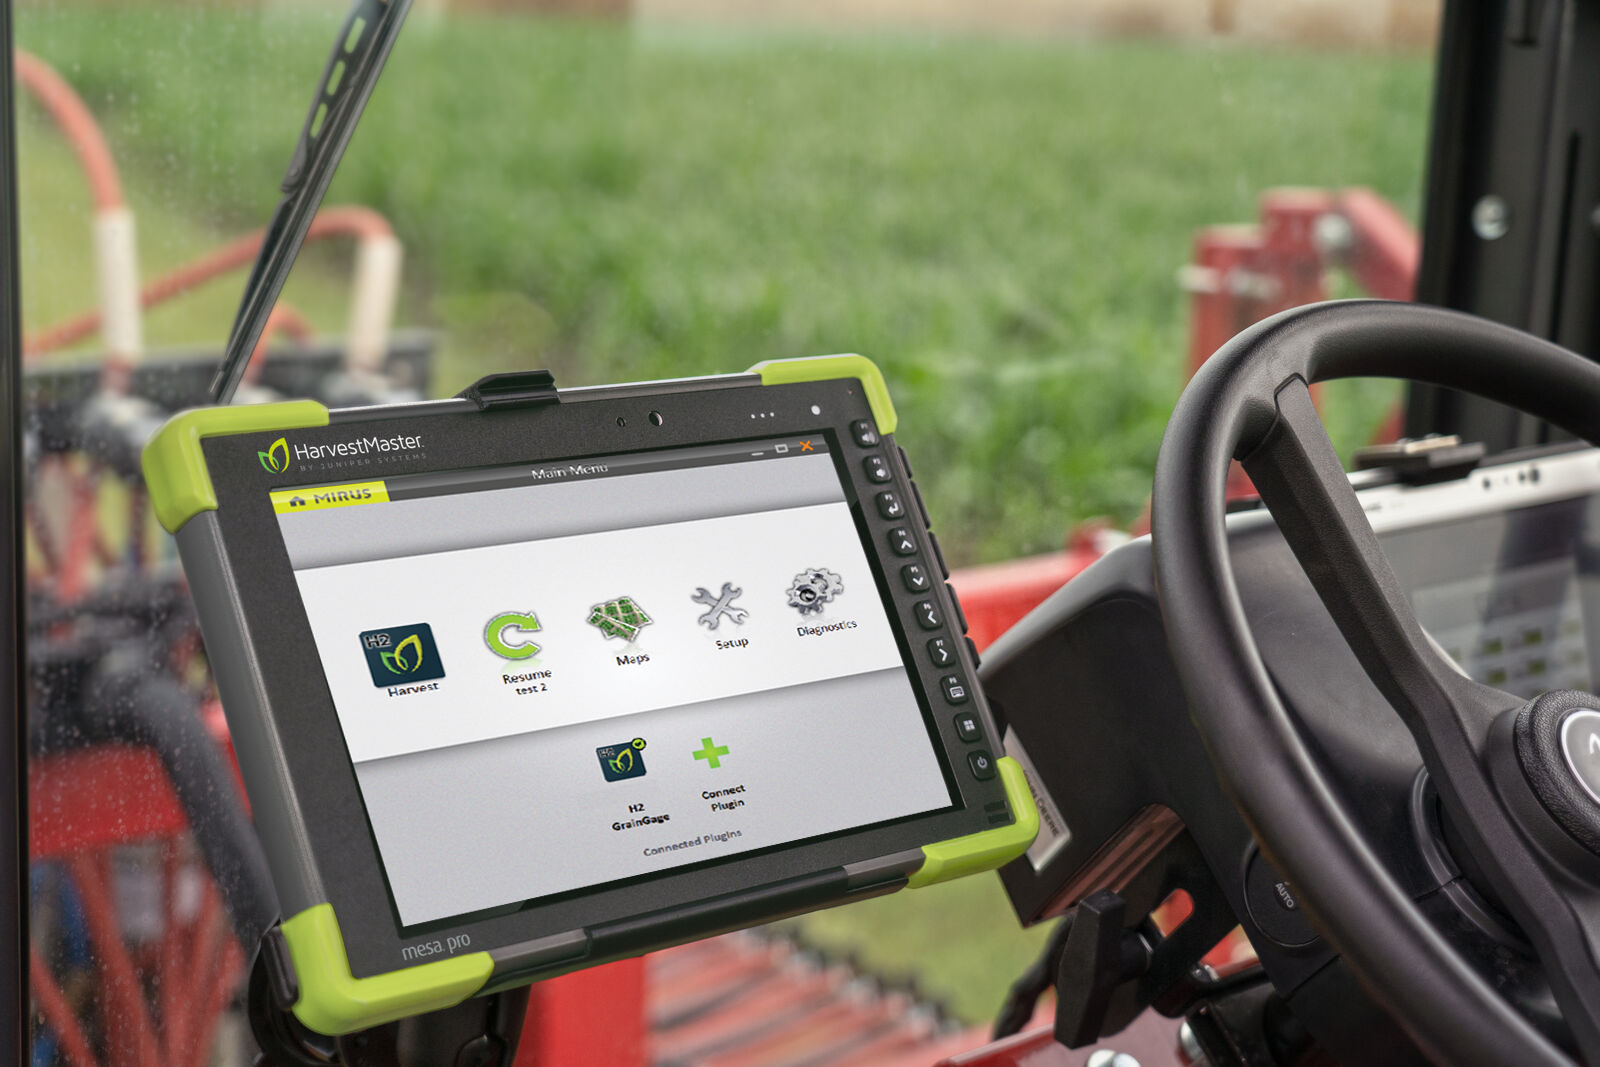
Mirus and GrainGage Setup
You will work with both the Mirus software on a portable device and your GrainGage hardware as part of your system setup. Depending on your specific system, setup may require configuring actuators, sensors, or the entire GrainGage system. Detailed configuration procedures are provided in the next chapter. Additionally, Mirus must be calibrated to accurately reflect your GrainGage. Calibration instructions are outlined in several of the following chapters of this manual. Before beginning any configuration or calibration, ensure that Mirus is installed on your portable device, take the device to your field, and prepare the GrainGage for operation.
Prepare the GrainGage
Please refer to the applicable GrainGage Hardware Manual available from our website https://harvestmaster.com/support > GrainGages > Knowledge Base > HarvestMaster Product Manuals.
Verify GrainGage Readiness
Verify the GrainGage is ready for operation by checking the following:
- The Mirus app is installed and activated.
- Windows updates are current.
- Automatic sleep, hibernate, and shutdown are disabled on the tablet if it is plugged in.
- The charging cable is connected to the tablet and the tablet is charging.
- Power (12 VDC) is connected to the GrainGage DSP 2 Module and System Controller.
- The CAN cable between the GrainGage and System Controller is connected.
- The USB to CAN or Serial to CAN cable is connected between the System Controller and tablet.
- The remote enter button (typically on the hydrostat lever) is connected properly and functioning.
- The pressurized air is turned on and connected to the GrainGage.
Turn on the GrainGage
To turn on the GrainGage:
- Start the combine.
- Activate the GrainGage by pressing the red button on the system controller.
- Open Mirus.
HarvestMaster recommends verifying the weight and test weight calibrations (in Diagnostics) of the GrainGage each morning by following the steps in Check Weigh Bucket Calibration and Check Test Weight Calibration . If the weight is off, then recalibrate by following the steps in sections Weigh Bucket Load Cell Calibration and Test Weight Load Cell Calibration .
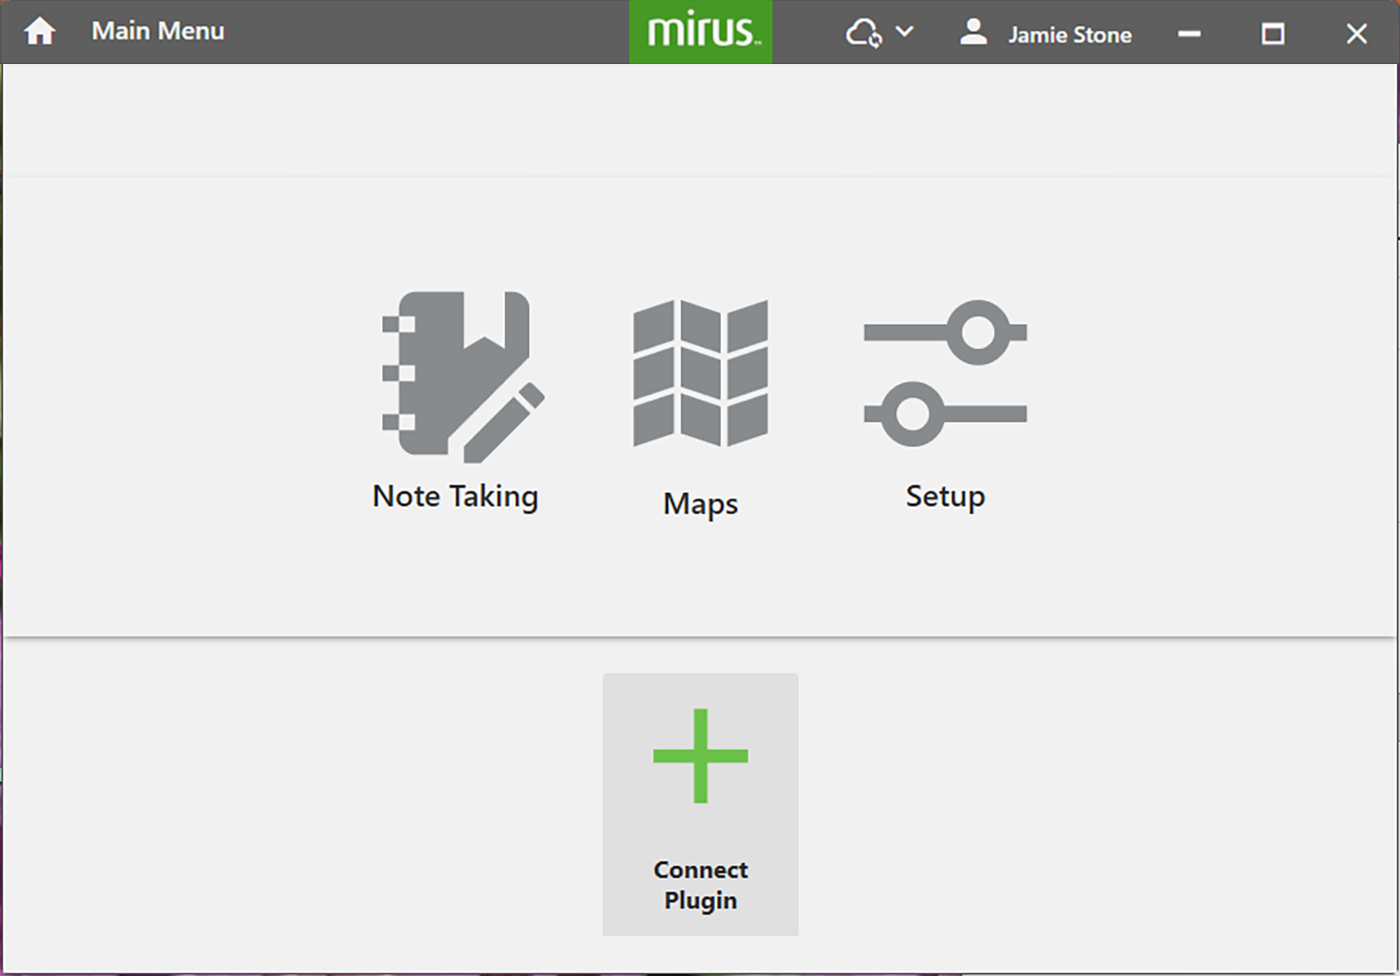
Connect the GrainGage Plugin
To connect the GrainGage Plugin:
- Open Mirus
 .
. - Tap Connect Plugin.
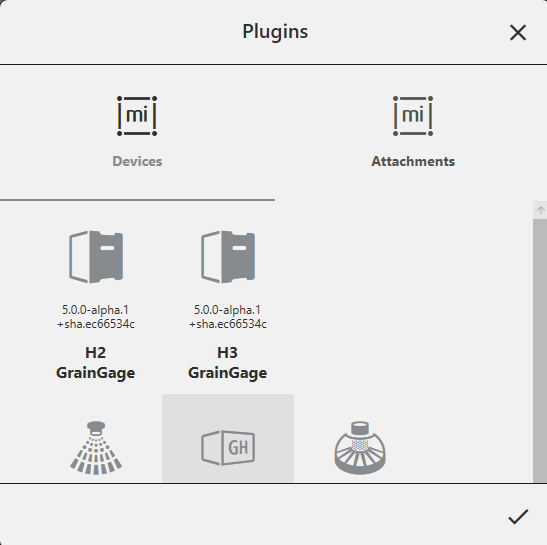
- Tap H2 GrainGage.
- Tap the
 .
.
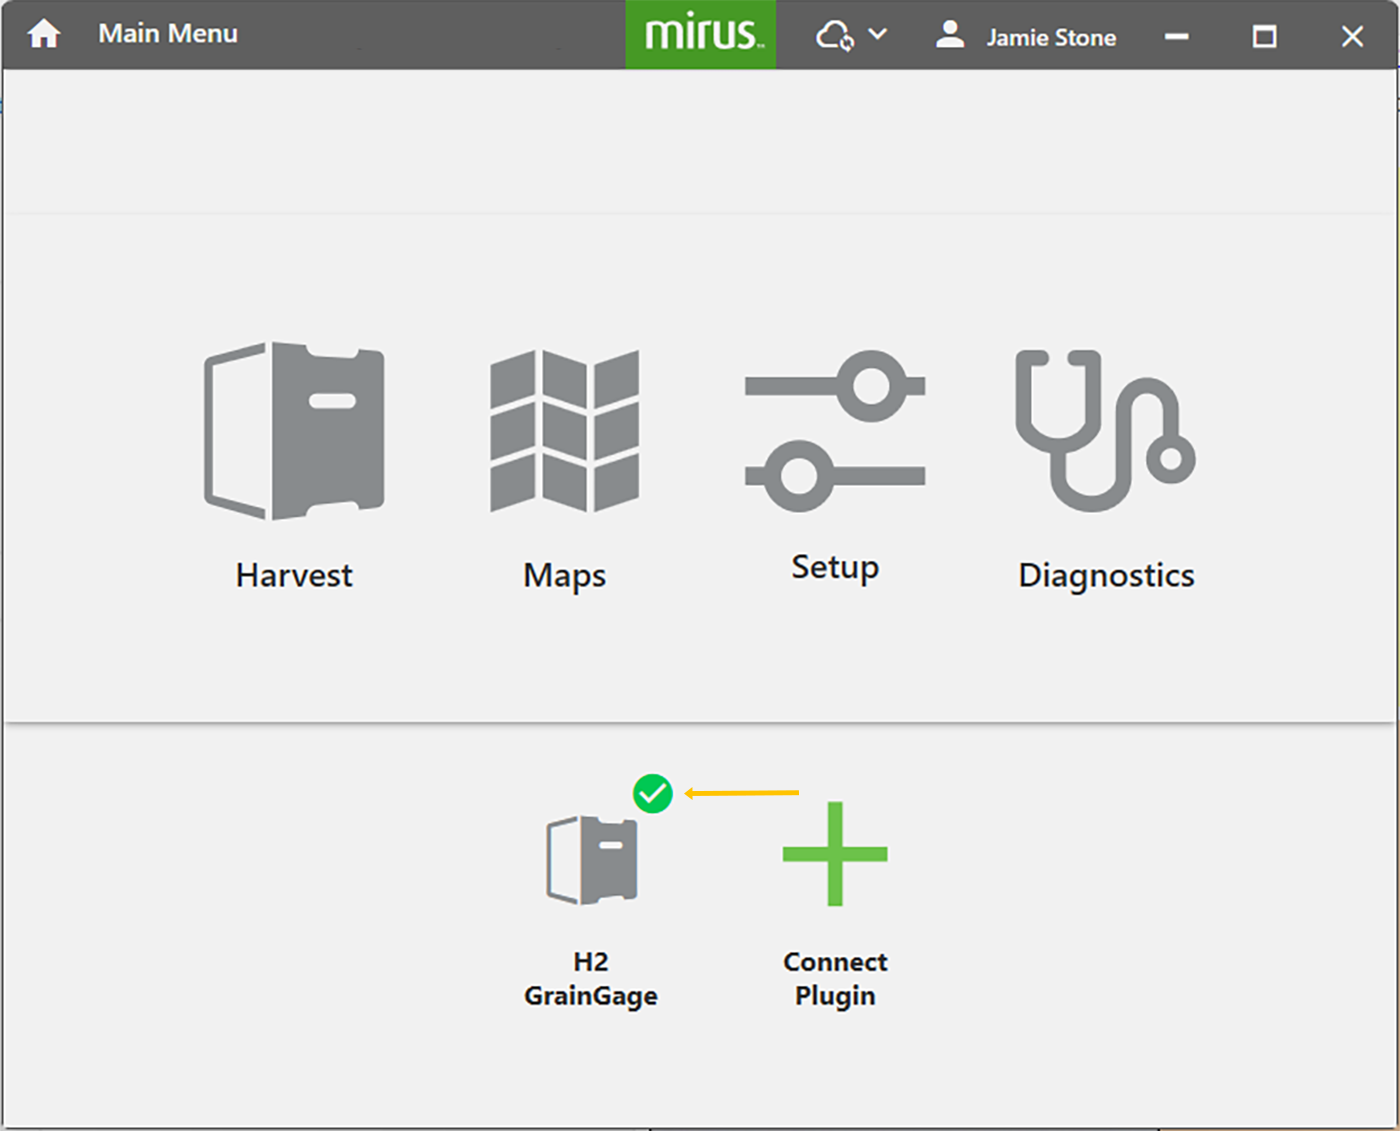
On the Home screen, the green check mark indicates that the GrainGage is connected.
If Mirus is unable to detect the GrainGage, the software may display a device connection error.
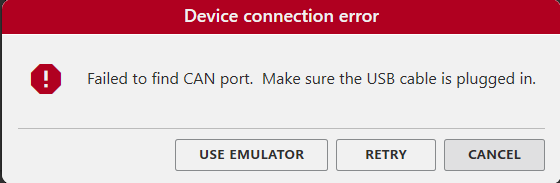
- Check the GrainGage power source to all modules (a green LED illuminated on each module).
Or
- Tap Use Emulator to proceed without connecting the GrainGage. Emulator Mode is not recommended for setting up the GrainGage.
The emulator is a feature within Mirus that allows the software to simulate the presence and behavior of the GrainGage hardware without requiring a physical connection. This mode is primarily used for training, demonstrations, and limited troubleshooting when the actual device is unavailable. It enables users to explore the interface, practice workflows, and understand system operations in a safe, simulated environment. The emulator does not require a Mirus license.
The emulator does not provide real sensor data or actuator feedback, so it should never be used for actual configuration, calibration, or live harvest operations. Any settings adjusted in emulator mode may not reflect real-world conditions and could lead to inconsistencies if assumed to be active on the hardware. The main benefit of the emulator is providing a risk-free way to learn and demonstrate Mirus functionality without interrupting field operations
If further troubleshooting is needed, see Can’t Connect to GrainGage.
If you upgraded Mirus to a new version or changed settings in emulator mode before connecting to the GrainGage, Mirus will display a Changed Settings Summary warning. You will be prompted to Use Local Settings or Use GrainGage Settings.
- Local settings use the current settings on the tablet.
- GrainGage settings use the old settings saved to the GrainGage from the previous Mirus version.
If you want to keep the current GrainGage weight and test weight calibrations, we recommend using the GrainGage settings.
Create Traits
If you would like to include specific traits in the research data you collect with Mirus, you can define those traits ahead of time from the Setup menu. You can also define traits when you create a map or when you enter Harvest. You can enter the data for a trait as you Harvest or Take Notes. The trait data is kept with other data for each plot.
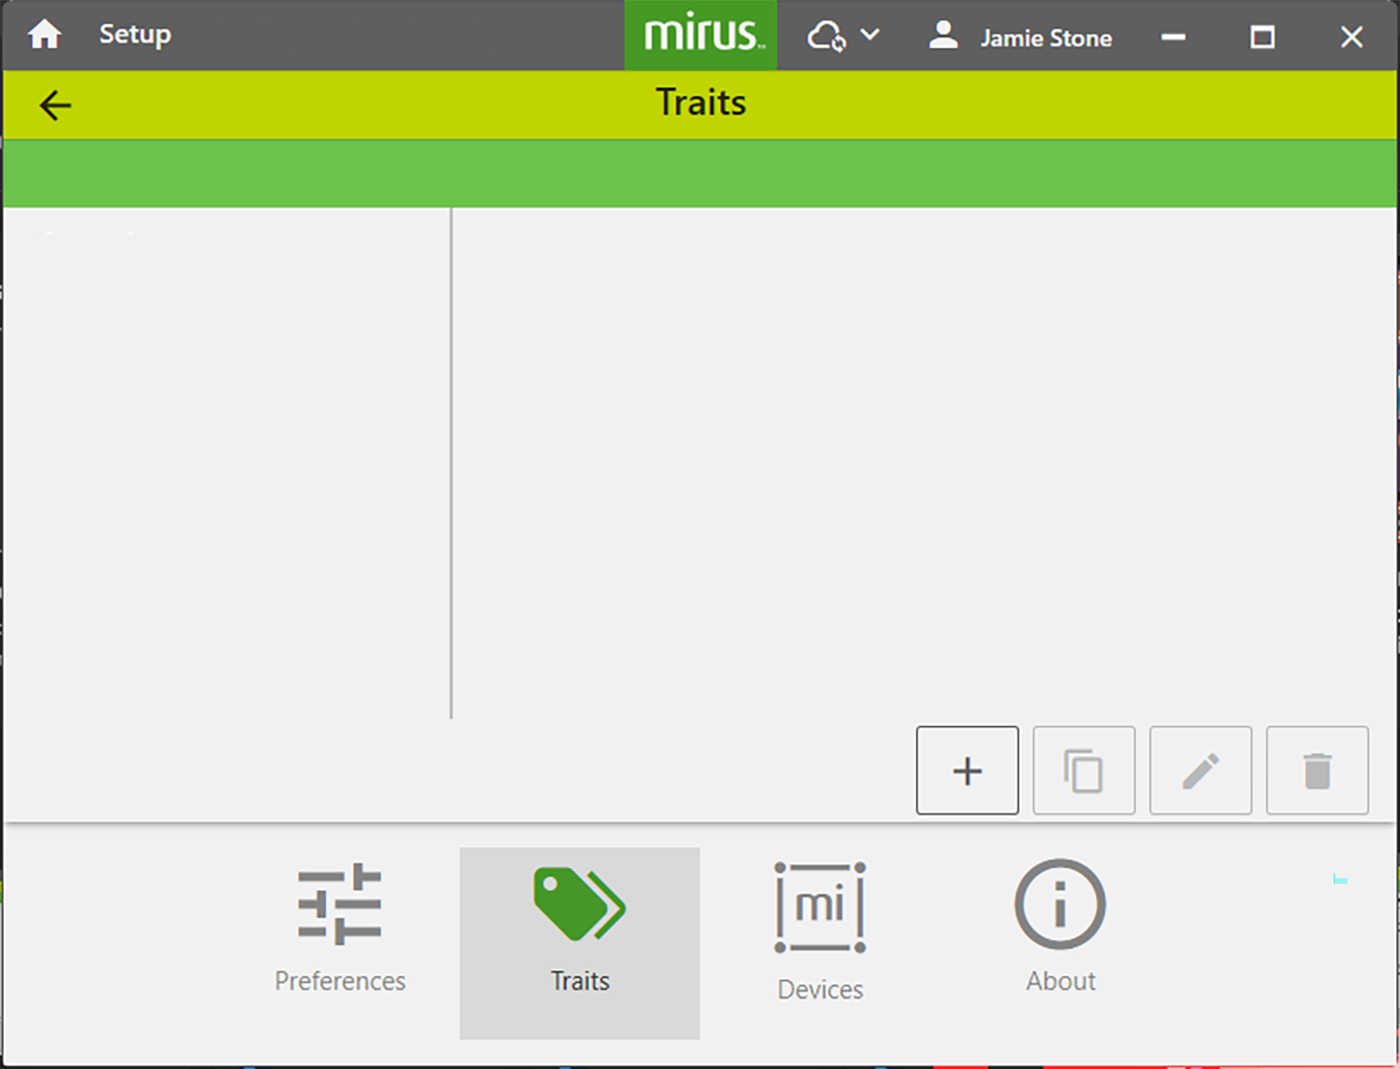
To create a trait from the Setup > H2 GrainGage Setup screen:
- Tap Traits.
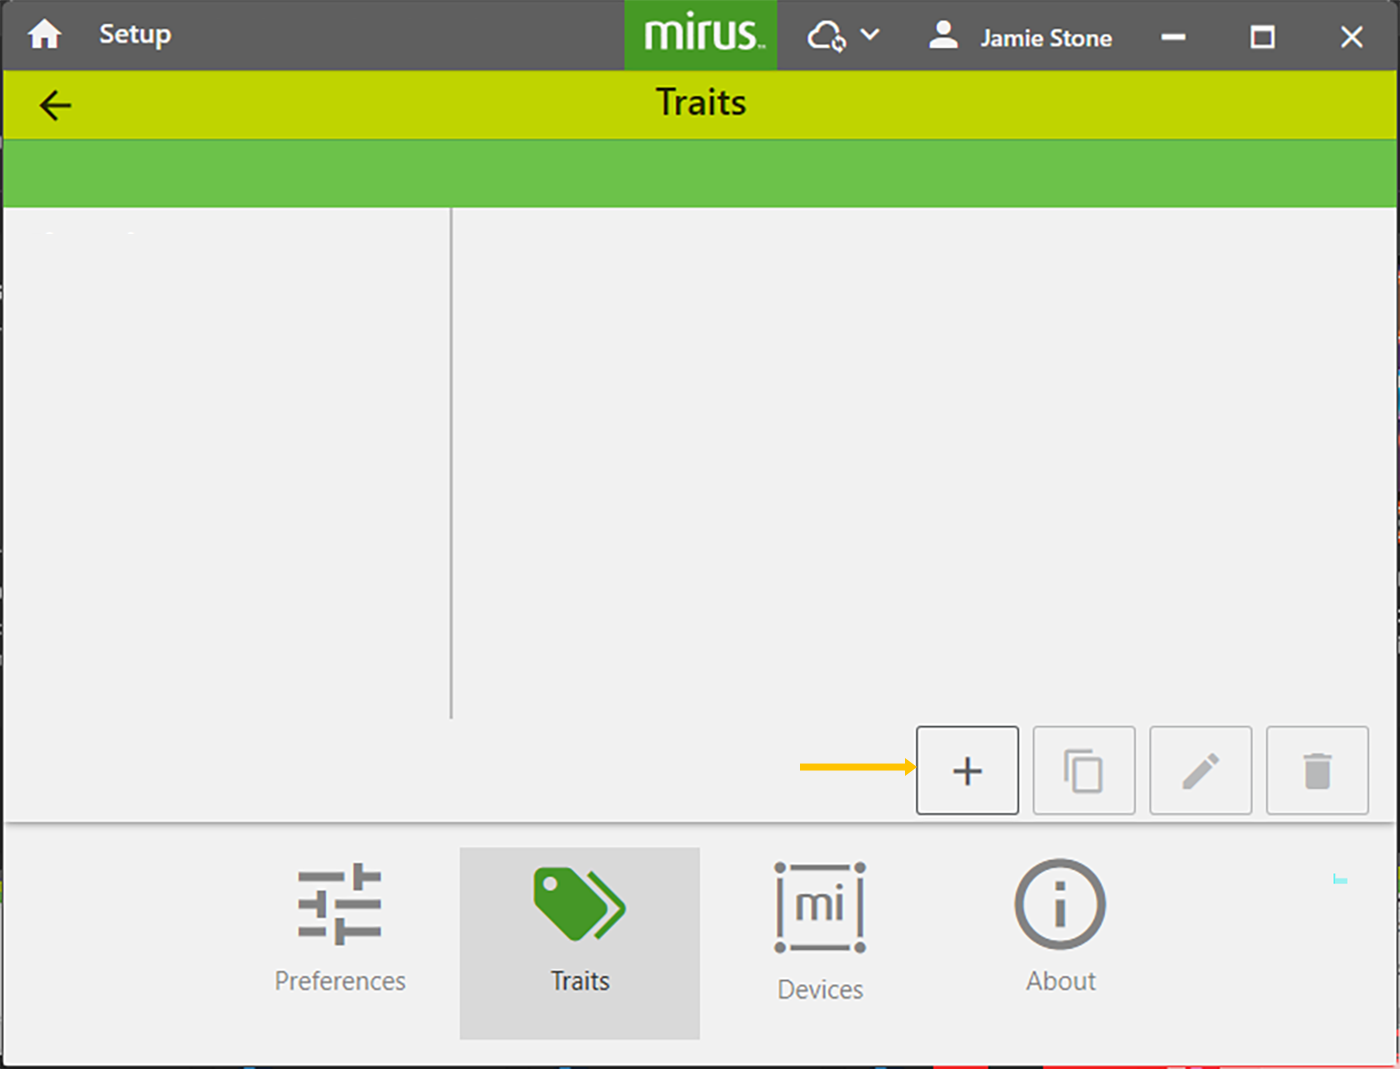
To create a new trait,
- Tap the new icon
 .
.
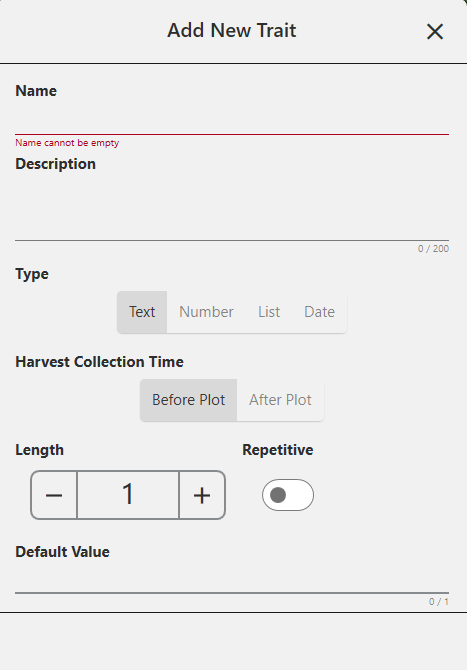
- Enter a Name and Description for the new trait.
- Select the Type of trait.
- Select when you want Mirus to prompt the operator to record the trait: Before Plot or After Plot.
- Specify the Length, or number of characters allowed in the record field.
- Indicate whether or not this trait is Repetitive.
- Enter the Default Value (if needed).
- Tap the next arrow
 to save the trait.
The following table describes the settings for each item on this screen.
|
New Trait Settings |
|
|---|---|
|
Item |
Description |
|
Name |
This is the name of the trait. |
|
Description |
This describes the type of data to be recorded within the trait. |
|
Type |
|
|
Harvest Collection Time |
Specifies whether trait data will be collected before or after the plot is harvested. |
|
Length |
This setting helps Mirus know when to move on to the next trait. After the allotted number of characters is entered, Mirus moves on automatically so that the operator doesn’t need to press enter. |
|
Repetitive |
Selecting Yes indicates data for that trait will be collected multiple times on different days. For example, if you wanted to rate your grain for disease three times a year, you would have a repetitive disease trait. |
|
Default Value |
This is the most common or most expected value for this trait. Mirus will automatically populate the record field with this value to save the operator time. The operator needs only to press or tap Enter. If the value is different from the default value, the operator can enter the new value and press Enter. If the maximum number of characters within the length of the trait is met, Mirus will advance automatically. |