Weigh Bucket Load Cell Calibration
Weigh bucket calibration ensures the accuracy of the GrainGage’s weight calculations. This calibration should be done on initial setup and should not need to be calibrated again unless repairs are needed on the GrainGage weigh system.
Use the weight calibration wizard and the larger weight (11 lb/5 kg) included with the GrainGage to calibrate the weigh bucket load cells.
To calibrate the weigh bucket:
- Park the combine on a level surface.
- Shut off the engine and keep the GrainGage powered on.
- Check that the weigh bucket is empty.
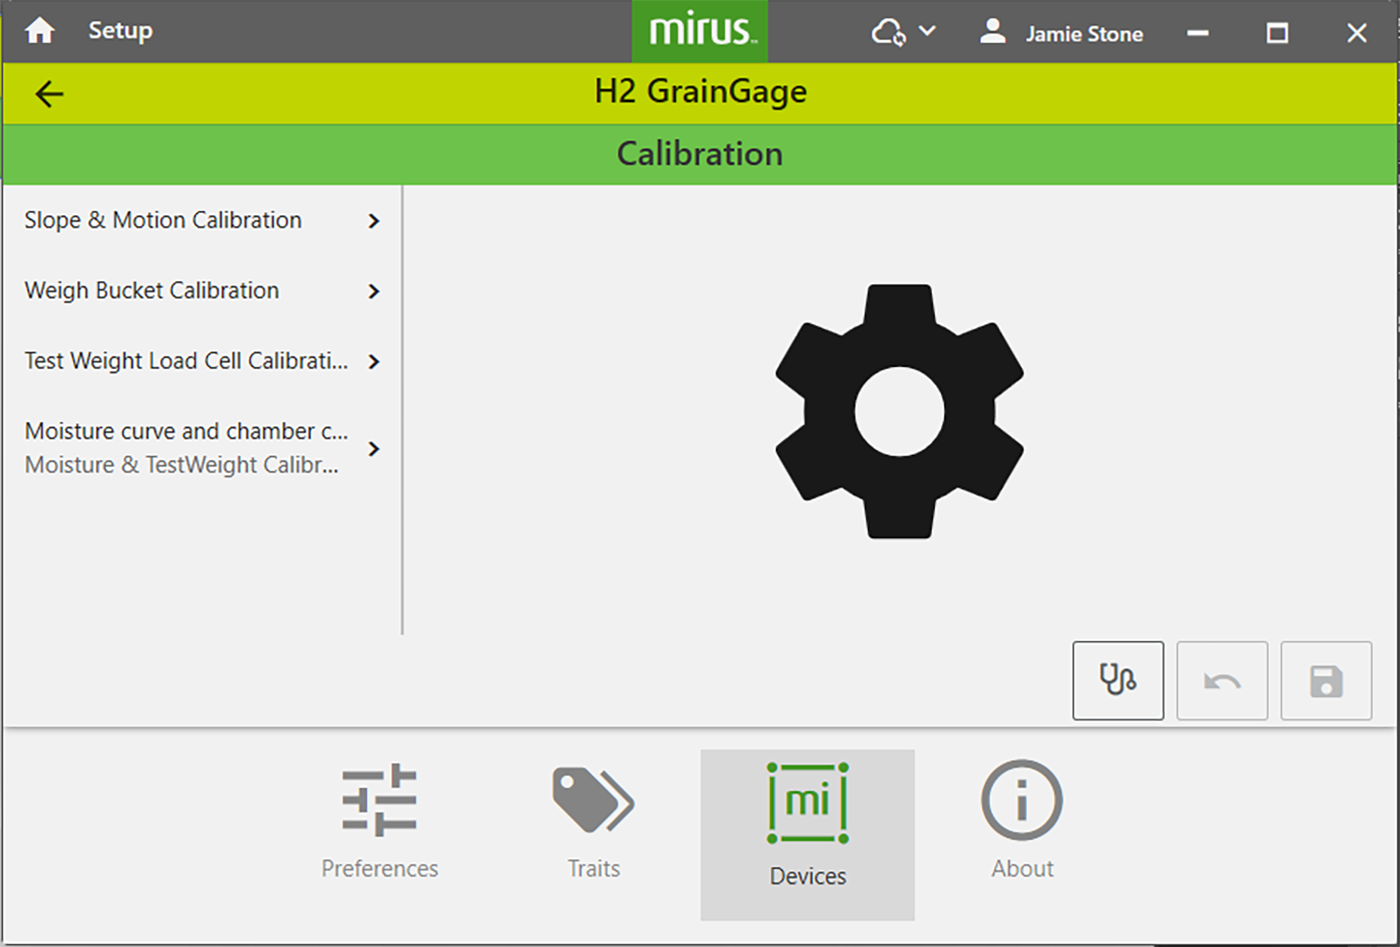
- From Home > Setup > H2 GrainGage, tap Calibration.
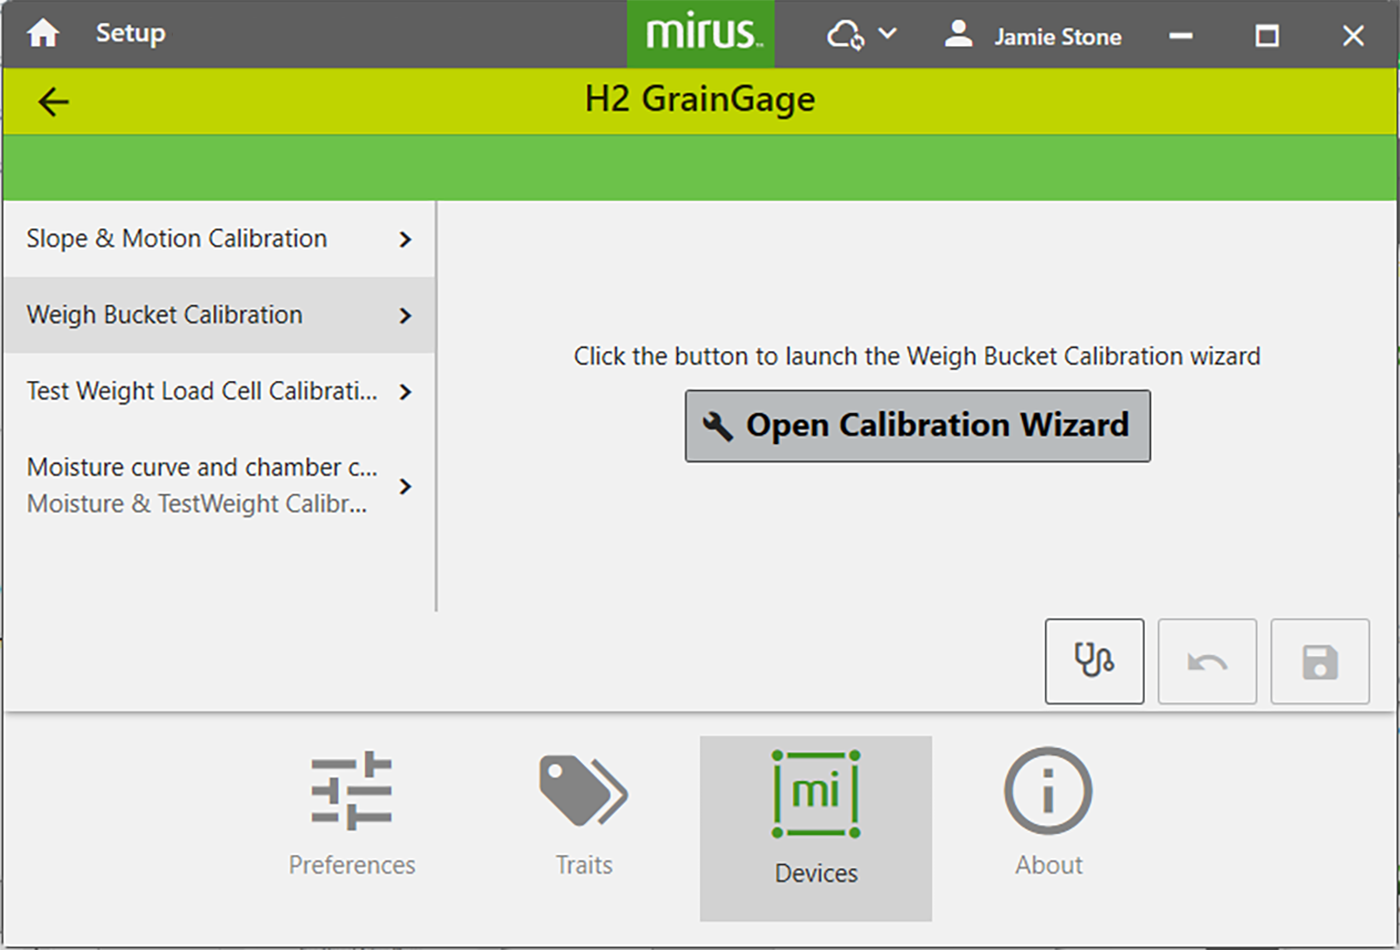
- Tap Weigh Bucket Calibration.
- Tap Open Calibration Wizard.
Follow the on-screen instructions as shown below.
- Find the value stamped on the side of the weight.
- Enter that value in the field.
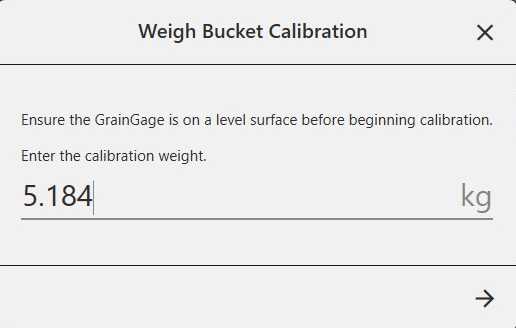
- Tap
 to initiate the calibration.
 - Check for and remove any extra weight from the weigh bucket.
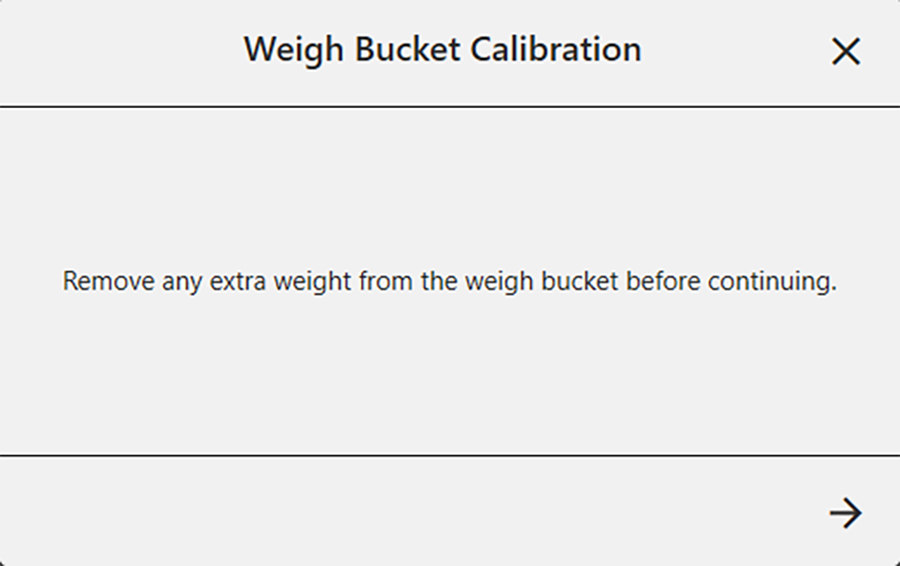
- Tap .
- When prompted, hang the weight as directed.
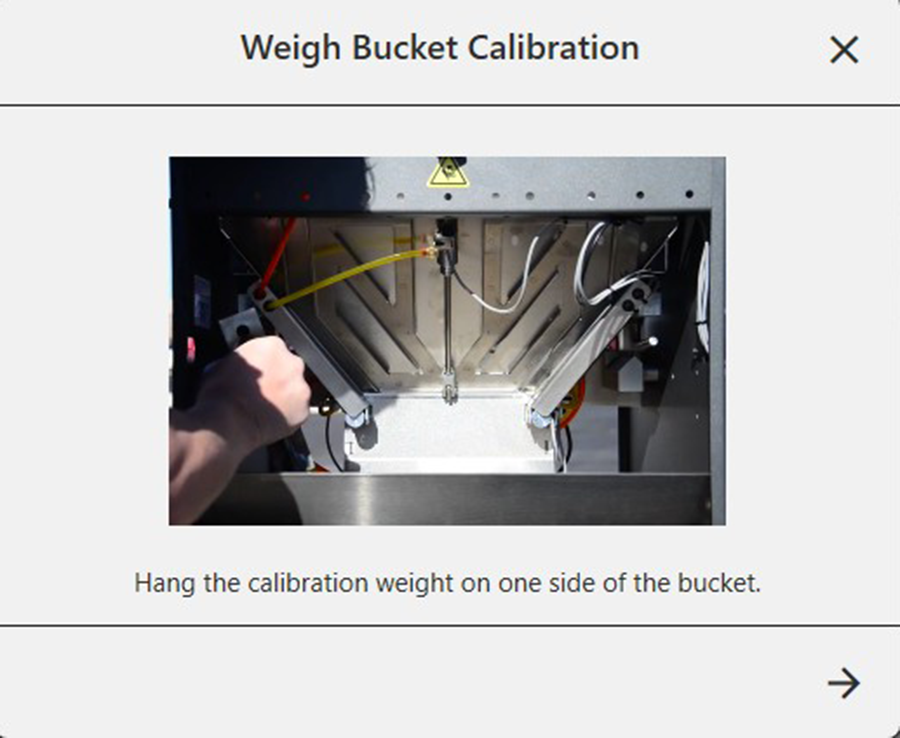
- Tap .
- When prompted, move and hang the weight on the other side as directed.
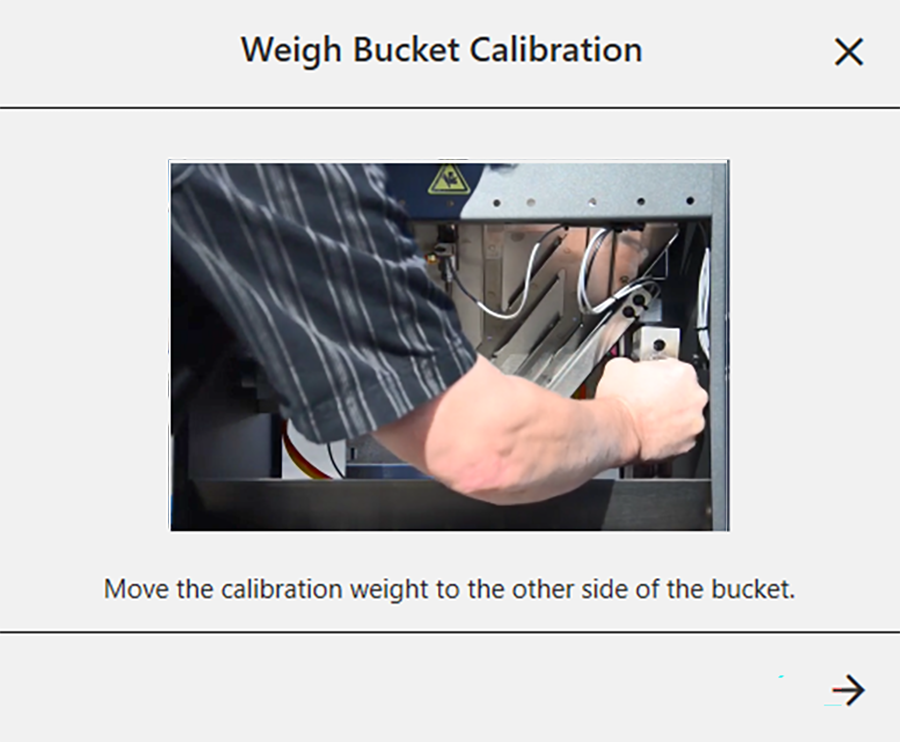
- Tap .
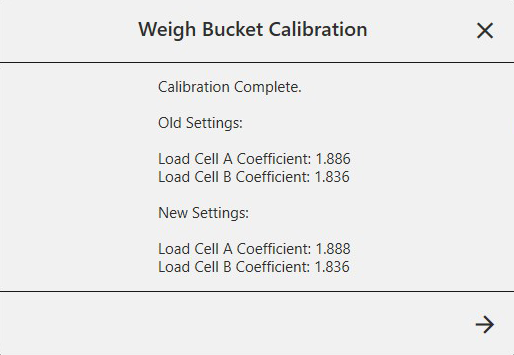
Mirus displays the old and new load cell coefficients.
Typical calibration coefficients should be 1.9 +/- .2.
- Tap .
- Remove the calibration weight.
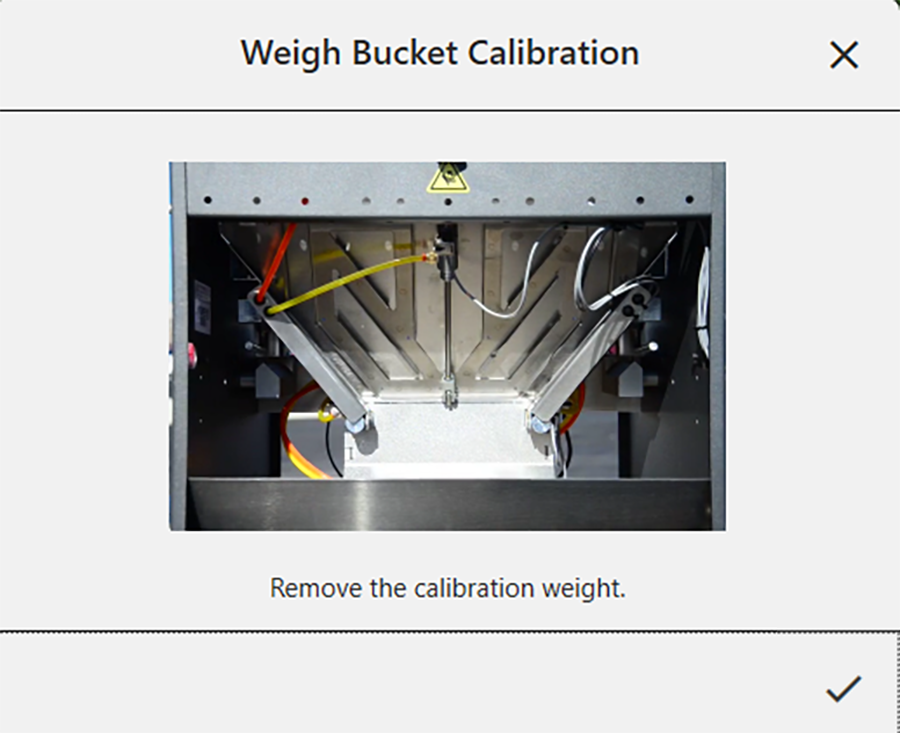
- Tap
 to finish. The system will tare, and the wizard will close.
Check Weigh Bucket Calibration
Weigh bucket calibration is stable. It rarely changes or loses accuracy. However, because the consequences of poor calibration can be devastating to your research data, HarvestMaster recommends checking the weigh bucket calibration every year before the harvest season begins, as well as every day before harvest. This can be done from the Weight Diagnostics screen.
Use the calibration weight (included with your GrainGage system) to check the weigh bucket reading. The calibration weight is stamped with its value.
To check the weigh bucket and test weight readings,
- Turn off the combine engine.
- If possible, slide the GrainGage out to access the bottom and/or remove the GrainGage access panel on the air supply side.
- Close the top and bottom slide gates.
- Place the larger calibration weight inside the weigh bucket.
If the top of the weigh bucket cannot be easily accessed, hang the smaller calibration weight from the weight hanger on the test chamber.
The two values should be within 0.02 lb (.01 kg) of the weight stamped on the calibration weight, indicating that the system is operating within the specified range. With the combine engine and thresher running, the weight and chamber weight should be within 0.05 lbs (.023 kg) of the calibration weight.
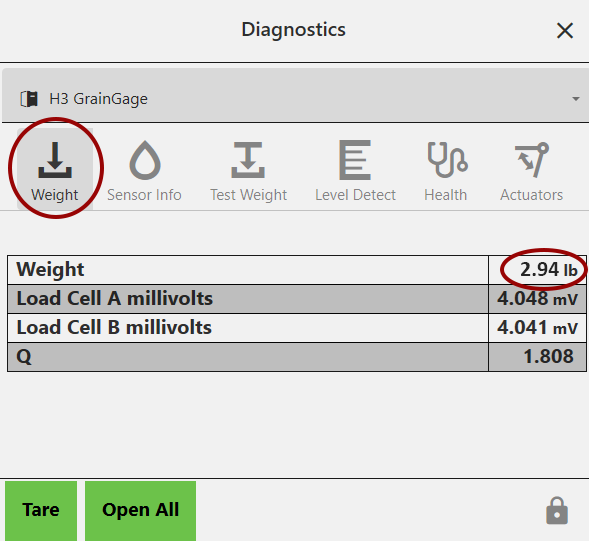
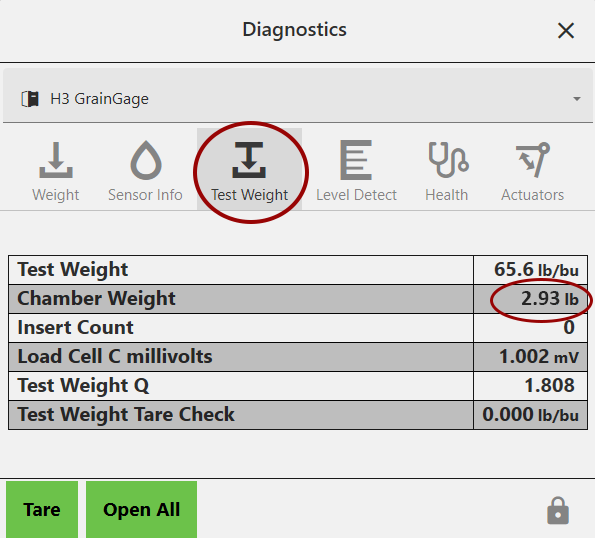
- Tap the
 below the calibration wizard to open the Diagnostics box.
 - Compare the weight on the Weight tab to the chamber weight on the Test Weight tab.
- If the reading is outside of this range, do the following:
- Press down on the plot bucket and then release. The weights should return to within 0.05 lbs (.023 kg). Lift up the test chamber and then release. The weights should return to within 0.05 lbs (.023 kg).
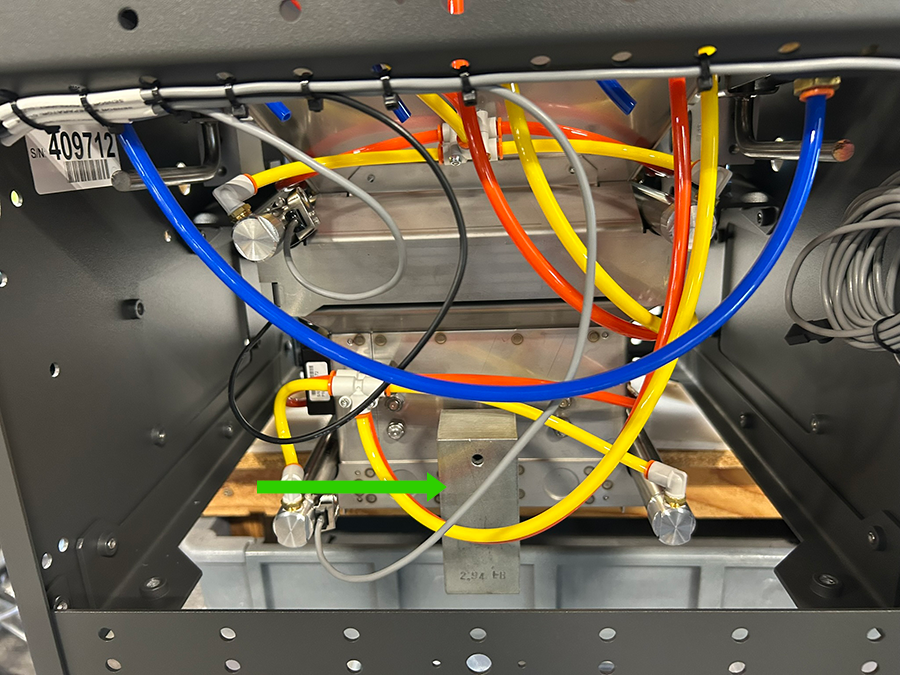
- Look for objects interfering with the movement of the plot bucket. Check for cables or air lines that may need to be re-tied. Ensure the bucket is in the tracks and not rubbing.
If the weight readings are drifting, the load cell may be bad. If the weight readings are off, you may have something interfering with the bucket weight.
- Tap
 to close the Diagnostics box.
 - If needed, re-calibrate the slope and motion, weight, and test weight. See Test Weight Load Cell Calibration.
For additional assistance, see Contact a HarvestMaster Field Service Engineer.